Leica M10 Digital Rangefinder Camera Review - Page 8
Index of Thorsten Overgaard's user review pages on Leica M9, Leica M9-P, Leica M-E, Leica M9 Monochrom, Leica M10, Leica M10-P, Leica M10-D, Leica M10-R, Leica M10 Monohcrom, Leica M11, Leica M11-D, Leica M 240, Leica M-D 262, Leica M Monochrom 246, Leica SL, Leica SL2, Leica SL2-S, Leica SL3, Leica SL3-S as well as Leica TL2, Leica CL, Leica Q, Leica Q2, Leica Q2 Monochrom, Leica Q3 and Leica Q3 43:
The electronic viewfinder on the Leica M
By: Thorsten Overgaard. December 27, 2021. Edited July 23, 2022.
Add to Flipboard Magazine.
Manual Focus with the Leica EVF Electronic ViewFinder
The electronic viewfinder on the Leica M is a fairly new thing, which in Leica context is nine years. I still meet people who never knew this useful device exists for their Leica camera. In this article I will give you an overview of the advantages, and how to use the EVF.
Let me say already now that it only works on the Leica M240 (2013) and Leica M10 (2017), before you scramble to dig out your good old Leica M3 or Leica M9 to see how it would fit. It wouldn’t work on any of the Leica M cameras previous to the Leica M240.
The Electronic Viewfinder (EVF) is an accessory for the Leica M10, and mostly it is bought with the excuse that “my eyesight is not that great anymore”, and the EVF thus makes it easier to focus due to its backlit screen and the fact that you can zoom into the image details.
But it has many other advantages than making focusing simpler – and a few disadvantages. Which I will try to cover in this article.
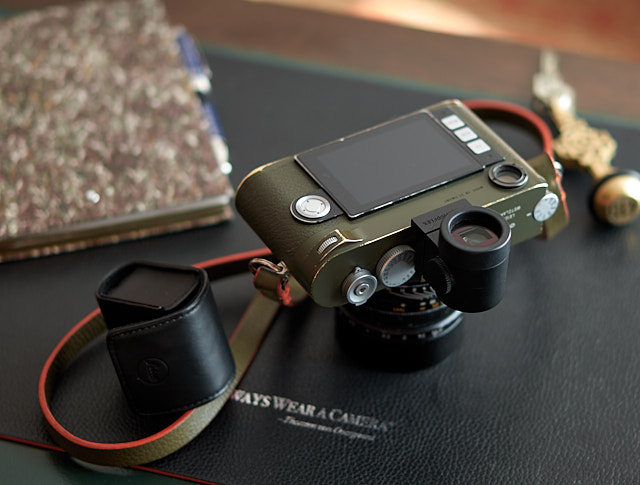
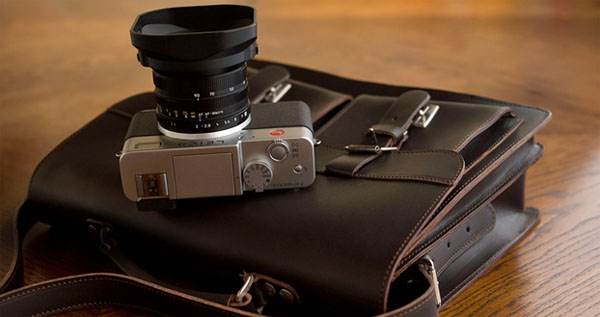
Since 2013, first the Leica M240 and now the Leica M10 got Live View which enables you to see what the sensor sees while focusing, when you put the EVF on top of the camera. It made a quantum leap forward in accurate focusing and previewing exposure. Yet many Leica M owners doesn't know it exists. In the photo the Leica M10-R Safari with the Leica EVF 020 electronic viewfinder.
First of all, what is an Electronic Viewfinder?
First off, an electronic viewfinder is simply a small screen inside a viewfinder, with optics in front of it so you can se the screen clearly, even it is only a few centimeters in front of your eyes.
The screen shows what the camera sensor sees - in real-time - and this is how the term "mirorless cameras" have become popular, because before electronic viewfinders, the only way to see the image the lens saw - in real-time - was via mirrors. Cameras in the past were called SLR (Single Lens Reflex) because of the mirror (reflex), and these days Leica SL is simply "single lens" due to electronic viewfinder, and the Leica M240 and Leica M10 the EVF can be attached as an accessory - which is what this article is about.
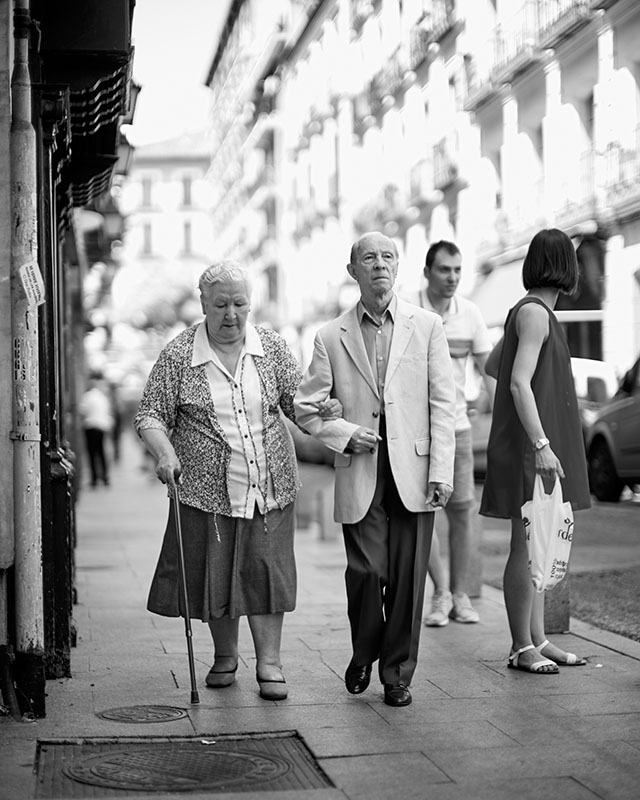
Madrid. Leica M10-P with Leica 50mm Noctilux-M ASPH f/0.95. © Thorsten Overgaard.
The ugly duckling
When I first got the Leica M10 in 2017, I found the EVF (Typ 020) so bulky and foreign looking at the camera, I decided to not use an EVF anymore. With the previous model, the Leica M240 (2013), I had used the EVF quite a lot.
I stayed with this decision of not using the EVF on the Leica M10 for a long while, but then I found use for the EVF on the Leica M10 and Leica M10-P (2018) and the Leica M10-R (2020). For the last couple of years, I have had periods of months where I used the EVF all the time, and then finding myself sliding back into a simplistic mode where I want to use the Leica M10 “naked” without any attachments for months.
The positive thing is that it’s a choice. I can use it when I want, and I can decide not to use it.
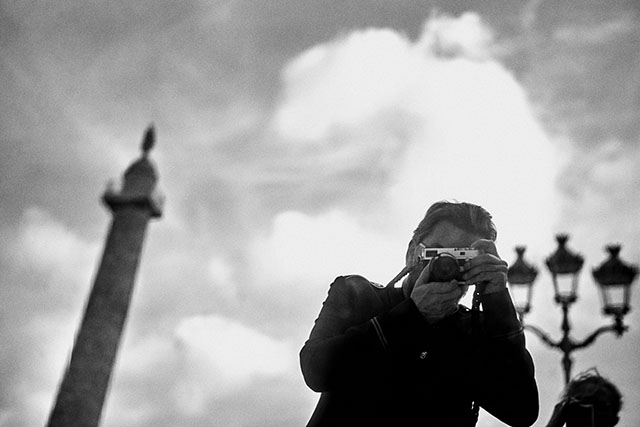
Selfie with Leica M10 in Paris. Leica M10 with Leica 50mm APO-Summicron-M ASPH f/2.0 LHSA. © Thorsten Overgaard.
Why I use the EVF on the Leica M10, and why I don’t
The EVF enables you to focus very precisely on a subject because you see in the EVF what the sensor sees, and further you can zoom in 5x or 10x to narrow in on a particular detail to get it 100% in focus.
The zoom of the view activates automatically when you turn the focusing ring of the lens: Inside the camera the traditional focusing mechanism is moved when you turn the focusing ring of the lens, and that is what activates the zoom function of the EVF.
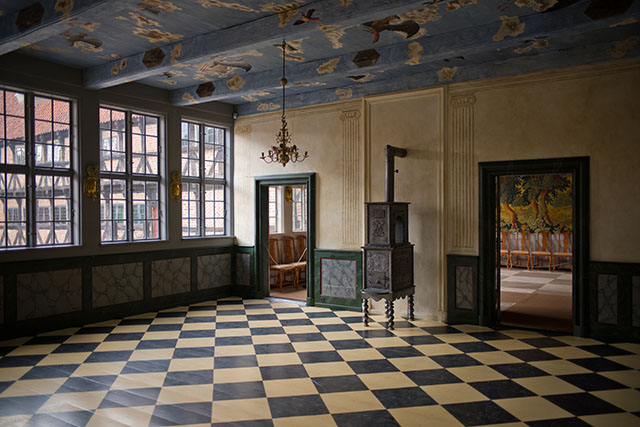
Leica M10 with Leica 28mm Summilux-M ASPH f/1.4. © Thorsten Overgaard.
When you first use the EVF, the Leica M10 is set to 1x view, which means that when you turn the focusing ring, nothing really happens. You just see the picture without zoom feature.
What you have to do to change this is that, once you focus, you see a white frame in the bottom left corner, and then when you turn the thumb wheel, you will see that white square change relative size, while at the same time you zoom into the picture either 5x or 10x. Whichever zoom factor you choose, the camera stays with this. So this is a one-time setting that stays that way till you change it again.
I find that 5x works well for 50mm, 75mm, 90mm and 135mm lenses, while for 35mm, 28mm, 21mm and so on, I set it to 10x.
The reason for this is that I find that if I use 10x (which of course would give more precision), I zoom too close on a 50mm or 75mm or 90mm photo to see what the context is. I spend too much time fumbling to find out what I am looking at. When set to 5x I still see the context and what I am focusing at, and it’s usually plenty of enlargement. For wide angle lenses, it makes sense to zoom in 10x to ensure the optimum focusing. So that is my rules, which I use mostly, and sometimes change if needed.
| |
|
|
|
|
| |
 |
|
| |
|
|
|
|
| |
Bundle offer:
"Leica M10
Video Masterclass"
and
"Street Photography Masterclass"
11 video classes on Leica M10
with 27 page checlists.
+ 11 video classes on Street Photography
with the Leica M10.
+ 8 Bonus videos on
photography.
+ Styles for Capture One for Leica M10.
+ Lightroom Presets for Leica M10.
+ More black and white syles and presets.
Normal price $1,397.00
Save 55%
Only $583.00
USE CODE: "ILOVEM10"

Order now. Instant delivery via email.
100% satisfaction or money back.
Item #1801-0223 |
|
Leica M10
Know-All
Video Masterclass
90 minutes of video classes
27-page checklists for computer,
iPad or smartphone.
Only $498.00

Order now. Instant delivery via email.
100% satisfaction or money back.
Leica M10
Leica M10-P
Leica M10-R
Leica M10M
Item #1801-0917 |
|
| |
|
|
|
|
| |
 |
|
| |
|
|
|
|
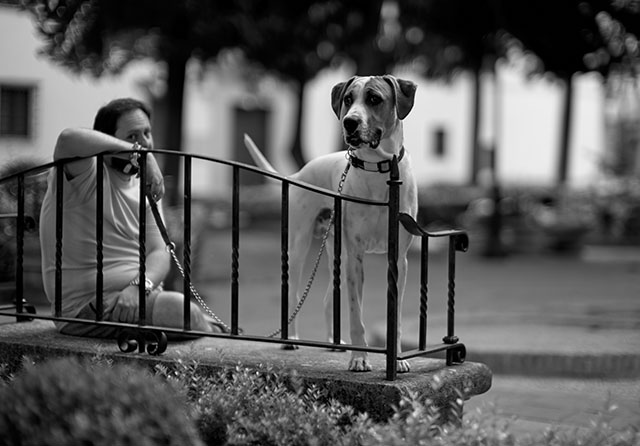
Leica M10-P with Leica 50mm Noctilux-M ASPH f/0.95. © Thorsten Overgaard.

John Legend. Leica M10-P with Leica 50mm Summilux-M ASPH f/1.4 BC. © Thorsten Overgaard.
 |
NEW VERSION 11.3 |
 |
| |
 |
|
| |
|
| |
|
|
|
|
| |
|
| |
|
|
| |
Buy Now. Instant delivery.
New Version 11.3
ONLY $698.00

Now includes
4+ hours of
video tutorials.
100% satisfaction
or 100% refund.
More info.
|
|
| |
#2130-1121-3 |
|
| |
|
|
| |
Update to Version 11.3
Apply
code "UPDATE113" on checkout to get this complete version 11.3 update.
$298.00

Updates all previous Surival Kit versions since 2009. |
|
| |
|
|
Buy the complete new
Lightroom Survival Kit 11.3
The Legendary Tutorial for Photographers
Brand-new JUNE 2022-version.
Now with brand-new 4+ hours of video tutorials.
New sections on compostition and storytelling.
How to edit color photos.
How to edit black & white photos.
How to do keywords logical and easy.
The most successful photo editing kit ever
Photographer Thorsten Overgaard first released the Lightroom Survival Kit in 2009 and have honed it with new and fresh updates. This Version 11 is the most radical updated and renewed version ever, four years in the making.
Professional workflow experience made simple, logical and easy to use.
Master editor makes it simple to understand
The Survival Kit is unique and one-of-a-kind being made for photographers for photographers. When someone understands their subject, they can explain it so it is easy to understand. The hallmark of Thorsten Overgaard is to make expert knowledge shown and told in a way so anyone can apply it.
Hands-on advice that works
With a 450 pages workbook and 4+ hours of video, every element of digital photography is touched on, in handy chapters and pre-flight checklists. Editing of color vs black and white photos, keywording, cropping of images, fine-tuning of tones, color balance and color control, export of originals, printing, archiving and backup, and much more.
Comes with the Overgaard Leica Presets (Value $48)
The Lightroom Survival Kit comes with Thorsten Overgaard's special-made Lightroom Presets for all digital cameras and for Leica digital cameras.
Understand all from camera to the final print
Chapters in this version goes over the background for High Dynamic Range (HDR), digital raw files and how to set up a professional photography workflow, from calibrating the screen to editing in Lightroom, and to making a final print. And more ...
10+ years experience in one package
No need to spend years figuring out the smartest way to do things when you can tap into the best way of doing things right here. The workflow of Thorsten Overgaard as been refined through years of field work with more than a thousand workshop attendees.
This method of workflow now used by thousands
The Survival Kit has been taught to thousands in workshops and in this Survival Kit. What does it do? It make you enjoy taking and making photos, and it increases your production considerabely. Most important of all, it'll give you back ownership of your files (which you will understand why is so important, once you have bought the Survival Kit and started applying its methods).
| |
|
|
| |
"Thorsten's methodology is perhaps not what hardware-, software- and cloud-companies want us to do, but as a former IT engineer I can only acknowledge his views about preserving our digital heritage. This workflow explained is for me the best I have ever seen".
★★★★★ |
|
| |
|
|
Video tutorials, image files, presets, checklists, definitions, tutorials of Lightroom, that boils down years of experience to a workflow you can implement in less than one day.
Start working in minutes. |
|
|
| |
|
| |
|
| |
|
| |
|
| |
|
| |
|
|
|
|
 |
|
 |
If my camera is out of adjustment, I use EVF
It happens that my camera goes out of adjustment, meaning that the mechanical mechanism inside the Leica M10 needs to go to the factory or an expert to be fine-tuned. Then it’s time to dig out the EVF. With the EVF, I see what the sensor sees, and I am independent of the mechanical focus mechanism and can keep using the Leica M with precision till I get the opportunity to get it adjusted at the factory.

Double reflections. New York. Leica M10-P with Leica 50mm Summilux-M ASPH f/1.4 BC. © Thorsten Overgaard.
I use the EVF for macro and strange lenses
The EVF is a great tool in that I can put on a OUFRO macro ring on any lens and do macro with literally any lens from 21mm to 90mm.
In the same manner, I can use and adaptor and put on a Leica R lens, or – if I wish – a Canon, Nikon or other lenses. Any lens I can get an adapter for, I can use, and even none of them are supported by the Leica M rangefinder mechanism for focusing, the EVF see what the sensor sees, so can focus any strange lens I can find.
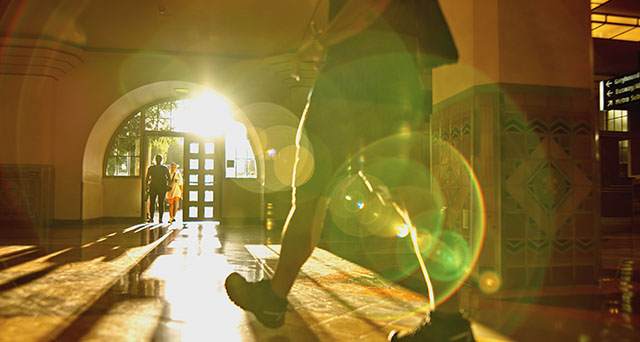
Leica M10-P with MasterBuilt 25/1.4 cinema lens. © Thorsten Overgaard.
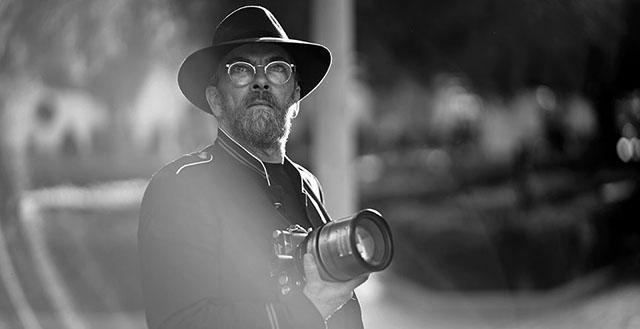
Thorsten Overgaard with the 105mm MasterBuilt om the Leica M10.
Macro and EVF
Also using a Macro adapter is now a possibility on the Leica M10. The OUFRO adapter from the 1970's is my favorite as it moves the lens 10mm away from the camera and thus brings you closer, but not too close.
Leica Camera AG also made a Leica M Macro Adapter which brings you even closer; and then you can "zoom" it to bring you really close.
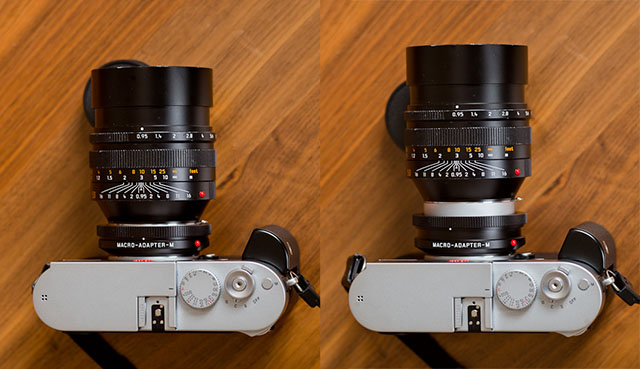
An easily overlooked detail is that the Leica M Macro Adapter is variable! It is very neatly designed and is a real piece of Leica engeneering. One turns the ring and it expands, as simple as that.
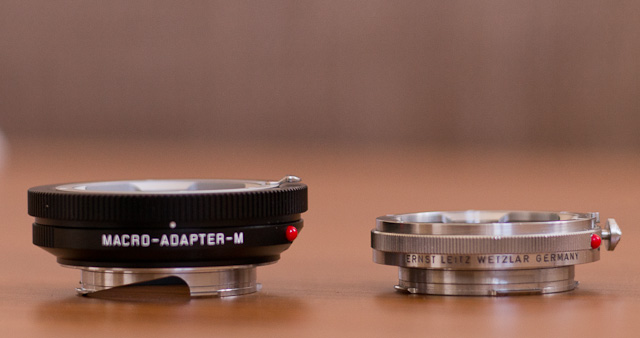
As can be seen in this image, the extent of macro (how far out the lens is moved from the Leica M body) is different from the OUFRO to the Leica M Macro Adapter. The OUFRO is a compact choice for traveling and have close range possibilities. The OUFRO is only available second-hand as it is 50 years old. The Leica M Macro adapter gets you even closer.
Size proportions for the Leica Macro M adapter and the OUFRO
| |
|
|
|
|
 |
|
 |
|
 |
| Leica Macro Adapter closest |
|
Leica Macro Adapter widest |
|
The Leitz OUFRO |
| |
|
|
|
|

Leica M10-P with Leica 50mm Noctilux-M ASPH f/0.95. © Thorsten Overgaard.
The polaroid of digital photography
The EVF offers exact precision in recoding the photograph. It shows what the sensor sees, the exact framing, the exact tones, the exact exposure … and if I set it to show a 1 second preview of the photo after it was taken, it provides me with instant gratification and quality control: A short 1 second glimpse of the photo I just took.
If I want to study the image further, I can press PLAY and I will see the image from the camera in the EVF, which is a bit like going to the cinema. The image is relatively large when seen through the EVF, and I can zoom into details using the thumbs wheel, should I want to.

Leica M10-P with Leica 50mm Noctilux-M ASPH f/0.95. © Thorsten Overgaard.
If I should feel I am cheating, I just have to remember that when we used film cameras, we used to put on a polaroid back on the camera and take a polaroid of the scene, wait for the polaroid to develop and then study it in details to see if framing, settings and all was good. Once everything was as it should be, we loaded real film and photographed it, certain that the photo would work out perfectly. This is not cheating. It’s making sure the photo is made right.
With the EVF, this same procedure is done within seconds, and that is what I also use the EVF for.
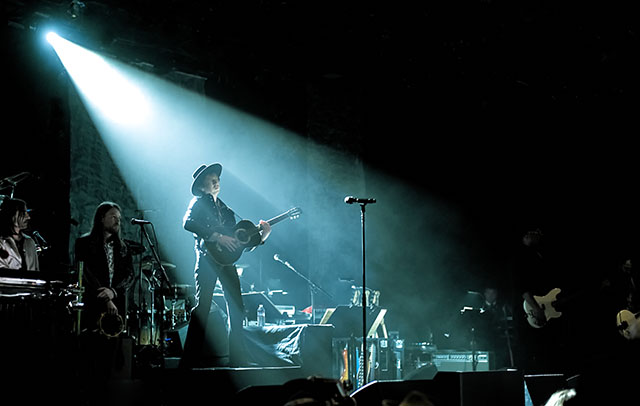
Beck. Leica M10-P with Leica 50mm Summilux-M ASPH f/1.4 BC. © Thorsten Overgaard.
Ansel Adams and (pre-)visualization
Ansel Adams realized when he was 25 years that he had to learn to visualizethe final print already when working with the camera in the field.
His visualization must be understood as two levels of prediction:
One is to have the knowledge and ability to predict how the current scene will look in a negative and what can be done in the darkroom for the final print with that negative.
The second level of prevision is the ability to see how it will technically work; and then make an artistic visualization of how to get the emotional impact you want (with the implied changes of the "correct" technical result).

Leica M10-P with Leica 50mm Noctilux-M ASPH f/0.95. © Thorsten Overgaard.
You start out with proper focus, correct exposure and correct white balance. That’s the visualization that require technical skills. Then you decide that you want to colors to be much warmer, the focus to be shallower, and the sky to be rally dark. That’s the (pre-)visualization that requires technical skills and an idea how to depart from that (and technical skills on how to get to that result).
The EVF gives you a great deal of prevision of the final result, and I’m sure Ansel Adams would have loved to be able to see the prevision already when hanging on some mountain side.
You put on a red filter and already before you press the shutter, you can actually see a prevision of how it will look. It’s actually pretty amazing. Maybe not as sportsman-like as not knowing, but who would blame you if the final photograph looks amazing?
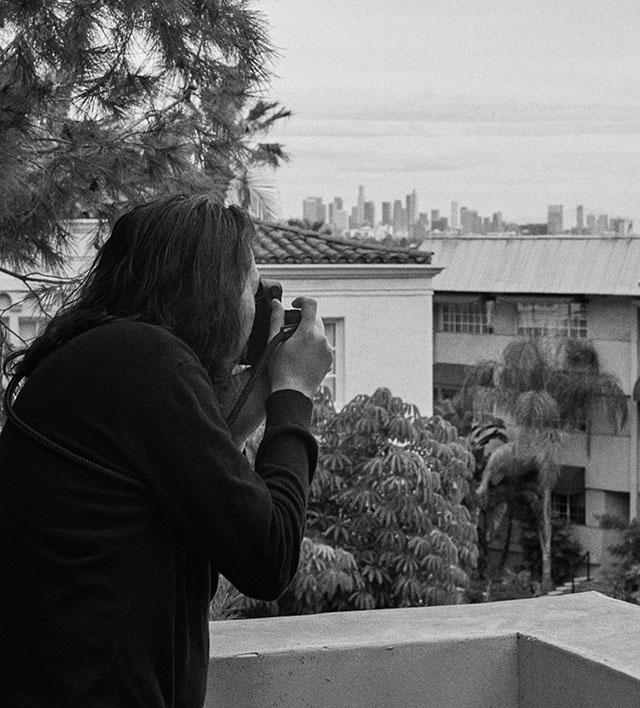
Leica M10-P with Leica 50mm Summilux-M ASPH f/1.4 BC. © Thorsten Overgaard.
The "glass plate feature" of photography is back
Even when glass plates were replaced by the much more economical and handy film plates, Ansel Adams and others would still use glass plates. Considering that a landscape photographer back then in the 1930’s had to carry a large wooden camera with large lenses and fragile glass plates up and down mountains, it would have been so much easier to just go with film.
Even in the 1960’s you could order glass plates for large format cameras. It wasn’t easy to get, but they were available for the patient and ambitious photographer.
The point in using glass plates was (and is) that the focal plane is very precise. The film may move or bend slightly in a camera, but the glass plate stays 100% plane.

Leica M10-P with Leica 50mm Noctilux-M ASPH f/0.95. © Thorsten Overgaard.
With digital sensors in the first digital rangefinder (the Leica M8 that came out on September 14, 2006) we achieved unheard-of precision in a 35mm camera.
To begin with – let’s be frank about this – it created some new problems. Suddenly we discovered that we weren’t as great at taking sharp photographs as we previously thought.
The digital sensor was merciless and showed each little departure from exact focus. It was easy to tell because in a matter of minutes we could now import the photograph to the computer and zoom in on each little detail.

Christian "King" Combs. Leica M10-P with Leica 50mm Summilux-M ASPH f/1.4 BC. © Thorsten Overgaard.
We also learned that the Depth of Field scale on the lenses wasn’t made for digital sensors. When the DOF scale said the lens would perform acceptable focus from 3 feet to 5 feet, we learned that this was in the film days. In the digital age, the acceptable sharpness was reduced.
Heck, the whole idea of what acceptable sharpness was, suddenly took a quantum leap in a disappointing direction.
With the EVF electronic viewfinder that reads directly from the digital sensor, we finally have a tool that is suitable for achieving the accuracy we want.

Leica M10-P with Leica 50mm Noctilux-M ASPH f/0.95. © Thorsten Overgaard.
I use the EVF to adjust exposure
I mostly use 50mm lenses, and mostly the Leica 50mm Noctilux ASPH f/0.95. I can figure out the exposure, change it by turning the camera to a less or more lit scene, then lock that exposure by pressing the shutter release button half down, and then frame the photo and take it. Before I take it, I can fine-tune the focus while still holding the shutter release half down (which locks the exposure but also maintain a full-size preview in 1x size). This will mostly work, and I can check the preview on the cameras screen again after I took the photo, and then eventually adjust accordingly and take another more perfect exposed photograph.

Leica M10-P with Leica 50mm Noctilux-M ASPH f/0.95. © Thorsten Overgaard.
But when I have the EVF on, I see the exact exposure, and I can point the camera to the side, down or up and see when the exposure looks right, then lock it by pressing the shutter release half down. But the point is I can see the exact exposure, rather than just guessing it approximately. It’s good control.
I also have another trick, which is that I will adjust the aperture slightly to make the picture a bit darker, if I find it need it. And if I use a very light-strong lens in sunshine without an ND-filter, this is the way I can adjust the exposure to be within the range, not over-exposed.

Malaga. Leica M10-P with Leica 50mm Noctilux-M ASPH f/0.95. © Thorsten Overgaard.
| |
|
|
|
|
| |
 |
|
| |
|
|
|
|
| |
Bundle offer:
"Leica M10
Video Masterclass"
and
"Street Photography Masterclass"
11 video classes on Leica M10
with 27 page checlists.
+ 11 video classes on Street Photography
with the Leica M10.
+ 8 Bonus videos on
photography.
+ Styles for Capture One for Leica M10.
+ Lightroom Presets for Leica M10.
+ More black and white syles and presets.
Normal price $1,397.00
Save 55%
Only $583.00
USE CODE: "ILOVEM10"

Order now. Instant delivery via email.
100% satisfaction or money back.
Item #1801-0223 |
|
Leica M10
Know-All
Video Masterclass
90 minutes of video classes
27-page checklists for computer,
iPad or smartphone.
Only $498.00

Order now. Instant delivery via email.
100% satisfaction or money back.
Leica M10
Leica M10-P
Leica M10-R
Leica M10M
Item #1801-0917 |
|
| |
|
|
|
|
| |
 |
|
| |
|
|
|
|
EVF for video
The Leica M10 doesn’t do video, but the Leica M240 and Leica SL2 does. Using the EVF on the camera while doing video, this is the way to constantly watch the exposure and adjust it either by using and rotating a variable ND filter, or by adjusting the aperture. And of course the focus needs constant adjustment when doing video with a moving subject. For this work, the EVF is rather necessary.

Leica M10-P with Leica 50mm Summilux-M ASPH f/1.4 BC. © Thorsten Overgaard.
I use EVF for learning
The EVF is a great tool for learning a lens and how the depth of field works, and it’s great for learning photography framing, composition and exposure as well. You see what you get.
Using for example a 50mm Noctilux f/0.95 or a 50mm Summilux-M ASPH f/1.4, you see a new world when the lens is wide open. As you use a lens more, you have a good idea how the final image will look, even when you use the rangefinder in the Leica M (where everything is always sharp and clear). For learning how a lens see the world and how it works, the EVF is a golden tool.

Leica M10-P with Leica 50mm Summilux-M ASPH f/1.4 BC. © Thorsten Overgaard.
If I feel uninspired and dull, I put on the EVF and the Noctilux, and suddenly all looks inspiring and glorious. Nothing in the world ever looks as exciting as through a Noctilux, and with the EVF I see what the lens sees, and it makes it easy to use the advantages of the narrow depth of field and the way it handles light. For example, using and EVF is a great way to control flare because you see exactly what it does to the image when you move half an inch to the side.

My daughter Caroline. Leica M10-P with Leica 50mm Summilux-M ASPH f/1.4 BC. © Thorsten Overgaard.
I use the EVF for certainty
When doing a portrait series, which for me is often 3-4 different locations where I take a series of maybe 15-30 photos of the subject in each location, I tend to use the EVF for some of the photos, and then the Leica M without EVF for the rest. And here we get straight into the pros and cons of the EVF.
The EVF ensures 100% focus accuracy and removes the uncertainty that the camera could be out of focus (which in theory could happen any moment the camera bumps into something or you fumbled when mounting a lens, and you wouldn’t necessarily know that it was off till later when you look at the photos). The EVF is my certainty that the photos at least are in focus technically speaking.

Paris. Leica M10-P with Leica 50mm Summilux-M ASPH f/1.4 BC. © Thorsten Overgaard.
But then, the EVF also introduce a delay in photographing, and it blinds me. Here is what happens: When I focus on the person, the EVF zooms into the face, and I can set the focus accurately on the eye. Then when I press the shutter release lightly, the frame changes back to full frame and I can see what I am doing overall. When the expression is right, I take the photo, but the EVF introduces a 1/10th second delay, in which time the face expression can change considerably. And after the photo, the EVF blacks out for 1/5th of a second where I don’t see the facial expressions of the person I photograph. Then I focus again and fundamentally don’t see the persons expression in the zoomed-in frame. And the picture taking repeats, with the 1/10th second shutter delay and the 1/5th second blackout.
Now, if I didn’t have any choice, this would be satisfactory. But I do have another choice, and that is to take the EVF off and use the rangefinder in the Leica M.
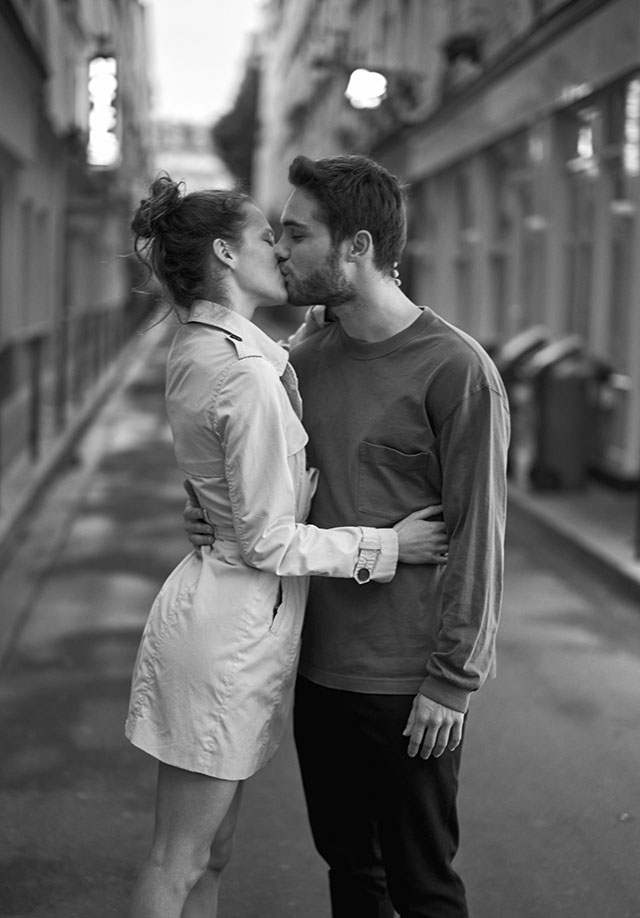
A Kiss in Paris. Leica M10-P with Leica 50mm Summilux-M ASPH f/1.4 BC. © Thorsten Overgaard.
With the rangefinder, I see the expression of the subject all the time, and I see the fame, and I see instantly when the expression is right. I can take the photo without any delay between the decision to take the photo and the actual photo is being taken. And while I work, focus, take photos and all, all the time see the person live in the frame.
If the person laugh and thus leans forward towards me, I can see what they are doing and follow their movement by leaning back. All the time I see in the rangefinder what is happening.
For me, this is the ultimate freedom and how it should be. I fundamentally only take the EVF as a security to ensure that even if my camera is off, I get some technically good photos.

Layla Bego. Leica M10-P with Leica 50mm Noctilux-M ASPH f/0.95. © Thorsten Overgaard.
The 90 degree angled view
That the EVF can be tilted in a 90 degree angle makes it possible to look down into the camera, while the scene is in front of you. In many ways, it’s like using a Mamiya two-eyed camera, or a Hasselblad, and I even had people who thought I was using an old film camera when I held the camera like that. The position is so classic people don’t look at the camera, because they already know it’s a Mamiya or Rolleiflex.
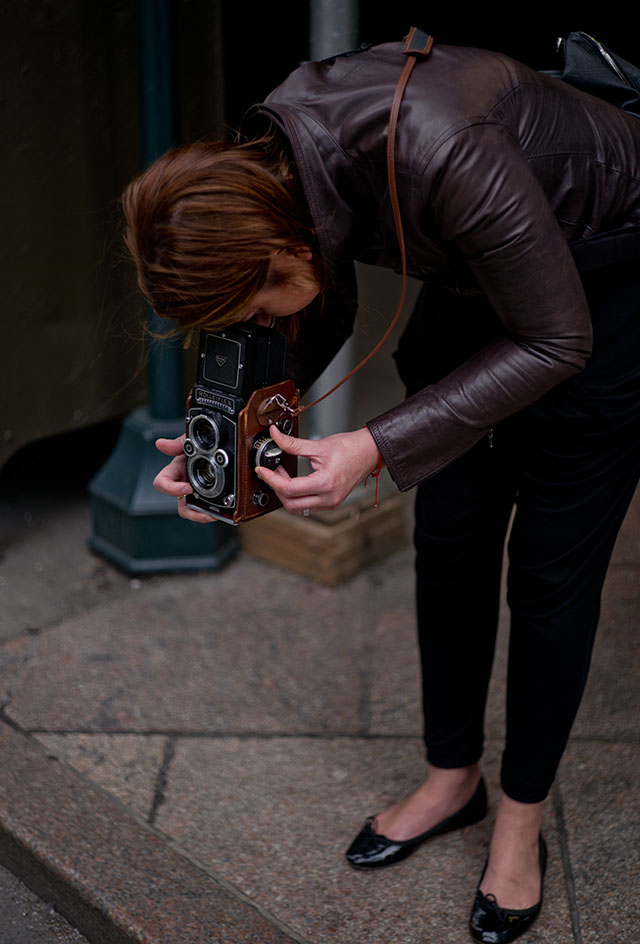
A girl in New York with her two-eyed Rolleiflex camera. © Thorsten Overgaard.
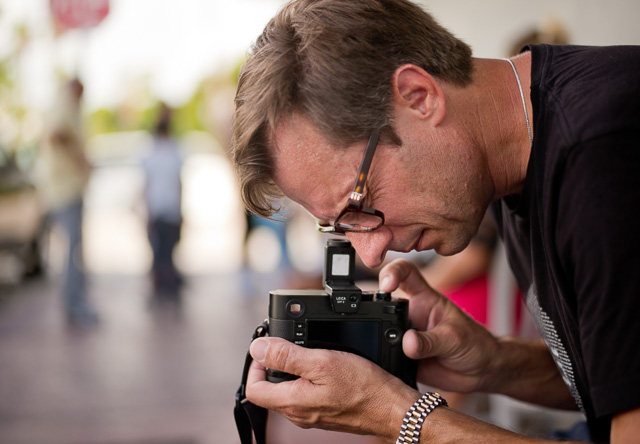
The Leica EVF enables you to photograph looking down, even from the side. © Thorsten Overgaard
It becomes a way of photographing, because it isolates you even more from the people and the scene you are photographing. For some odd reason, having a camera pointed straight at them, but me looking down, people think you are looking at something else.
If you are shy of photographing people, this will strangely do the trick that they don’t care what you are doing: You are just looking down into a camera, like you are in an entirely different world.
For reasons I have no explanation for, but experience vividly, looking down into the camera also make you very attentive to making the image. I find myself often using this 90 degree feature for any type of photography where I want to concentrate.
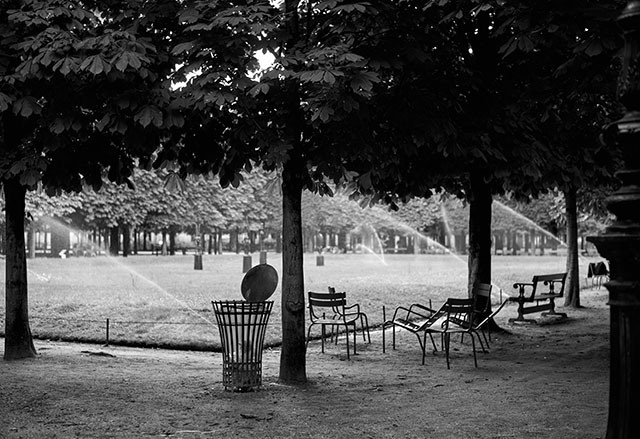
Enthusiasm. Leica M10-P with Leica 50mm Summilux-M ASPH f/1.4 BC. © Thorsten Overgaard.
The elevated view
The need for an elevated view, for example with an audience between me and the subject, inspired me to turn the camera upside-down so as to have a higher vantage point. I simply turn the camera 180 degrees, upside-down, with EVF on the bottom in a 90 degree angle, and then I look up into the EVF. It’s an unusual position, but it works.

Leica M10-P with Leica 50mm Noctilux-M ASPH f/0.95. © Thorsten Overgaard.
Framing the world
I’m walking in the hills above Sunset Boulevard in West Hollywood. I’m almost at the very top when I notice this empty street with the sky behind it. I turn around to face it, and I tilt the viewfinder to a 90 degree view. I move my feet back a bit, then to the side. I am framing the location with precision, checking the vertical lines, avoiding a sign to the right. Adjusting the balance.

Bellgrave Place in Los Angeles. Leica M10-P with Leica 28mm Summilux-M ASPH f/1.4. © Thorsten Overgaard. More on the story behind that picture here.
| |
NEW VERSION 22.3 |
|
| |
 |
|
| |
|
|
|
|
| |

490 pages easy-to-understand
workflow logics, checklists, Styles
and 3+ hours of videos.
Packed with help and tools for all questions on digital photography workflow.
Read more ...
Buy now
Start today

Thorsten Overgaard
Black and White Photography
Editing Color Photographs
Special Effects
Organizing files
Organizing Old Archives
Keywords
How to do safe backup
Hardware setup
Screens and Calibration
Printing Workflow
Capture One on iPad
Capture One Live
Publishing
+ Export Formats
+ Free Overgaard Styles
+ Preflight Checklists
The one and only method
The Survivel Kit is the only of it's kind, made by photographers for photographers.
|
|
The Brand New June 2022
"Capture One Survival Kit 22"
By Thorsten Overgaard
The complete workflow of Thorsten Overgaard,
made easy with pre-flight checklists and step-by-step instructions on how to set up and use a professional
photo editing software like Capture One Pro.
Laid out in a way that is easy to understand
and everyone can apply. Works for Capture One Pro 22
and all previous versions.
New revised version
This is the most revised version ever of the
best-selling Surival Kit by Thorsten Overgaard. This new
version includes many new chapters, on Capture One on iPad and how to add keywords better, as well as more
than 3+ hours of videos tutorials with
Thorsten Overgaard.
Simple and to-the-point tools on how to use select tools, how to do backup and how to manage and organize pictures archives so they don't get lost and doesn't have to be reorganized again and again.
Expanded and simplified
Also: Specialized first-help chapters on how to
sync your entire photo archive with the smartphone,
how to escape Apple Photos, how to empty photos out
of an iPhone, how to get out of Lightroom CC, what to do with iPad editing ... and more on how to not survive the digital age and perhaps even outsmart it.
Now comes with
Overgaard Leica Styles for FREE
Special black & white conversion, better skintones
and a CMOS sensor color correction.
(Value $48.00. FREE with this kit).
Thorsten Overgaard
Capture One Survival Kit 22.3
For computer, iPad, smartphone and Kindle.
Buy Now
Instant download.
Price $798.00
100% satisfaction or money back.
Released June, 2022.
UPDATE
VERSION 22.3 UPDATE
Compatible with all previous versions.
Simply use
code: "UPDATE22"
Only $298,00

|
|
|
| |
|
|
|
|
| |
#2131-1222-3 |
|
|
|
Seeing around corners
In the dog park in New York, at Madison Square Park, I fell in conversation with a man. I think it was about cameras, but frankly, I can’t remember what we talked about. He was taking my time and attention away from the park, and I was trying to find a pause in his questions to get back to taking pictures in the dog park. Then suddenly, he takes out a small scissor to cut the eyebrows of his dog!
As I am kneeling down by the bench already, it’s easy to turn the camera towards him and the dog, and so as to not have to jump a step to the side, which might scare both him and the dog, I stay where I am, tilt the camera to an upright frame, and I turn the EVF 90 degrees so I can look into the frame from the side of the upright camera. I focus, and I can see the frame. I need to tilt the camera a bit up so as to get some skyscrapers in the background, and I lean a bit further out to the side so the scissor is visible and not hidden behind his arm and shoulder.
I’m sure it looks casual what I am doing, but in reality it’s quite an operation. I am taking a photo from the place next to me, in a different direction than I am looking.
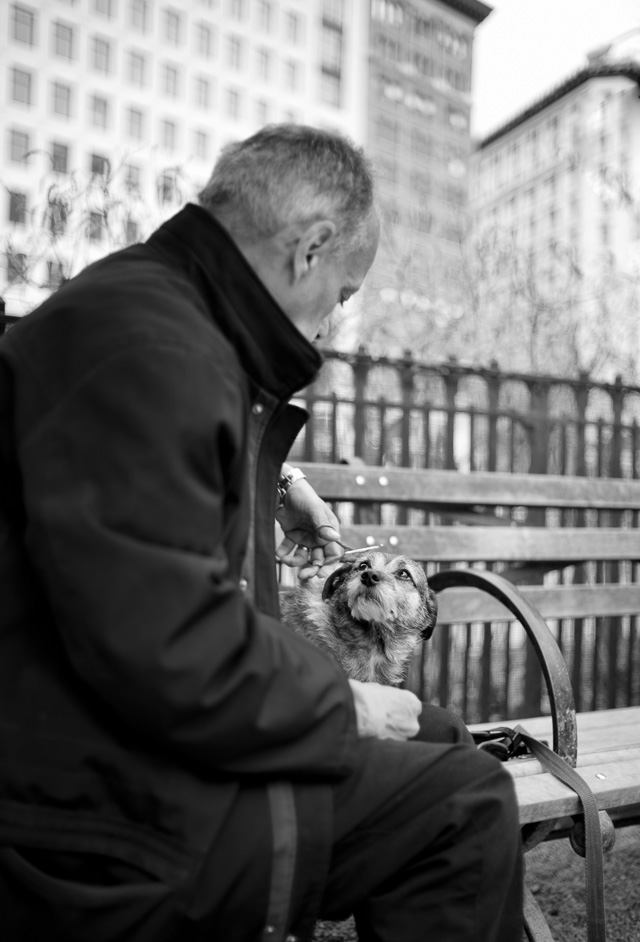
The man in the dog park. Leica 35mm Summilux-M ASPHERICAL F/1.4 AA. © Thorsten Overgaard.
I can’t recall I ever did it, but this makes me think of how easy it is to take pictures around the corners, or behind oneself. Sitting in a cafe, one would be able to take pictures behind oneself, or to the side.
I generally don’t like to do sneaky pictures. I don’t hide that I am taking pictures. I will walk straight up to people and not making it a secret I am taking their pictures. For some other reasons, I am invisible at the same time, so either they don’t notice or they don’t mind.
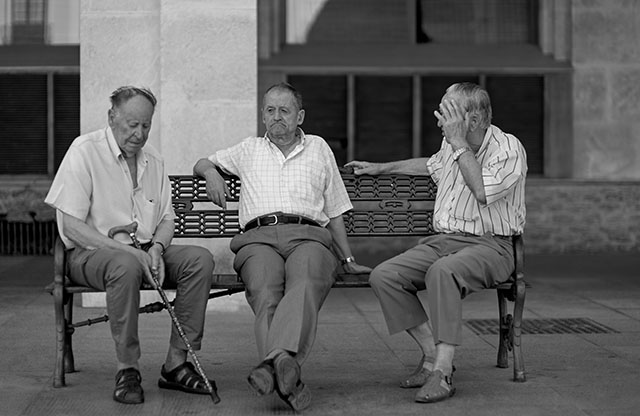
Leica M10-P with Leica 50mm Noctilux-M ASPH f/0.95. © Thorsten Overgaard.
Night vision and the EVF - Seeing in the dark
The EVF shows the image as if in daylight. Only when you press the shutter release slightly down do you then see the preview of the exposure. Until then it is as a daylight photo, even in the darkest places. That is obviously very helpful when it is dark.
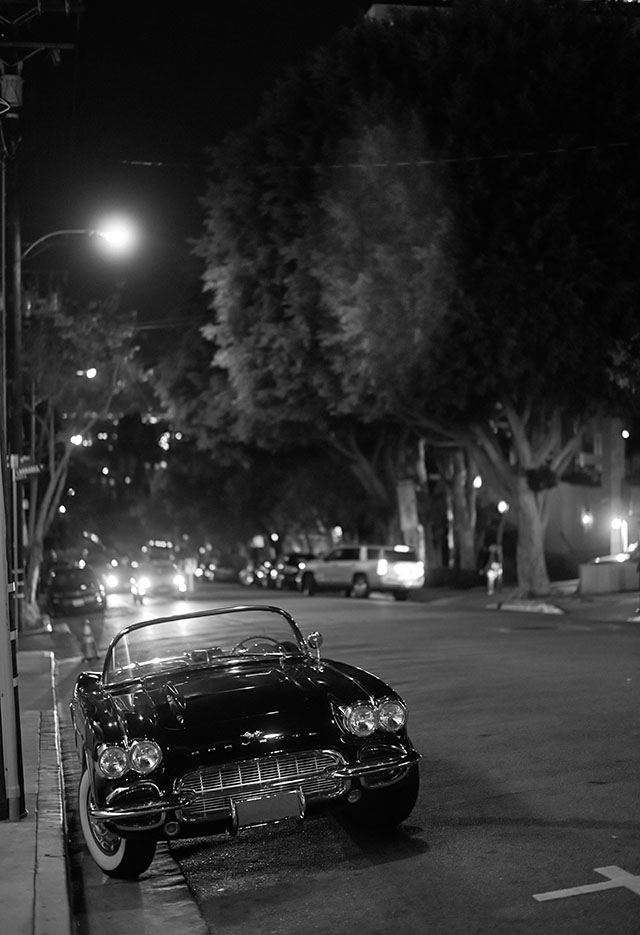
Classic Corvette in the night in Los Angeles. Leica M10-P with Leica 50mm Summilux-M ASPH f/1.4 BC. © Thorsten Overgaard.
A focusing trick with the EVF
I often use the EVF as my “permanent polaroid” where I focus on a scene on the street, or trying to capture the spouse in a café, or capturing a moment somewhere else. I frame the scene with the EVF, and get the exposure set by pressing the shutter release half down, and then I simply move the frame and adjust in this full-size preview (no zoom for focusing when the release button is pressed lightly down), and when the moment is right, I press the shutter.
If you try this, you will see it is like recording a video, except that you are not doing video. You see the scene as a movie, and when a memorable moment and expression is there, you capture it – and then keep observing for the next time to press the shutter.
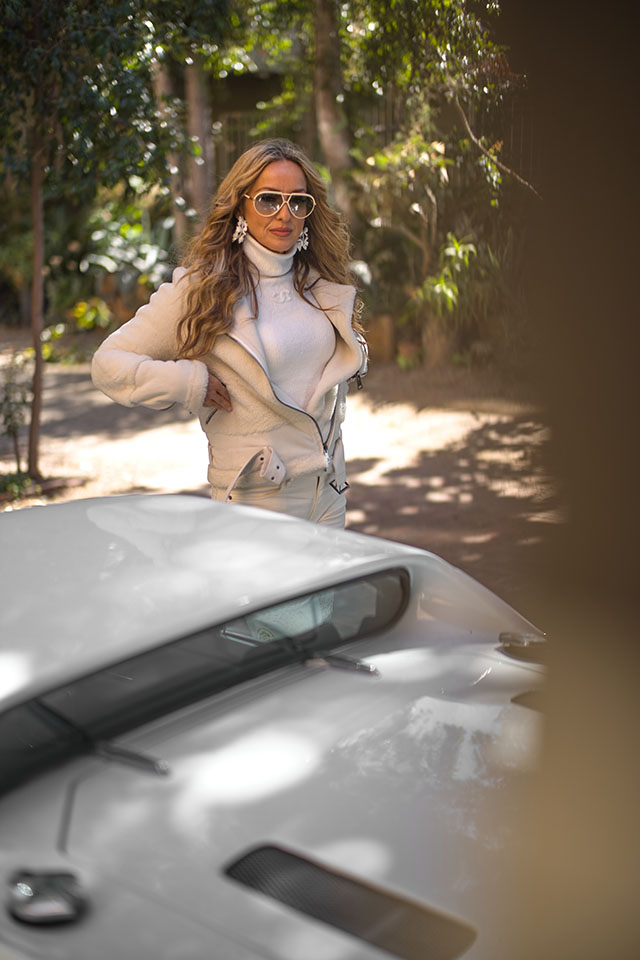
Layla Bego. Leica M10-P with Leica 50mm Summilux-M ASPH f/1.4 BC. © Thorsten Overgaard.
I find that this gives excellent control of framing, exposure and focus – and as photographing people is all about timing, this is a great way for me to be prepared for the next decisive moment.
Holding the shutter release button half down is essential in this, because then it shows the preview of the exposure, and there is a little less delay from pressing the shutter till the image is taken.

Creative Director Marc Ascoli in Paris. Leica M10-P with Leica 50mm Summilux-M ASPH f/1.4 BC. © Thorsten Overgaard.
EVF is new technology enabling old techniques
Painters used to hold up a closed hand to make a hole to see through in order to judge a color. The EVF is a bit of the same, you only see the part of the world the photo is about. What’s happening in this little world inside your frame?

Leica M10-P with Leica 50mm Summilux-M ASPH f/1.4 BC. © Thorsten Overgaard.
The dilemma of using EVF for street photography
For street photography, you can imagine the dilemma I often have in choosing to use the EVF, or not to use the EVF. On one hand I want to see the depth of field, the exact exposure, the exact frame and all, but on the other hand I want to work with the freedom the “naked Leica M” offers, without the EVF delay.
This “naked camera” that the Leica M offers, where you are one with the scene and the world at all times, is what you sacrifice a bit when you put on an EVF on the Leica M, or use the Leica SL2 (2020) or Leica Q2 (2019). Though I would say that in the Leica Q2, the sacrifice doesn’t feel like a sacrifice. The Leica Q2 is one camera where the EVF feels a 100% integrated part of the camera, and I’m sure we’ll see more of that type of EVF’s in the future.

Leica M10-P with Leica 50mm Summilux-M ASPH f/1.4 BC. © Thorsten Overgaard.
| |
|
|
|
|
| |
New eBook from Thorsten Overgaard:
"The Portrait Book
– How to Make People Look Beautiful" |
|
| |
|
|
|
|
| |

"Love the book.
Very insightful and very well done"
"You are my favorite author" |
|
Questions answered in this new eBook:
- What’s the secret behind Mona Lisa?
- How do you make anybody look beautiful?
- What is the right timing for portraits?
- What do you say to the people?
- How to photograph your spouse?
- How to edit portraits?
- What is the one right thing in all portraits?
- How to do research for portraits?
- What is the secret to light in portraits?
- Which lens to use for portraits?
- What is the composition rules for portraits?
- How to photograph children?
- Who should I photograph?
- How to do street portraits?
- and more...
Buy Now. Instant Delivery.
Only $298.00
578 pages.
Released April 5, 2020
|
|
| |
#1905-0119 |
|
100% satisfaction or money back. |
|
| |
|
|
|
|

Leica M10-P with Leica 50mm Summilux-M ASPH f/1.4 BC. © Thorsten Overgaard.
The disadvantages of the EVF
The disadvantages of the EVF on the Leica M10 is that it’s ugly and doesn’t really look integrated or comfortable on the camera. Which is something you can get used to, believe it or not. The Leica M is a fantastic piece of industrial design in itself, and I want it to remain as such, what I call the “naked camera”, but you can get used to the EVF mounted on top of it.
Another disadvantage is that “Live View” and EVF takes battery life. Not so much the EVF in itself, but the fact that the cameras sensor is on at all times in order to show the preview in the EVF. That the sensor is active heats up the sensor and camera, and drains battery.
Speaking of the sensor is on at all times, it heats up, and that attracts dust. It’s not that the whole of Sahara is being sucked into the camera, but expect a little more dust on a sensor used in “Live View” than on one that is not.
Expect a Leica M10, M10-P or Leica M10-R to work for six-seven hours of walking around taking photos in the streets without the EVF, and expect it to last for four hours or so when using the EVF. In other words, bring an extra battery.
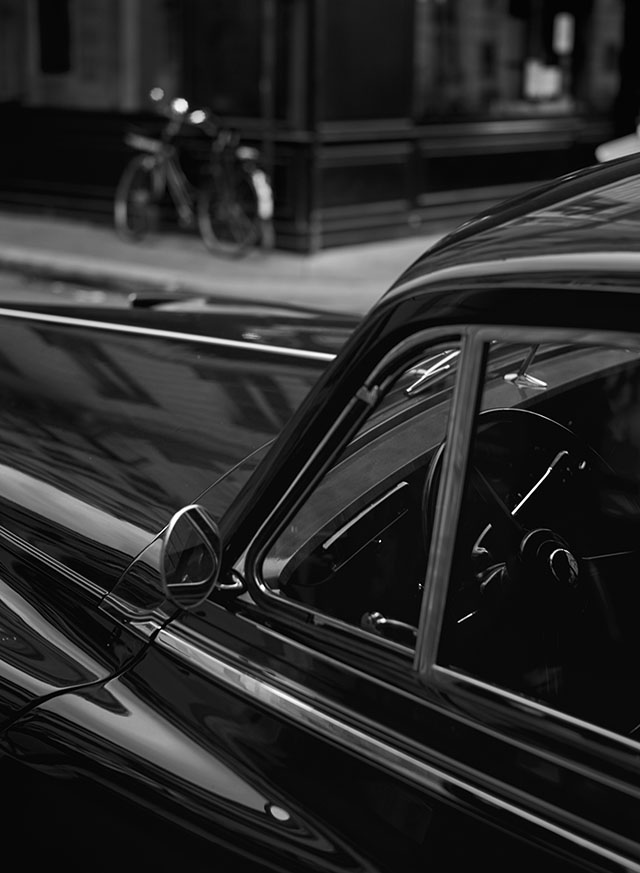
Leica M10-P with Leica 50mm Summilux-M ASPH f/1.4 BC. © Thorsten Overgaard.
Of artistic disadvantages, the 1/10th second delay from you take the photo till you make it is the one worry. The shutter feels “sticky”, and the reason is that the shutter is open to show you the “Live View”, but then when you take the photo, the shutter actually closes to clear the sensor, then then she shutter opens for example in a mere 1/125th of a second to take the photo; then closes again to end the picture taking process, and then open again to show you a new “Live View”.
All this is fascinating that can be done, and that it actually happens with such a speed is amazing. But for you and me, it is perceived as a delay, and while we don’t see what is going on, we do register this “sticky shutter” sound and feel. A short slow-down of what we want to do.

Leica M10-P with Leica 50mm Noctilux-M ASPH f/0.95. © Thorsten Overgaard.
Also the beforementioned “blocking of my view” in that the EVF shows you what the sensor sees. Obviously not as direct and free as looking through the rangefinder optics where nothing ever blocks anything. Hence it is part of using an EVF to foresee and time what you do, and when, because part of the time you will be looking at a zoomed-in image, at other times a short blackout, and there is always small delays shifting from one to another.
And then there is the preview of the photo just taken (which should be turned off in the camera menu).
All these small things … it is what it is. You must learn to plan with them if you also want the advantages of the EVF.
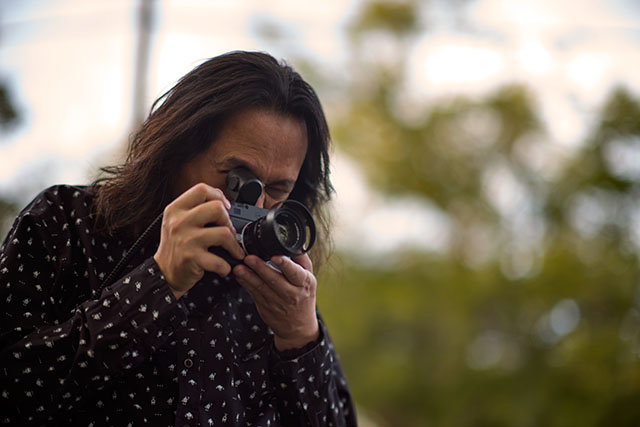
Celso using the EVF in an angled view. Leica M10-P with 7artisans 75mm f/1.25. © Thorsten Overgaard.
Then and now … The VisoFlex system
After 100 years of almost unchanged proportions and usability, with digital cameras, an electronic vierwfinder can be attached to any Leica M camera since the Leica M240 model in 2013.
It’s called an Electronic ViewFinder (EVF), or “Electronic VisoFlex” with a reference back to the VisoFlex attachment Leica made in 1951, so the Leica M film cameras with screw-mount lenses had a built-in mirror for use of tele lenses and macro attachments.

The White House. Leica M10-P with Leica 50mm Summilux-M ASPH f/1.4 BC. © Thorsten Overgaard.
Adjusting the EVF to your eyesight
The EVF has a diopter adjustment wheel on the right side. I look through the EVF and adjust the diopter till the text in the top and bottom of the EVF looks crisp. Then I take a look at the outside of the EVF and make a note where the diopter should be for it to be right, because it can move when using the camera and roaming around. It’s one of the things that sits in my muscle memory to check, that the EVF’s diopter is in the right place, just as I check without thinking about it, if the camera is on or off, what the ISO dial is set to, and if the aperture is wide open or not.
You don’t look through the EVF and adjust the sharpness of the live view image. You adjust for the text.
For extreme precision, take a sharp picture of something, and then press PLAY on the camera to bring that image into the EVF. Then look through the EVF and adjust the diopter so the details of that image is in focus. If the photo has grain or noise, that is perfect for fine-tuning of the diopter. This is the way to adjust the SL2 diopter as the text below and above the photo in the SL2 seem to be at a slightly different plane than the image preview.

Croatia. Leica M10-P with Leica 50mm Summilux-M ASPH f/1.4 BC. © Thorsten Overgaard.


How exactly to use the EVF on the Leica M10
1. Put on the EVF into the hot shoe on top of the Leica M10.
2. Turn on the camera.
3. Press the LV button top left of the back.
Within 1/5th of a second, you feel a vibration in the camera and you hear a click. That is the shutter curtain inside the camera that goes up.
You will see that the EVF is on; that there is light inside the EVF's viewfinder, and if you look into it, you will see the live frame that the camera sees.
4. If you press the thumb button to the right of the screen on the back, you will see that the view changes from a) just the image to b) the image with text above and below about shutter speed, battery left, and more.
In mode a) with just the image, once you press the shutter release lightly, you get shutter speed, ISO speed and either A in the left bottom corner (Aperture Priority), or M (manual, if you turn the shutter speed dial to a manual setting).
5. If you haven’t set a zoom level yet, then do so now: Turn the focusing ring on the camera and notice that there is a white square in the bottom left corner. Turn the thumbs wheel by your right thumb, and you will be able to change the view from 1x to 5x or 10x. Whichever setting you leave it on, it stays there.
6. When you take a picture, turn the focusing ring and the camera will zoom in 1x, 5x or 10x (whichever you sat it to), and you turn that zoomed area onto the thing you want in focus. Focus till it is crisp. Press the shutter release lightly to get back to the full 1x view of the entire frame.
7. Take the photo. You will experience 1/3 second of blackout after you too the photo (if the preview has been set to OFF in the camera. If you set the preview to 1 sec or 2 sec or so, it will show the photo you just took for 1 sec or 2 sec or so.
8. If you take a series of photos, the EVF will go black while you take the photos, and then the live view appears again. If you set the EVF to preview of 1 sec or 2 sec or so, it will show the last of the series of photos for 1 sec or 2 sec or so after you have finished the burst.
9. The focus and frame stays the same till you touch the focusing ring next time. It can be a little annoying that the camera zooms into a picture you didn’t want it to, but that is just because you hold the lens so you move the focusing ring the slightest. Press the shutter release down lightly to change to full 1x view.
10. You may find it useful to sometime holding the shutter release button down a bit to maintain full 1x view while you focus and frame. You may not need the zoom to focus, but instead you want to see the frame and what is happening in it.
11. Provided the camera has been set to turn off power automatically after 2 minutes of inactivity, the camera and EVF will shut off automatically. In this mode it doesn’t use any battery. You could leave it like that for days without any battery consumption.
12. To wake up the camera and EVF, simply press the shutter release lightly. In about 3/4 second, the camera wakes up, and the EVF wakes up a little slower than that.
Again, if you have your hand on the camera, you will be able to feel a vibration in the camera and you hear a click. The “Live View” is activated in that the shutter curtain went up, and there will be light in the EVF.
This is where most people get confused, because they start pressing the LV button (which tuns off the EVF). Don’t do other than let the camera go to sleep, and wake it up when you need it. It will all turn back on as before, just give it a second. The EVF and camera doesn’t use any battery when I sleep mode. No need to turn anything off.
13. When you put the camera back in the bag or on the shelf, turn it off.
14. Next time you grab the camera, you turn it on, and the same procedure repeats. The camera wakes up and the shutter opens and the EVF comes on with a slight delay. Again, no need to press the LV button or anything.
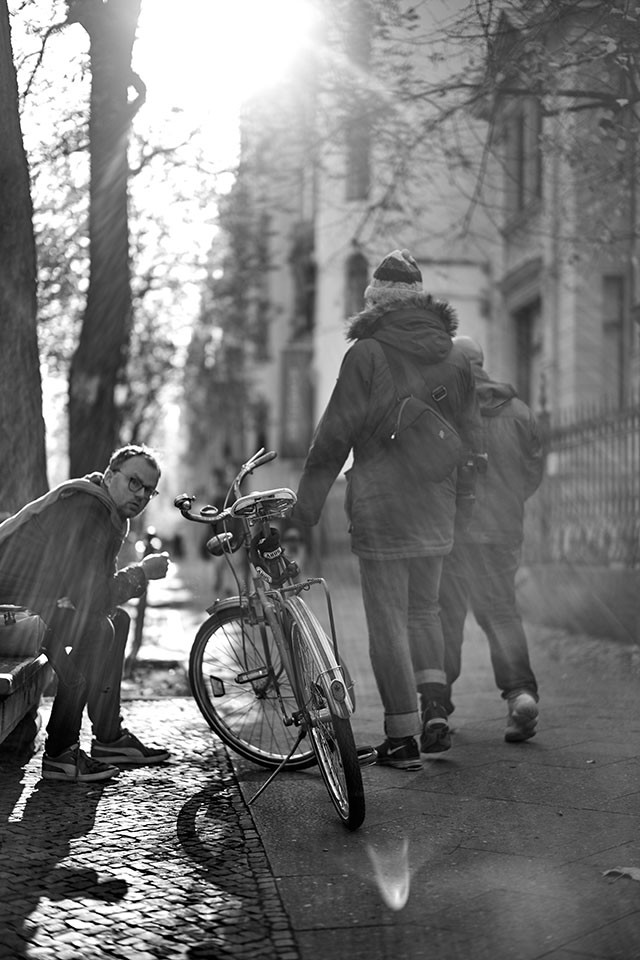
Hamburg. Leica M10-P with Leica 50mm Summilux-M ASPH f/1.4 BC. © Thorsten Overgaard.
| |
|
|
|
|
| |
Buy the new eBook
"A Little Book on Photography"
by Thorsten von Overgaard |
|
| |
|
|
|
|
| |

Order now - Instant delivery.
More info
★
★
★
★
★
★ |
|
It's a humorous understatement to call this
new eBook by Thorsten Overgaard for
"A Little Book on Photography".
It's a grand book, a history lesson, life experience, a biography and poetry book and brilliant photo book!
All in one beautiful package of 180 pages
to fire you up and get you to love
photography ... unconditionally!
"A Little Book on Photography"
eBook for computer, Kindle and iPad.
New release March 2017.
Intro price only $47 - 180 pages.
| |
|
|
| |
Buy Now

Instant Delivery |
|
| |
|
|

|
|
| |
|
|
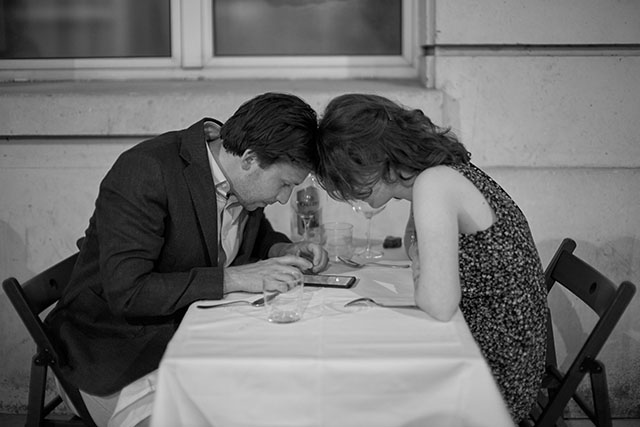
Leica M10-P with Leica 50mm Noctilux-M ASPH f/0.95. © Thorsten Overgaard.
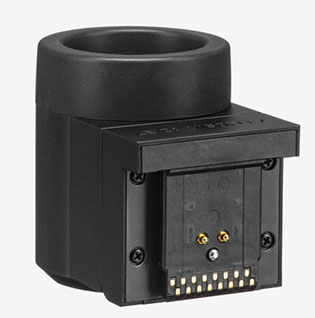
Possible errors with Leica EVF
| |
 |
| |
There are electronic conenctors
on the bottom of the EVF. |
| |
|
The EVF stays off
The EVF can be sitting not quite right. Take it off and push it back in place again. That usually does the trick. I can’t remember that I ever cleaned contacts on the EVF or camera to make it work. If you study the EVF and camera, you will see that there are a series of contact under the EVF shoe that connects with contacts hidden in the very back inside the hot shoe of the camera.
The EVF still stays off
Press the LV button and see if that gets it back. Else turn the camera off and on, then try again.
The view is blurred in the EVF
Check the diopter adjustment wheel on the right side of the EVF. It likely turned, so turn it back to the neutral mark in the middle, or to the position you usually have it in.
The EVF is broken
The EVF is definitely made less durable than the Leica M10 body itself. Hence, if you drop the camera on the EVF, the EVF is more likely to be damaged than if you drop the camera so it hits with the bottom plate (which will hardly take notice). But I must say I haven’t broken a single EVF on the Leica M10 in the last four years. On the Leica M240, where the model EVF2 was the model used, I broke 3-4 of them over a four year period.
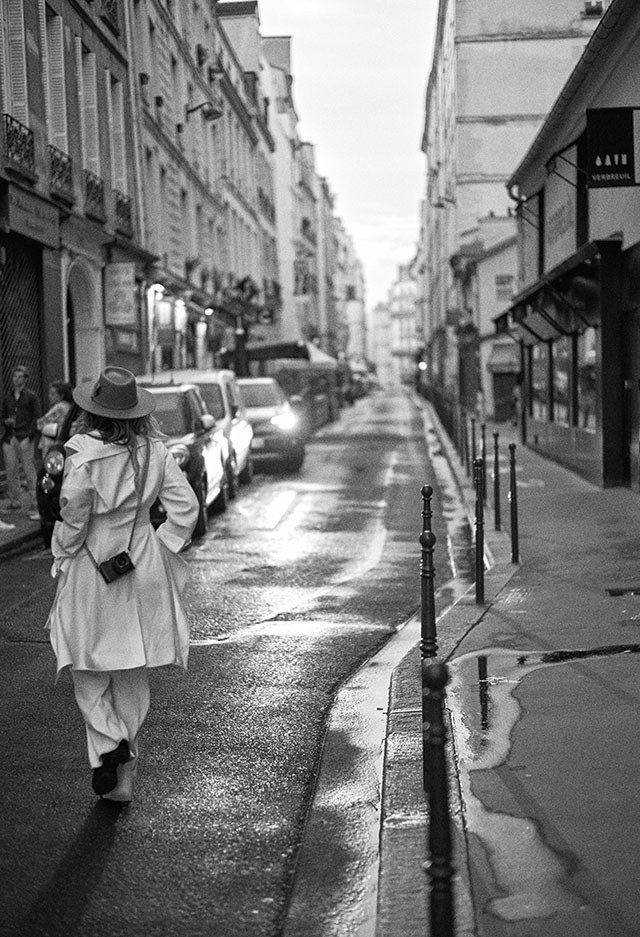
Leica M10-P with Leica 50mm Summilux-M ASPH f/1.4 BC. © Thorsten Overgaard.
Trick: Turn off red outline
Many digital cameras with electronic viewfinders comes with a feature so that there is a red outline around things that are in focus. It’s a good solution if you can’t clearly see the EVF, but in this case where you can clearly see in the EVF, it should be turned off. The EVF 020 for the Leica M10 is clear enough to see what is actually going on. The red outline on top of the details in focus makes it impossible for you to see details of focus. So turn it off:
MENU > Capture Assistants > Focus Peaking > OFF
Particularly if you use wide angle lenses with narrow depth of focus (28/1.4, 21/1.4, 35/1.4 and so on), the lens is so sharp that the red outline turn on when the lens is almost in focus. Hence, using the red outline, you (don’t see the details but) trust that when the red outline shows up, you can take the photo – just to discover when you get back home to the computer, that most photos are almost in focus. They’re a bit blurry, and it might cause you to wonder for many hours what could possibly be wrong with your eyesight, your lenses or the sensor. Nothing of the sort, you just had red outline that blocked your view. So turn the red outline off and look at the image. If it looks sharp, it is sharp!

Mother and son in Berlin. Leica M10-P with Leica 50mm Summilux-M ASPH f/1.4 BC. © Thorsten Overgaard.
The history of EVF
The electronic viewfinder came along together with the CMOS sensors that Leica started using from 2013. The CMOS sensor is different from the previously used CCD sensor in that the CMOS sensor scans the image in rows, whereas the CCD sensor makes one snapshot. Now, I don’t know if that make sense to you, but it’s the only way to explain it. CCD-sensors can’t be used for “Live View”, but CMOS sensors can show in an electronic viewfinder what the sensor sees, as it sees it. It’s a bit like difference between a six cylinder gasoline engine and an electrical car. They both drive, if you get my drift.

Leica M10-P with Leica 50mm Noctilux-M ASPH f/0.95. © Thorsten Overgaard.
The change to CMOS sensors was a strategic choice as that type of sensors was cheaper, used less energy, had less digital image-noise, and generally had more of a future than the CCD. In a way it can be compared to the BETA and VHS videotape discussion, that maybe one type was better, but it didn’t matter because the industry went with the other. In the camera industry, the CMOS was the winner, and I can shortcut all discussions with simply stating the fact that now, nine years later, the CMOS sensors have developed to a level of image quality so there is no reason to discuss the past anymore. It’s a matter of fact.
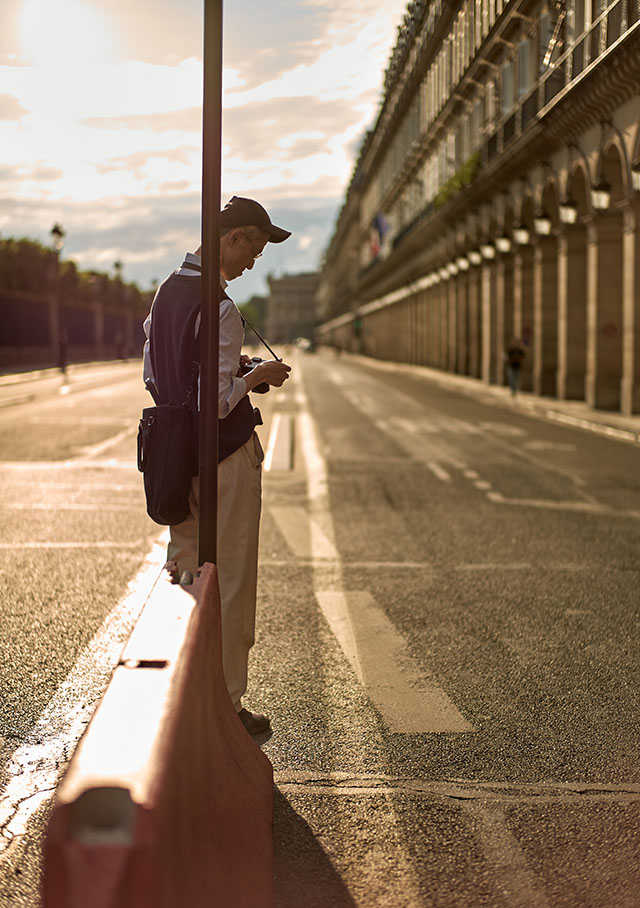
Leica M10-P with Leica 50mm Summilux-M ASPH f/1.4 BC. © Thorsten Overgaard.
Then again. The Leica S (2008) with its CCD sensor produce beautiful images, and so does both the Leica M8.2 (2006) and Leica M9 (2009), and the Leica DMR digital back (2004). They really look beautiful, crisp and clear … but those sensors sits in old cameras that are not obsolete yet, but in this context – the use of electronic viewfinders – have no relevance.
You could wish that the electronics industry would take a little care and time to come up with names that say something, or at least make us feel something. CMOS is abbreviation for “Complementary Metal Oxide Semiconductor”, which already there tells you that the word should never have made its way into modern language. They could have called it “Rapid Sensor” or something else that promised something and made us like them from the first moment.

A future masterbuilder in the kindergarden. Leica M10-P with Leica 50mm Summilux-M ASPH f/1.4 BC. © Thorsten Overgaard.
 |
|
 |
| |
 |
|
| |
|
| |
|
|
|
|
| |
|
| |
|
|
| |
Buy today
Pre-order today:
Delivers
Early Jan 2022
ONLY $598.00

Now includes
3+ hours of
video class.
100% satisfaction
or 100% refund.
|
|
| |
#2130-1121 |
|
Buy the complete new
Lightroom Survival Kit 11
Brand-new 2022-version.
Now with brand-new 3+ hours of video masterclass.
New sections on compostition and storytelling.
How to edit color photos.
How to edit black & white photos.
The most successful photo editing kit ever
Photographer Thorsten Overgaard first released the Lightroom Survival Kit ten years ago and have kept it new and fresh with new updates. This Version 11 is the most radical updated and renewed version ever.

Professional workflow experience made simple, logical and easy to use.
Master editor makes it simple to understand
When someone understands their subject, they can explain it simply. The hallmark of Thorsten Overgaard is to make expert knowledge shown and told in a way so anyone can understand and apply it.
Hands-on advice that works
With a 350 pages workbook and 3+ hours of video, every element of digital photography is touched on, in handy chapters and pre-flight checklists. Editing of color vs black and white photos, keywording, cropping of images, fine-tuning of tones, color balance and color control, export of originals, printing, archiving and backup, and much more ... all made simpel to understand so it is easy to apply by anyone.
With free Lightroom Presets (Value $48)
The Lightroom Survival Kit comes with Thorsten Overgaard's special-made Lightroom Presets for all digital cameras and for Leica digital cameras.
Understand all from the nerdy details of digital phototraphy, to the final print
Chapters in this version goes over the background for High Dynamic Range (HDR), digital raw files and how to set up a professional photography workflow, from calibrating the screen to editing in Lightroom, and to make a final print.
10+ years experience in one package
Why spend years figuring out the smartest way to do things when you can tap into the best way of doing things? The workflow hof Thorsten Overgaard as been refined through years of field work with more than a thousand workshop attendees.
Video tutorials, image files, presets, checklists, definitions, tutorials of Lightroom, that boils down years of experience to a workflow you can implement in less than one day. Buy today |
|
| |
|
| |
|
| |
|
| |
|
| |
|
| |
|
|
|
|
 |
|
 |
The EVF in Leica cameras
Other Leica cameras with CMOS sensors also enabled the electronic viewfinder (or “Live View” as it is sometimes called). These are the Leica X (2014), Leica T (2014), Leica TL (2016) and Leica TL2 (2017) that all uses the same EVF as the Leica M10, the one you mount into the hot shoe (flash shoe) on top of the camera. The Leica SL (2015), Leica SL2 (2020) and Leica SL2-S (2021) has built-in EVF, and so does the Leica Q (2015) and Leica Q2 (2019). The Leica C-lux and Leica D-lux series also have built-in electronic viewfinders.
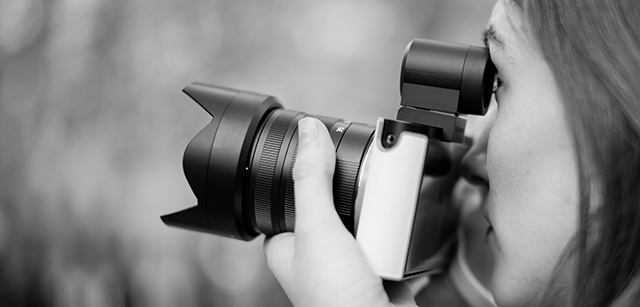
The EVF 020 was originally made for the Leica T in 2014 and then also used for Leica X and Leica M10. It is the first EVF that Leica made themselves. © Thorsten Overgaard.
If the medium format Leica, the Leica S series will enable live view with an electronic viewfinder in upcoming models is still a question. The Leica S is known for its excellent optical viewfinder which is a large optical constructed opening for the eye, with very typical Leica optics that simply seem to make the view brighter through the optics, than how the world looks with the bare eye. This beautiful large and bright opening to the viewfinder was copied and is now used on the Leica SL, but with a view to an electronic screen instead of a matte screen inside the camera.

Leica M10-P with Leica 50mm Summilux-M ASPH f/1.4 BC. © Thorsten Overgaard.
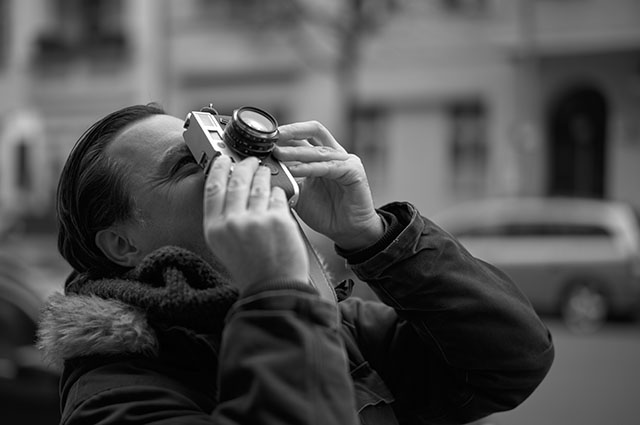
A Leica M6 film camera in action in Berlin. Leica M10-P with Leica 50mm Summilux-M ASPH f/1.4 BC. © Thorsten Overgaard.
Optical glass on viewfinders
One shouldn’t forget that live view, or electronic viewfinder – which in modern technology often is referred to as “mirrorless camera” – is a small screen inside the camera, and the reason your eyes can focus on a screen that close to the eye, is thanks to optics in the viewfinder.
When you look into the viewfinder through these optics, you are sort of is equipped with strong reading glasses that enables you to focus on the screen a few centimeters from your eye. Without the optics, your eye wouldn’t be able to focus on a screen that close to the eye.
This also explains why it can be tiring for the eye to use a camera with electronic viewfinder when used for hours. In fact, SLR cameras with their optical viewfinders also can be tiring for the eye to work with (as the principle is the same; you focus on a (matte) screen very close to the eye.

Leica M10-P with Leica 50mm Summilux-M ASPH f/1.4 BC. © Thorsten Overgaard.
When the optical part of the viewfinder is really well-made, it’s like being in a cinema where the screen fills most of your viewing field, and the picture is clear and crisp while the space around it is dark. Old camera models like the Nikon F3 HP and the Leica R9 have this peaceful view that made you forget the world and enjoy the view through the viewfinder. Sometimes the view was so clear and peaceful that the final image could be disappointing in comparison.
In any case, the point I am making is that some cameras have so great optics in the viewfinder that it becomes really relaxing to look at the electronic screen inside the viewfinder. The Leica S is a traditional viewfinder camera where you see via a mirror (SLR = single lens reflex), known and admired for the world class state-of-the-art optics. If you understand that Leica have been making binoculars for many years, and when you look through one of those, you realize it is possible to make optics that make the world seem clearer, more detailed and more crisp than with the bare eye. Well, that knowledge and the technology of optics was applied – in grand style – to the Leica S; and then when the Leica SL was introduced in 2015, it was used on that camera, just with the minor detail that you didn’t see through the lens directly via mirror anymore (SLR), but instead looked at a screen a few centimeters inside the camera (SL = Single Lens).
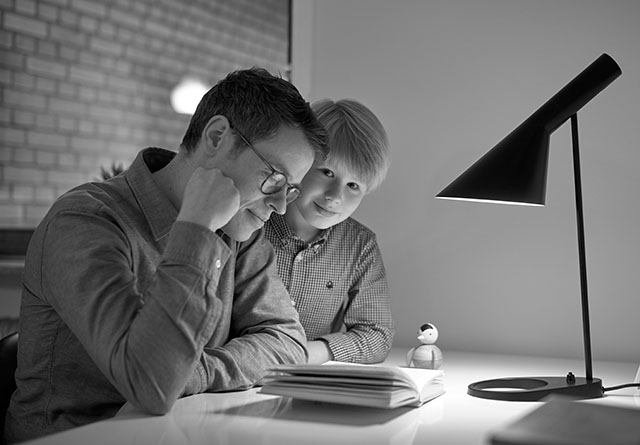
Leica M10-P with Leica 50mm Summilux-M ASPH f/1.4 BC. © Thorsten Overgaard.
The small but important screen in the EVF
The other element of the electronic viewfinder is of course the screen itself. The resolution of it, and the color accuracy. The Leica Q (2015) was a remarkable improvement of the screen clarity and resolution at that time, with an optical eye entrance to the viewfinder that was good but not perfect. In the Leica Q2 (2020) the optical entrance to the EVF was one of the improvements made to an else rather perfect camera.
There is no doubt there is lots of room for improvements in the screens used for the electronic viewfinder. One can easily recognize, when looking into any modern or a few years older viewfinder, that the color accuracy, the tonality, the contrast and the overall accuracy is still far from what it can be as technology will improve. Just look at television screens in a store where they have ten or fifty standing next to each other. They differ a lot in color accuracy, contrast and all. So screen technology has a lot of possible improvements ahead of them in the coming years, and without a perfect screen, the preview in an electronic viewfinder will not be perfect.

Leica M10-P with 7artisans 75mm f/1.25. © Thorsten Overgaard.
It would be beautiful and a pleasure to look at a perfect picture in the EVF, but for the purpose of capturing a photograph, it is not really necessary. Actually. The preview of the image serves as a guide to framing, exposure and sometimes to get the manual focusing right. No matter the quality of the screen, you somehow find a way to let it guide you in framing, focusing and exposure. I would almost say that a low quality screen can be an advantage in that you don’t make the mistake to think you are looking at the photo in the viewfinder.
The photograph is one you imagine and make in your mind before you even take the camera to your eye, and the electronic viewfinder is an instrument to capture it. The final image is the one you see on a computer screen or in a print. That is what I mean when I say that a less great electronic viewfinder can almost be an advantage.

A young photographer with his Leica Digilux 2. Leica M10-P with Leica 50mm Summilux-M ASPH f/1.4 BC. © Thorsten Overgaard.
What you see is not what you get. Nothing is, because the image you see on your computer screen is not the same that comes out of the printer. But once you’ve done it a few times, you know that when you look at that thing, it will look like this in a print. You adjust, you adapt.
The Leica Digilux 2 (2004) was the first Leica to have an electronic viewfinder. It was not very fine-lined or detailed, and the colors weren’t that clear. It was very blue with all other colors muted. Nevertheless, it was the camera that made me become almost passionate about EVF’s, because it enabled you to see the photo before you took it, and again the final result in a short glimpse in the viewfinder, after the photo was taken and written to the memory card.

Beck. Leica M10-P with Leica 50mm Summilux-M ASPH f/1.4 BC. © Thorsten Overgaard.
| |
|
|
|
|
|
| |
Join the NEW Thorsten von Overgaard
Photography Extension Course
"My wife gave me this course and I absolutely love it.
Now I think more in light and shadows. Used a lot of the techniques on a recent trip and
my photos have improved a lot. Well done, Thorsten!"
S.N. (Mexico)
"I am happy with my purchase of the extension course. Well written, easy to understand"
K.D. (USA)
“I very much enjoy the incredible knowledge”
V.V. (United Kingdom)
"Addictive, beautifully and simplistically written. Just amazing. Cleared my concepts"
V.P. (USA)
"The extension course is the best course I read about photography (and I'm still at the beginning)"
M.S. (Luxembourg)
"I'm already in page 81 of the Extension Course, and your communication and words
provoked a change in me at an aesthetic level."
C.L. (USA)
|
|
| |
|
|
|
|
|
| |
 |
|
| |
|
|
|
|
|
| |
|
|
|
|
|
| |
The NEW
Overgaard Photography Extension Course
The waiting list is over!
After a couple of years with a long waiting list, I have finally redesigned the course so I can handle the students interested in this course. Not only that. The number of pages has gone up from 120 to 330!
I teach you the basics of photography in an easy-to-understand and step-by-step way that anyone from ages 12 to 90 can understand and easily apply.
The intention with this extension course is to get you going in your photography adventure with lightning speed, and to inspire you to reach to new heights.
Enjoy!
Specially tailored for Leica and digital photographers.
You work at your own pace after you receive the full package of material via mail. It works as a PDF on computer, iPad, Kindle, or - if you like - make your own print.
More info ---> |
|
|
Join the Home School for
Leica and Digital Photographers
Only $798.00


Buy now. Instant delivery by mail.
ITEM #1708-2016 |
|
|
| |
|
|
|
|
|
The future of the EVF
The EVF on the Leica M is an accessory, and has so far been seen as a feature that isn’t really part of the camera and it’s legacy. As such, nobody seem to have taken it seriously enough to design it with the same care as the many elegant – and now historic – details of the Leica M. This hopefully will change with the Leica M11 and forward models.
The rangefinder of a Leica M is a masterpiece of engineering. Extremely precise measurement of the distance to the subject, allowing the photographer to focus mechanically and control the focus in so many ways.
The new ISO dial introduced on the Leica M10 is a simple looking dial that connects to the camera via magnets (and as such doesn’t contain any openings into the camera, which is how it is waterproof), and it has a design-connection back to the historic Leica M3.

Leica M10-P with Leica 50mm Summilux-M ASPH f/1.4 BC. © Thorsten Overgaard.
The EVF is so far a piece of technology and mechanical design that has been designed as if it is a temporary accessory. And in many ways it was an experiment in 2013, but by now it is such an essential part of the Leica M that it will go in two simultaneously directions: An EVF designed to look great and work perfectly on a Leica M body, with the same elegant and thought-through details as any other apart of a Leica M. The other direction that is likely is an “experimental” edition of the Leica M with built-in electronic viewfinder. Experiential because nobody in their right mind would want a Leica M without the classic rangefinder. And then at the same time, maybe not that experimental because removing the mechanical rangefinder and replacing it with a digital one could reduce the price of the Leica M with somewhat 20% or more. And even more importantly, the factory would never have to perform focus-adjustment of a Leica M with built-in EVF (The Leica SL2, Leica Q2 and other Leica cameras with built-in electronic viewfinders never needs adjustments). A win-win situation as it would be called in modern management literature. A daring move and a fresh-forward attitude as we may befittingly name it. Yes, it will divide the users of Leica M in two camps. The ones who consider it the only right thing to have, and the ones who see it as blasphemy. But frankly, not that bold a move. After all, a digital sensor inside and a screen on the back of a Leica M caused uproar, and the removal of the bottom plate a revolution.
EVF resolutions on Leica cameras
 |
Leica
Digilux 2 |
Leica
Q |
Leica
Q2 |
Leica
SL |
Leica
SL2 |
Leica
SL2-S |
Leica
CL |
Leica
TL2 |
Leica
M240 |
Leica
M10 |
Leica
M11 |
 |
| 0.30 MP |
3.68 MP |
3.68 MP |
4 MP |
5.8 MP |
5.8 MP |
2.4 MP |
2.4 MP |
1.4 MP |
2.4 MP |
3.7 MP |
 |
| Internal |
Internal |
Internal |
Internal |
Internal |
Internal |
Internal |
EVF 020 |
EVF2 |
EVF 020 |
Visoflex2 |
 |
| |
Conclusion - Leica EVF 020 Review
The EVF 020 for the Leica M10, M10-P and M10-R works well. You should think that the higher resolution EVF on the Leica SL2 is much clearer, but that is not my experience. For what you use it for - to set the focus, the exposure and judge the overall composition - the EVF 020 does the job well with the mere 2.4MP resolution.

Leica M10-P with Leica 50mm Summilux-M ASPH f/1.4 BC. © Thorsten Overgaard.
Black & White preview in the EVF
The Leica M10, M10-P and Leica M10-R offer you the possibility to photograph both DNG and JPG at the same time. Not much point in photogtraphing JPG, because the DNG offers more editing possibilities, and eventually a better photograph with more accurate tonality and all.
I recommended that one did both, and then set the JPG to Monochrome. This would result in a color DNG file and a black nad white JPG file, but mainly it would result in a black and white preview in the EVF. Considering that 70% or so of Leica photos end up in black and white, why not see them in black and white in the EVF?
But also, viewing a photo in black and white in the EVF makes it simple to judge exposure, framing and focus - without getting distracted by the colors one eventually don't want anyways.
But then ... Leica made it possible to have black and white preview without having to use the JPG. And that is what I do on Leica M10-P (and Leica SL2 and Leica Q2), I set the camera to black and white preview, while I only photograph in DNG. Later in editing on the computer, I try to edit all my DNG files into nice color photos, and then I make a virtual copy that I make a black and white version of.
The way to get black and white preview in the Leica M10, Leica M10-P and Leica M10-R is simply:
MENU > JPG Settings > Monochrome > ON.

Doug E Fresh and Chick Cores. Leica M10-P with Leica 50mm Summilux-M ASPH f/1.4 BC. © Thorsten Overgaard.
"I can't focus without the EVF"
Using the EVF has the back side that you may lose confidence that you can focus without it. When in fact, you can focus with the rangefinder, and it’s actually much easier than you thought. But that's a story for another day.
I hope you enjoyed this article on focusing with the Leica EVF. As always, feel free to e-mail me at thorsten@overgaard.dk with suggestions, ideas, corrections and interesting stories and details.

Leica M10-P with Leica 50mm Summilux-M ASPH f/1.4 BC. © Thorsten Overgaard.
| |
|
|
|
| |
How to find the shutter count on Leica M10 |
|
|
| |
By Thorsten von Overgaard |
|
| |
|
|
|
How many photos has my Leica M10 taken?
The shutter count of Leica M10, Leica M10-P, Leica M10 Monochrom and Leica M10-R is not available in the meny. There is a way for the service personnel at Leica to get to it, but the secret trick hasn't been revealed yet.
Instead, download the free software Leica Sync from Transient Eye.
Once you have donloaded it to your Mac and opened it, you turn on your Leica M10 and open (turn on) Leica FOTOS on the camera.
On the computer you select LeicaM10 as WiFi (go to Other Networks if it doesnt show up).

Next you will see your Leica M10 in the Leica Sync software.
Take a photo and hit info in the top right corner of the software window. There is your shutter count.
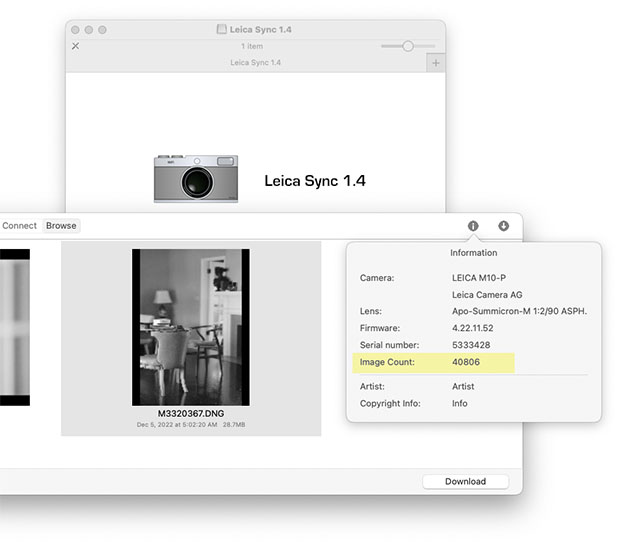
How to find the shutter count on Leica M10, Leica M10-P, Leica M10-R, Leica M10 Monochrom and Leica M10-D.
Leica M11 shutter count does not work in this app, even you can connct the camera (the shount shows 0).
Leica SL2 shutter count you cannot get via this app as Leica SL2 does not connect with the wifi network.
Leica M9 shutter count you can find in my guide to here.
Index of Thorsten Overgaard's user review pages on Leica M9, Leica M9-P, Leica M-E, Leica M9 Monochrom, Leica M10, Leica M10-P, Leica M10-D, Leica M10-R, Leica M10 Monohcrom, Leica M11, Leica M11-D, Leica M 240, Leica M-D 262, Leica M Monochrom 246, Leica SL, Leica SL2, Leica SL2-S, Leica SL3, Leica SL3-S as well as Leica TL2, Leica CL, Leica Q, Leica Q2, Leica Q2 Monochrom, Leica Q3 and Leica Q3 43:
|
![]()
