By: Thorsten Overgaard. August 4, 2017.
Add to Flipboard Magazine.
I want to give a little write-up today on how to write keywords into your photographs. This is very important to get in as part of your daily workflow if you want to be able to easily find the photographs again
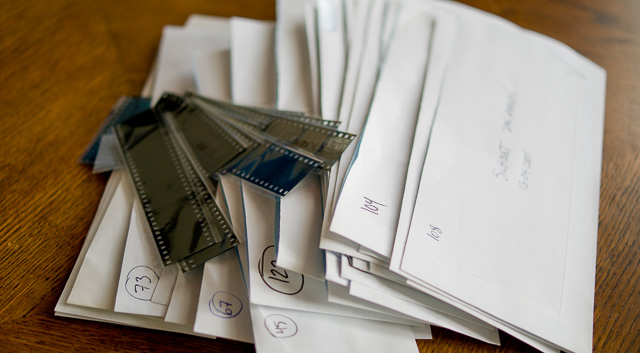
Much of the logics in organizing picture archives follows the logics of how it wsa done with it was film and photo paper. Whenever in doubt, think how you would do it if it was paper and not digital files. In the photo you see some of my negatives that organized in envelopes that has a number and a short description of the event inside, and date. © Thorsten Overgaard.
If you have been working with digital scans or digital photographs for some time, you already know how difficult it can be to find them. To begin with, we can remember where we put them. But then, after a while, the number of digital files takes on a volume so overwhelming that finding things becomes a project. The idea of re-organizing an archive every time you ralize it needs some cleaning up … not feasible after you stacked up some years of files. You have to think ahead, and keywords is the most important thing to add.
I will excuse for this boring subject already now, but it’s necessary to grasp it and attack it. The whole digital workflow is overall rather complicated, which is why I made the Lightroom Survival Kit as a guide to set a workflow up and get things done; without getting into all the things that doesn’t matter.
Today I will give some advice on keywords.
The "floating" archive
You must make your photographs “floating” rather than in folder archive. This allows that you don't need a structure to hold them, and they can 'float' around on any hard drive or cloud. The number of folders are already so overwhelming on any 1TB hard drive that you won’t scroll through the folder. You would rather search keywords. Much faster.
Obviously, you will see that folders are only of use because other things you might want to find, is in the same folder. But too large folder structures (main folders with sub folders) prevent to move archives to new hard drives.
Your ideal is that each file is independent and self-explaining. The information must be in the image file, not in a software.
Most likely, computers will be organized as the internet in the future, meaning it is all just floating around, and that you pick and choose. You search Google and find it, no matter which folder and which computer and which country it is in.
Much indicate that computers will move away from folder structure in the future. So much more important to add keywords now.
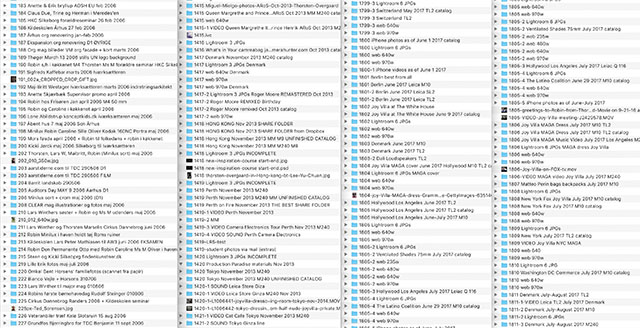
My archive today: The number of folders is already overwhelming on any hard drive after a while, so you won’t scroll through them. You would rather search keywords inside the individual pictures. Much faster. But notice that no folder is more than 50GB, which means the archive can 'float' acrosse several hard drives.
How to keyword?
In your daily workflow, using Lightroom or Capture One to edit your pictures, you can add keywords when in Library mode.
In Lightroom you go to Library and press ESC so you see thumbnails on the screen. The picture or pictures you have activated are the ones that will get the keywords you put in.
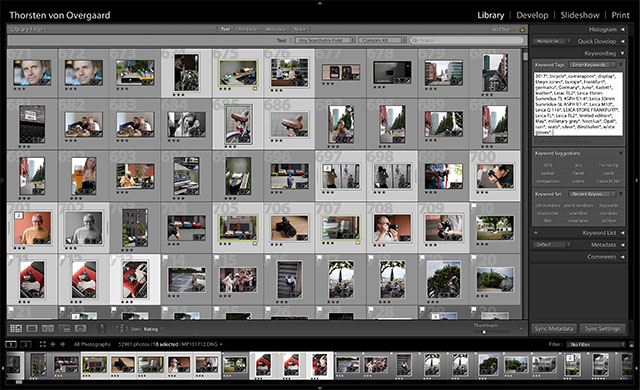
In Lightroom, you can add keywords to multiple files you select, but only when you are in thumbnail view (seeing only a film strip of thumbs in the bottom won’t add keywords to all the selected files).
You must write keyword1, keyword2, keyword2. Notice the comma and space after each word.
If you write Keyword1 Keyword2 without commas, it becomes one long keyword.
Likewise, if you write Keyword1,Keyword2,Keyword3 without the space, it also becomes one long keyword.
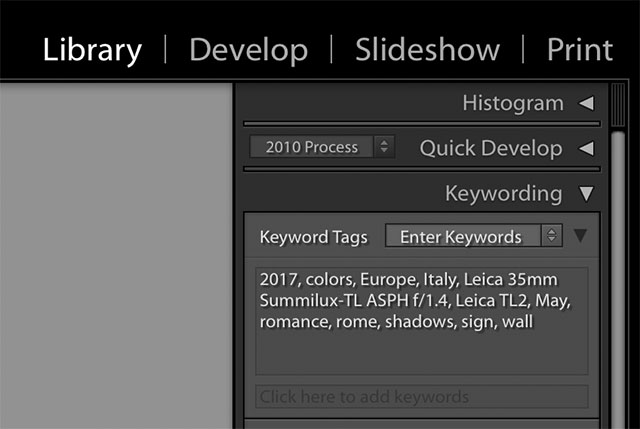
Write keyword, keyword, with comma and space between each keyword. Hit return key on the keyboard when you are done and the keywords are written to the file.
Keywords in Capture One
In Capture One you go to Metadata Tool and press the I in the top. Then you can add keywords to the image(s).
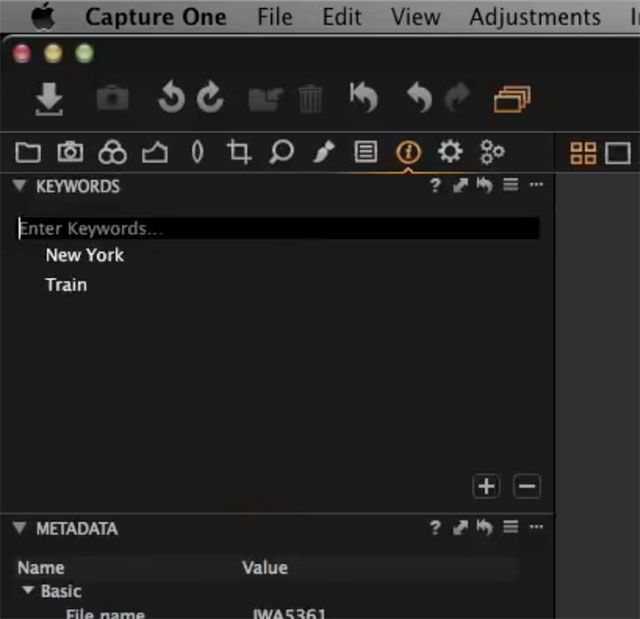
In Capture One, you write the keyword and hit return key on the keyboard. You can also add keyword, keyword, keyword and then hit return. The program divides them into separate keywords then.
Adding keywords to your exiting photo archive
You likely have a lot of picture files already on teh computer that needs to get keywords added. There’s tool to do this fast.
For exiting files, you can add keywords by using Media Pro from Phase One.
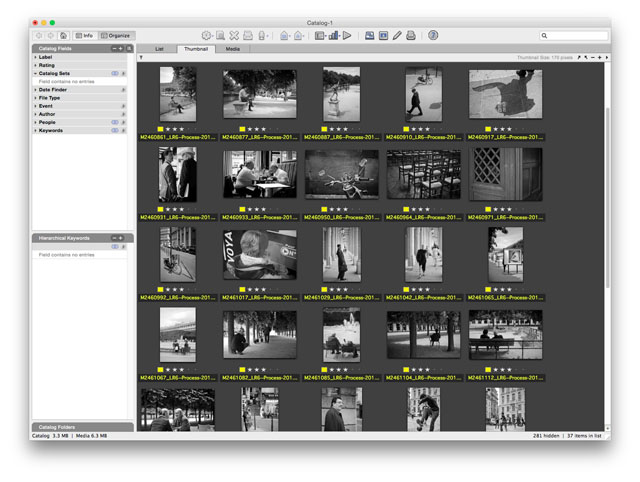
Media Pro is a virtual catalog (not physically existing). When you have 100,000 pictures in it, it's only 1 GB because it doesn't hold any of the original files. It just shows previews and has a link to the original file. You can add descriptions, keywords, etc in Media Pro, and then sync the data with the original files (Media Pro used to be iView Media Pro, then bought my Microsoft to be Microsoft Expression Media, then finally bought by Phase One to be Media Pro).
Media Pro is a virtual catalog, which means it can catalog a large number of files without importing them: The files stay in the folder and hard drive they reside and doesn’t get moved. In fact, Media Pro does nothing to them till you choose Action > Export Annotations. Then it writes the changes to the file, without moving it or altering the visuals of it.
Media Pro can be used to add keywords, stars, descriptions. It’s also the tool of choice for pre-viewing and organizing pictures in a way that doesn’t ruin your organized archive.
There are several brands of virtual catalogs, usually called DAM software (Digigtal Asset Management). One very popular is Photo Mechanic which indexes all drives. A littel too much for me personally, but used by many.
There is a whole section about how to use Media Pro in my Lightroom Survival Kit becasue that;s the one i have been using for the last 10+ years.
Apple Photo Keywords
Apple Photo is a piece of shit. Excuse my French, but I want to make sure you don’t miss this point. Useless for any photo archive of more than 1,000 photos. IUsign it is like digging a grave for yourself and your valuable archive. The moment you realize it, your photographs are stuck in their software and cloud.
As for keywords, they stay in the Apple Photos and are not written to the file. Not useable.
Everything else is also wrong with Apple Photos it in terms of speed and organizing. No need to go there. Unfortunately it's a sympthom of Apple's inability to deal with large data. Music, photos, addresses, etc - Apple software can't handle those things. It was built back when the average citizen had 200 CD's, 50 phone numbers in their phone and a 500 photos. It hasn't been scaled to today where an average smartphone owner takes twice as many photos a year as they did four years ago.
Keywords is likely the best way, because …
You can add stars, colors, libraries and many other things to your pictures in Lightroom and other editing software. But you want to make sure your file is still organized outside a software.
Unfortunately, color marks and codes won’t be seen by every software. Stars is not dependable in the future either but are so far visible in many software programs.
I use three stars to mark which pictures I will edit and keyword. I use colors to distinguish sets within that category. I don't expect to be able to see the stars or colors once the pictures has left Lightroom.
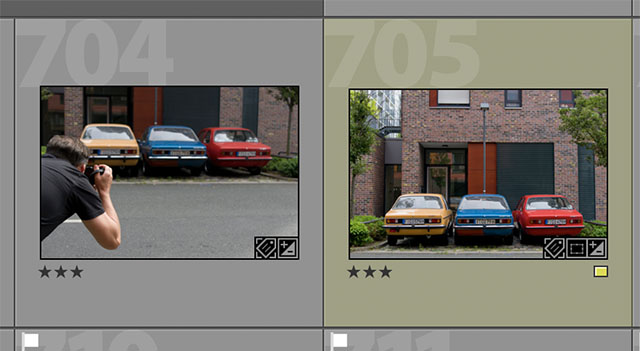
Stars, flags, color codes, collections, libraries, etc. can be used to organize the files while you work with them; to distinguish which are what. Don't expect these marks to be visible in other software now and in the future. Only keywords are likely to exist. The point is that you cannot organize your photo archive in a software and hope that software will continue to exist. You must ready your files in a way so they can exist outside of any software and still be organized.
Keywords is a universal standard that has been around for a long time and is used across computer systems, and keywords inside picture files are read by Google for pictures online.
The keywords are stored in the “IPTC” of the file, and this also gives a hint to the history of keywords. IPTC stands for International Press Telecommunications Council which is from the early 1970’s, before the Internet basically.
IPTC is the data in a photo file that gives the copyright holders name, subtitle and headline and many other things from back when the information were added to the not-digital images when transferred via telephone.
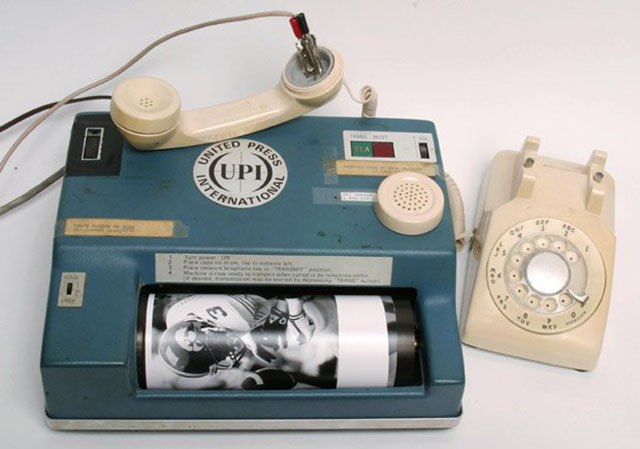
This is how pictures were transmitted in the 1970’s. A photograph would usually have the the IPTC data written by typewriter in the edge or on the back, which was the keywords and factual data about the photo that would stay with the print in the archive. Photograph by Andy Scott/The Dallas Morning News.
If you have heard the word Metadata, this also covers the IPTC data file inside the photograph. Meta basically means “behind” or “beyond” and metadata is the overall name for the data in a photo file that is not the image itself (like EXIF data from the camera about lens, serial number, shutter time, etc).
The important thing to notice here is that keywords and IPTC is not something that came from some software or computer company; which means that it will not change or disappear when some software or computer company does.

My local city history archive had a large group of people come for coffee in 2014 to look through pictures to determine locations, keywords and more as the archive was digitized. So much work and so many questions, just because nobody took care to write a note on the back of the photos! Photo by Jens Thaysen.
Think archive
Think archive. The way we used to organize things in the old days was good, but add digitalization to it. Which means, it’s a different way to organize stuff, but the principles are the same.
How did we do it in the old days?
When we photographed on film, it was less files, and it was slower and filled a lot more space up.
1) We looked through all film rolls we got back from the development and marked the ones we liked. Either on the negative, or on a contact sheet that was an overview of the images on that film roll.
2) We made final prints of the negatives that were good and archived the final prints in a way so we could use them.
3) We archived the negatives in job folders that had a number and a description.
4) We cross-indexed things so the negative and the print had the same reference number. For many reasons: If a print was missing in a newspaper archive, you could go look in the negatives and see which number was missing and make a new one.
If you made art prints, you wanted to be able to find the negative and make a new print.
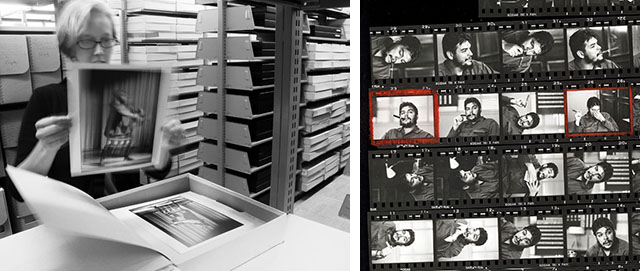
A look into the Magnum archive: Prints archive and to the right, a contact sheet with marks for which photos to make prints of. Often a print will also have a note on how it was made so a new print can be made to look the same. Most picture archives would have large archives of prints in the past, and when advertising agencies or newspapers asked for a photo, they would send a selection of prints that then had to be returned to the archive when done with scanning them.
Not that much changed, really
Instead of envelopes, you now have folders on a computer. Instead of prints, you make final high resolution files that has the final edits (the look, the crop, etc) so this acting as the “original” file has is ready for print.
In essence, you do it all in the same manner, but you have to add digitization to it:
A) You must organize your folders so they are in sequence (by numbers or letters), because how else would you know where to look?
B) With digitization, you get the ability to search for keywords and find a few photos that has those keywords. And once you find the photo, the other relevant photos from the same event will be in that folder.
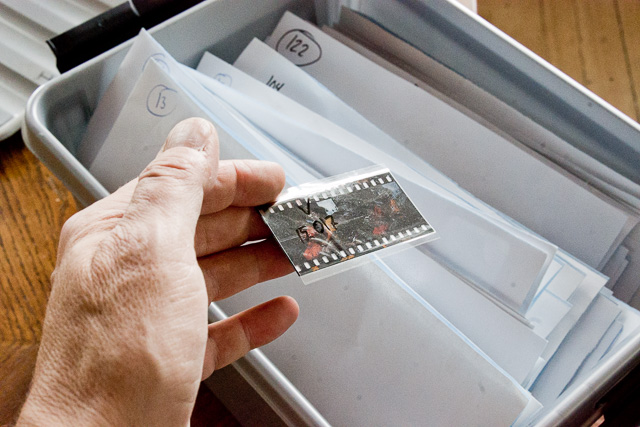
Cross-referencing: One of my archive boxes in Denmark. You can see that each envelope has an event number: Each slide or negative scanned has a number that refers to the event, as well as the picture number. The one I’m holding is 15_017. All negatives and slides ever taken is here, but only the selected ones are scanned and numbered. © 2017 Thorsten Overgaard.
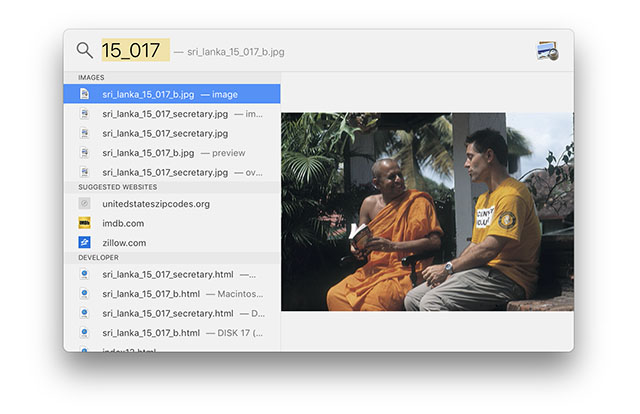
When typing in the number 15_017 in Spotlight on the computer, I can see which sizes and versions exist where on the hard drives.

Why keywords are important
Like everybody else you probably started out organizing your photographs at some point with folders like “Holiday”, “Family”, “Work”, etc. But after a while you realized that the number of photographs couldn’t get organized well with folders alone, and some photographs were both “Holiday” and “Family”, so where to put them?
The Internet and homepages used to be organized by domain names and page structure on a website. But unlike how we did it in 1998 we don’t visit a website and walk down the page structure. We search for keywords and go straight to the information.
The computer is going the same way. For once, the amount of data on your computer increase with great speed; just like the Internet. Even if you had organized all your files neatly in folders for many years, you would realize today that it’s too slow looking for things in folders. You search files instead. And you search e-mail as well.
This is the same way to find photographs. You don’t go into folders or software to look through 50,000 or 500,000 photographs. You type in keywords.

You search, and on an Apple computer it’s easily done in Spotlight in the top right corner of the screen. All files on the computer (and connected hard drives) are indexed by the system at all times so you don’t have to wait. It’s already indexed, just as Google have indexed the whole Internet.
Even if you change to another system, the keywords will still be in the files and any search engine will be able to read them and find the files you are looking for.
Don’t spill keywords
You don’t want to spill keywords away. If you add keyword to your photographs when you import, you are spilling keywords: You are putting too many keywords in too many files.
When you search Peter and New York, you don’t want 400 images to pop up. You only want the ones you are looking for.
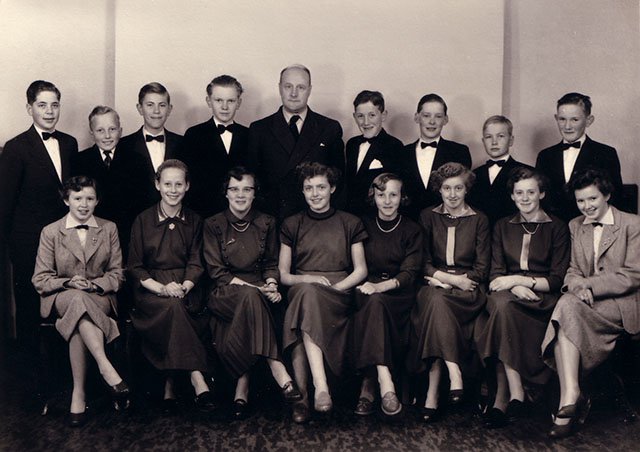
My aunt Connie (far left) and my mother Jytte (far right) in 1954 with their class and the priest, preparing for their confirmation.
So that is why you only add keywords to images that are important (enough that you want to find them again). What I mean is that you might have taken 400 photographs in New York, and Peter happens to be in three of them. If you add “relevant” keywords on import, all 400 images will have Peter and New York in them.
You import without keywords and then when you are done selecting and editing your photographs, you add relevant keywords to the three photographs of Peter that you like.
Which keywords to use
You use keywords that you would look for when searching, as well as descriptive keywords and keywords that serve as memory of facts.
For the photo of Peter it could be that he is standing on 5th Avenue with Central Park in the background, it was December month, in year 2015, with a Yellow Cab or Taxi in front of him. It was taken with a Leica M9 and a Leica 50mm APO-Summicron-M ASPH f/2.0. It is New York, Manhattan in the USA, also known as America. It would also be helpful if you didn’t just write Peter but his full name, Peter Summerville. Maybe you want to add a note that the photo has a lot of Sunshine, Trees and Green and Yellow. It is Morning and it is Snowing because it is Winter.
It could also be as simple as New York, Peter Summerville, 2015, December, USA, Central Park.
Depends what you would look for. Often it’s very simple. You are looking for a picture of Peter in New York.
In a larger archive, you might want to be able to find atmosphere, colors, themes, pictures from a certain place. Then you would have to predict that and add it while you are anyways writing keywords into the file.
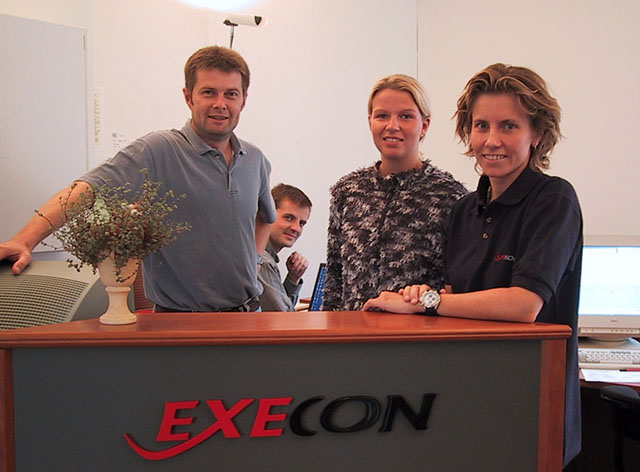
What I found in the archive: September 10, 2001 when I had an internet company in Denmark. Fergal Keegan, Aage Romvig, Anne Kisum and Ann-Britt Christensen.
Big picture agencies have librarians doing these keywords and they are very precise in how they name things. They have standards if it is USA or U.S.A. or US.
But you are not a librarian working with other librarians, so you simply use the words you would search for yourself, as well as keywords that would make sense in describing the scene for others.

You can figure out the story from the keywords in this file: 2015; 29th Street; ACE Hotel; Broadway; Leica 28mm Summilux-M ASPH f/1.4; Leica M 240; New York; September; Stomptown Coffee; Thorsten von Overgaard; artprint; taxi; yellow cab.
Relevant facts in keywords
I’ll add names of streets, names of restaurants, names of other people in the pictures and so on, as relevant facts.
You find a picture and what is it? It’s Peter Summerville at Blue Note jazz blub in New York, year 2015.
It’s a simple as this: You find a pile of old family photos and by the help of older family members, you learn that woman standing no 2 from left is your grandmother family. Nobody really remembers her name, and no idea who the others are in the photo.
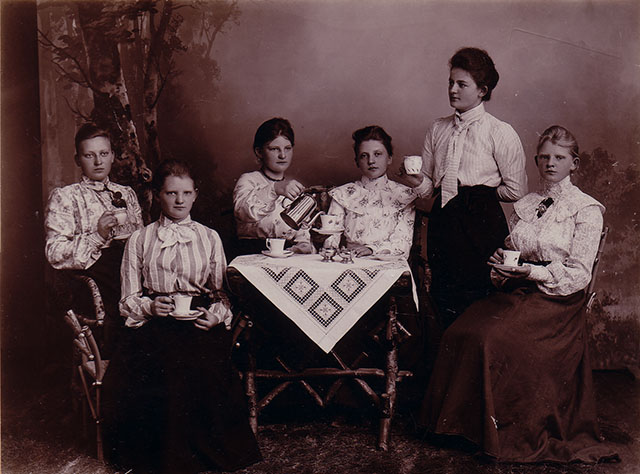
Lack of factual keywords: Nobody knows who these people are, where it is, and when. Likely my grandad's sisters, but nobody realluy knows anymore. It wouldn’t have been a question at the time, but for my family 100 years later, it would have been valuable if someone had written their names on the back of the print!
Now, sometimes someone has written with a pencil on the back of a photo who that it’s 1894 on Mors Island, the Overgaard family farm, and it’s good ol’ Ganny Lisa with the members of the Mors Horse Riding Club.
Aha!
Imagine your kids or somebody else finding one of your pictures in 50 years. What should be in the file to give an idea what it is, where and when?
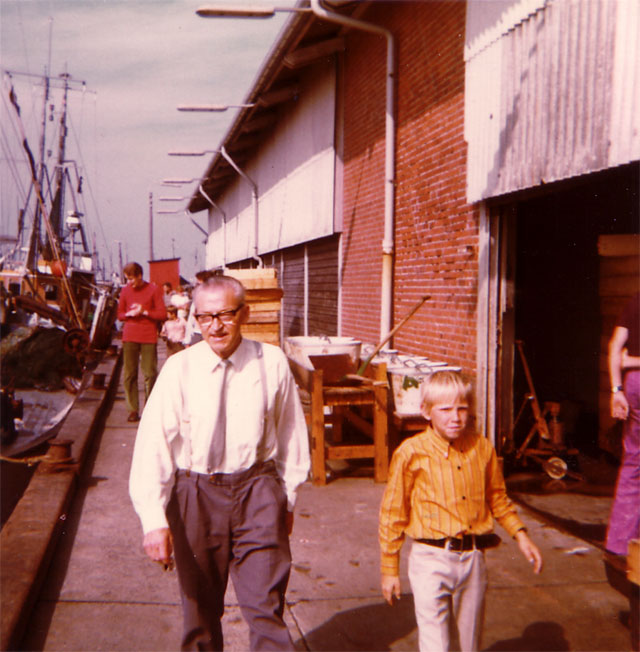
My grandad and my brother Martin, 1970.
Making sure the keywords are registered
Lightroom comes with a small detail that is very important. For some reason, Adobe thought it was enough to have your keywords in the Lightroom catalog and not the files themselves.
The keywords are of no use in a software catalog. They have to be in the files. One day Lightroom will be dead and gone.
Go into Lightroom > Catalog Settings > Metadata > and then put an X in the "Automatically write changes into XMP".
This ensures that both the keywords you add, as well as the edits you do to the pictures, stars, keywords and all is in the DNG files and JPG files and not only in the catalog.
This way, if you lose the catalog, you can drag the files into a new catalog and still see stars, edits, keywords, cropping, etc).
Few seconds after you wrote a keyword into a picture in Lightroom, you can find that photograph via the Spotlight search function. That is how fast the keyword and changes are written into the file.
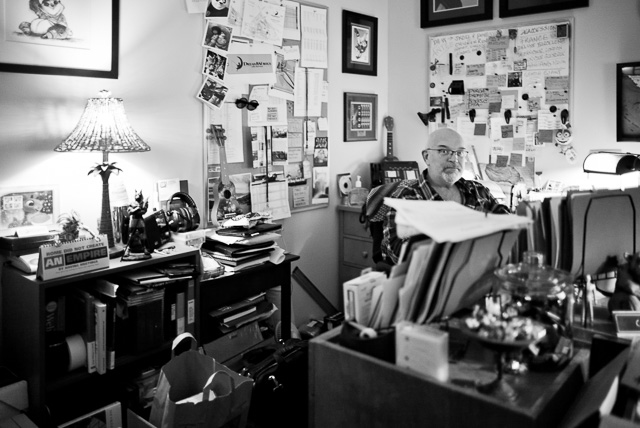
You are not alone. Here's Chase Schultz who oversees the archive at DreamWorks Animation studios in Los Angeles. He has warehouses full of gifts, gadgets, prototypes, samples of final t-shirts, mugs, movie sets, hard drives, cars, motorbikes and everything you can think of. He knows where the things are (mostly), but his team oversees logging everything so anyone can look up on the computer and see what it is and where to find it. All neatly cross-indexed with patents, contracts, who worked on it and all. I just wanted you to get the scope of things. Now we can return to keywording our files, knowing it could be much worse! © 2016-2017 Thorsten Overgaard.
To be continued
I hope you enjoyed this story on keywords. I will be doing some more articles on workflow as I get time to do so. You can also buy my Lightroom Survival Kit to get an overview of workflow and how to organize it.
As always, feel free to e-mail me at thorsten@overgaard.dk with questions, ideas and suggestions.
Related articles:
Advice for photographers: "Which computer to get"
Advice for photographers: "Organizing old photo archives"
Advice for photogtraphers: "How to write keywords into your photographs"
Advice on Apple Photos and smartphones: "How to sync your photo archive to your iPhone"
Advice for photographers: "The ultimate backup is in the bank"
Advice for photographers: "Calibrating computer screen for photographers"
Thorsten Overgaard's workflow extension course: Lightroom Survival Kit

Talking workflow, backup, keywords and editing in the Overgaard Workshop. © 2015-2017 Joy Villa.
| |
|
|
| |
A short review of DAM catalog software for photographers
By Thorsten Overgaard. August 9, 2017
DAM = Digital Asset Managament. Software for organizing photos, PDF files, music files etc. In this context the interest is how to use it for still photographs.
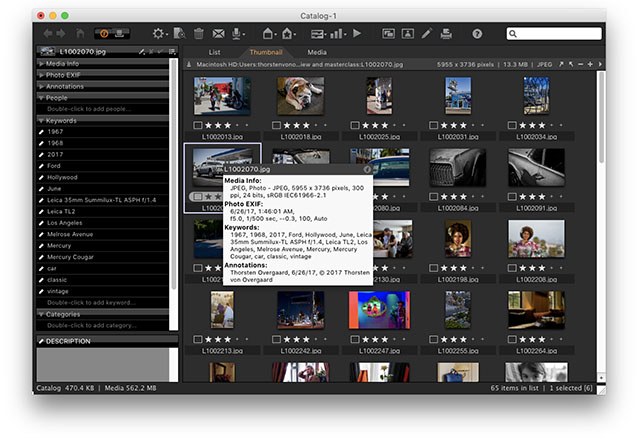
 Media Pro by Phase One, Denmark Media Pro by Phase One, Denmark
First there was iView, them Microsoft bought it and called it Expression Media as part of their web suite "Expression". Every time they made an update, something stopped working. Thnkfully, Phase One in Copenhagen bought it and re-programmed the whole thing to be a tool for their clients with a need to catalog their pictures taken with the Phase One medium format cameras. It's a great tool also for everyone else with pictues to catalog and keep track of. Price Euro 189.00 (for three users).
Good:
- Virtual catalog and tool. Handles a lot of files without altering the originals and without becoming a huge file itself.
- You can change the sequence of photos (good for organizing slideshows or sequence of how pictures should appear in an exhibition, etc).
- For keywords and reorganizing files, it’s great. The keyword box is just to the left and you can type keyword, keyword, keyword (with commas as separators) and then hot return, then Media Pro splits them out to separate keywords in the list.
- Media Pro only deals with the images you thrown into it, it doesn’t scan all your hard drives and show you everything. This way you can stay with just what you want to work with, 50 or 30,000 pictures, but nothing not relevant.
- No changes to your original files till you save the changes into the files.
- Free trial available from Media Pro.
Bad:
- The previews take time to create.
- The software sharpens the previews which I don’t like (I want to see the actual file, not a changed preview).
What was this made for: Professional photo management built to manage large photo libraries.
How do I use it: 1) To add keywords to previous and old projects, 2) To review and organize projects like exhibitions, slideshows, etc. as ad hoc catalogs (I open Media Pro, throw in the folders I want to see, then organize them and mark the ones I want to use). I don’t maintain “one catalog” of all my photos anymore.
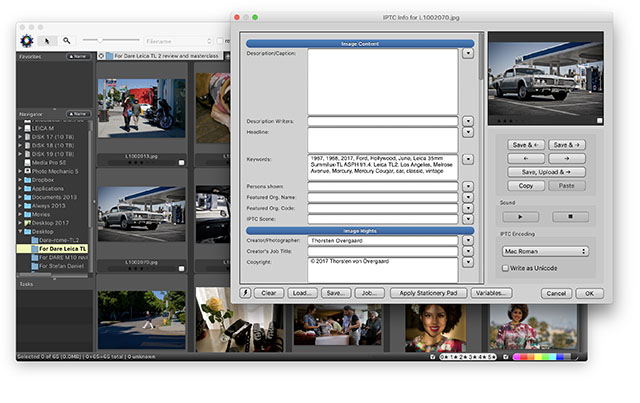
 Photo Mechanic by Camera Bits, Inc. Photo Mechanic by Camera Bits, Inc.
This has been the long-standing gold standard for DAM software. I've mostly seen it used by photojournalists in the field for fast selection (and keywording) of photos. Here is an article by Scott Kelby on how he uses it. Price $150 (for three computers).
Good:
- Virtual catalog and tool. Handles a lot of files without altering the originals and without becoming a huge file itself.
- Fast indexing of all drives.
- Has tools for sharing with 500px and more.
Bad:
- Indexes all your drives (which is good if that is what you want, bad if you wanted to only work on a project of certain folders or files – then get Media Pro instead).
- You must open a window for each photo to add keywords to each photo.
- 14-days trail for Mac and PC at https://www.camerabits.com/try-photo-mechanic-for-free/
What was this made for: Photo ingesting, tagging, and browsing tool.
How do people use it: 1) Many photojournalists use it in the field to preview what’s on a memory card so they can quickly select the photos the need to send to the newspaper right now, 2) To add keywords to previous and old projects, 3) To have an overview/search engine of all pictures on all drives at all times (a bit like Adobe Bridge, but much faster).
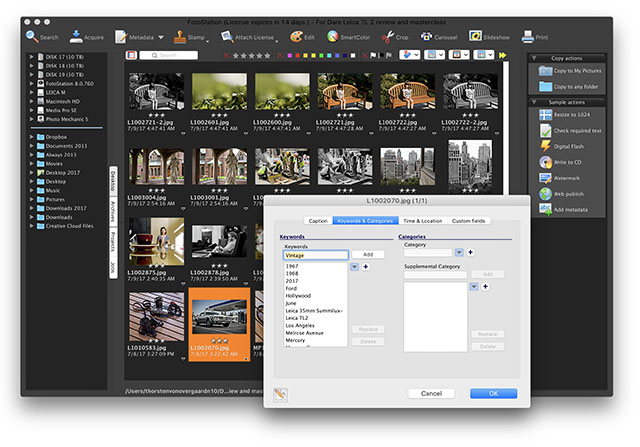
 FotoStation from FotoWare, Norway. FotoStation from FotoWare, Norway.
FotoWare in Norway seem to promote their cloud version mostly, but they still have a stand-alone software to use on a PC or Mac. $Price $149.00 (single user; two computers).
Good:
- Virtual catalog and tool. Handles a lot of files without altering the originals and without becoming a huge file itself.
- Fast indexing of all drives.
- Has workflow tools for making resized editions, etc. (Personally I wouldn't need or use it, but as an alternative to for example Apple Photos, this would be much times better).
Bad:
- Sharpens picture previews (which you can and should turn off in settings).
- Indexes all your drives (which is good if that is what you want, bad if you wanted to only work on a project of certain folders or files – then get Media Pro instead).
- You must open a window for each photo to add keywords to each photo.
- You can only add keywords to one file at the time, can’t add keywords to multiple files at the same time.
- Contains other tools like editing, etc. that doesn’t belong in a DAM software because FotoStation sees themselves as a workflow software (trying to be Lightroom, Photoshop and DAM in one).
- 14-days trail for Mac and PC at https://www.fotostation.com
What was this made for: Organizing and processing large collections of pictures.
How do people use it: 1) As an on-stop catalog and workflow editing software.
A user's experience with Photo Mechanic
I got this mail from mail from Dennis Linden on his use of Photo Mechanic:
I thought I was the only one in the world who thought the same as you when it comes to organizing photos. From the old photos from the 60’s to now, I have been doing for years what I have just discovered you are preaching.
I have now put the photos into my folder structure of choice on a Western Digital device. This device is “mirrored” to another similar device off-site so, the Source images are here in my studio and the back up is at my office building across town. One original, one backup. These new devices make that process completely foolproof.
My next step has been to really learn Photo Mechanic. This program is actually a miracle, but it took me a couple tries to get it right. Here are some observations I have and would submit for your consideration.
- PM works the same on Windows and Mac.
- PM is NOT a virtual catalog, not at all. There is nothing stored at all in PM, there is no database. Everything is read from the IPTC and EXIF data from the files in the folder, or subfolders you choose from.
- PM has a tremendous advantage with key-wording and captioning over any application I have used before.
- It has a feature called “Structured” keywords. This permits you to develop your own keywords, manage them in Google Sheets (since it exports TSV files and PM imports TSV files). You can use these structured keywords to import multiple synonyms automatically or manually.(New York, NY, USA, The Big Apple … can be entered as a single click. I use it for hardware combinations such as body and lens, so one click instead of multiple.
- You can stack keywords, and no duplicates are recorded. If you have “blue” in one stack and another, only one “blue” is recorded making it impossible to mess up the keywords.
- PM also has text substitutions which are also managed as Google Sheets and imported or merged within the program. So, if you shoot with a model and certain people tend to be around that model all the time, you can import a list for her/his “team” and then entires like ~dt speaks with ~js regarding ~fs, can be auto expanded to “Donald Tump speaks with Jeff Sessions regarding fall fashion shoot” any abbreviations you personally need or use can be placed into the description or the keywords.
- The searching works equally well from PM, or the finder program in Windows or Mac. So, for the folder 2017 I can search for Donald and Jeff and all the photos keyworded or having those words in the description will be shown. This means, on my folders on my personal and backed up network (for less than $1000) I can use windows computers or Macs, with our without PM.
- PM does permit you to load applications to edit photos, and these may be different on each computer or platform. So the program is not needed to import the raw files at all. I use Capture One and DxO if needed, but if all I need to do is crop and resize a JPEG, then PM will do that independently. However when printing, I prefer to do it old school and SIZE the TIFF for the final output print size at the printer specific PPI, as I learned from Mac Holbert. For example my Vancouver skyline print from May has the Original TIFF and then an 8x10 and a 9x15 and an 11x17 TIFF, sized and sharpened specifically for the printer and the paper I am using. No worries, putting codes in the tiff versions allows me to search for “Vancouver skyline night rain 11x17 epson luster” and voila.
|
|
| |
|
|
| |
|
|
|
 |
| |
Buy the Best-Selling eBook by Thorsten Overgaard:
"Finding the Magic of Light"
The new 2025-edition with 50% more pages and illustrations.
i"I have just been reading your eBook last night, which opened my eyes for more than
I have been thinking about before. You have a great sensitivity that I feel
connected with, and I enjoyed every word."
"I am reading your book, Finding the Magic of Light. Exactly what I crave."
"I find your books very helpful and thought-provoking."
"A must have. Personally useful for street photography."
|
 |
|
|
|
| |

Also available in German:
"Die Magie des Lichts Finden"
 DE DE |
|
In this easy to read and apply eBook, Thorsten Overgaard takes you on a journey to see, understand and simply use light.
"One of the most important ways to get an aesthetic and pleasant picture is to find the good light."
"Finding the Magic of Light"
New edition (January 2025)
eBook for computer and iPad.
(129 pages)
Only $78.00


Order now - Instant delivery.
★
★
★
★
★
★
|
| |
|
|
|
![]()
