By: Thorsten Overgaard. August 8, 2017.
Add to Flipboard Magazine.
Today I will give some advice on organizing the mess you made on your hard drives when you photographed without having a way to organize the archive
We’ve all been there, or are still there: We have a few thousand photographs lying around on hard drives that we have a vague memory about what might contain, but no structure to actual find what we need.
Okay, deep breath!
Make final pictures, ready for use
In my workshops, we deal with workflow extensively, it’s important. You cannot take photographs and take photographs and take photographs, and not deal with them. You got to make final photos that you can publish. Photography is not a solo sport. It’s communication, and communication involves two or more terminals.
(As a side note, taking photos for yourself and never show them to others can work. It’s against my principles, but it can work, because if you make a final photograph that is ready to be viewed, you can gain pleasure looking at it yourself. You’ve seen it before, of course yes, but the fact that you are looking at a photograph at a distance – you are not looking at it in your mind but at a piece of paper or on a screen – is therapeutic. Apart from that, I do believe photographs should be shared with others. Don’t be shy, don’t be an unpublished writer).

Why would I be the only one who should look at this photograph? I make photographs for sharing and publishing. This is Volker Figueredo Véliz and Somaida in Havana, Cuba. Leica M10 with Leica 50mm Noctilux-M ASPH f/0.95. © 2017 Thorsten Overgaard.
How to organize photographs
In my workshop, and in my Lightroom Survival Kit, we deal with how to organize it all so it’s there, it’s final, it’s in good order and you don’t have to reorganize later again, you don’t have to wonder where something went. It’s all there, it’s simple and it works.
In the same breath, I always tell people, “Don’t try to apply this workflow to all your previous pictures and then to your current and future pictures. No, forget the old pictures and get the workflow in from now on.”
Then, if you find time to organize your past mess of pictures at some point later, then set aside the time to do so. But it’s also a calculation of your time. If you have a pile of old pictures that you hardly revisit, then why would you set aside four days to reorganize them?
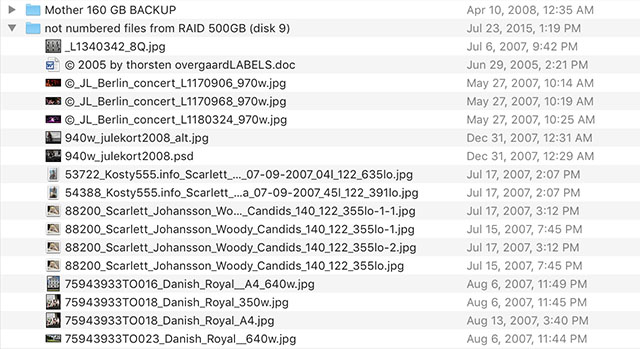
A royal mess: Files that got lost the days we were in a hurry, or we just didn't phantom that remembering what was where, one day would become a problem!
Maybe it’s better to leave the pile there and spend 20 minutes here and there to find something you need to find, than it is to invest four days organizing it to save a total of two days in the future looking for stuff?
We humans seem to get a lot of pleasure cleaning up things. We can get obsessed with organizing stuff. It's such a nice feeling you cannot stop! You know, you go through an IKEA store and you get this urge to buy a lot of boxes and bins and go home and organize shoes, scarfs, keyrings, pillows and all in neatly see-through boxes. Then you stack the boxes neatly and forget about them for some years. I avoid "organizing raids" like that. Deliberately; been there, done that. You always end up three years later opening boxes of things you never used. You should have left them were they were, or you should have thrown them out when you had the chance.
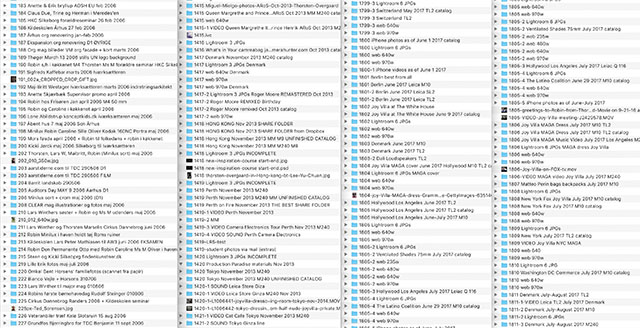
How a picture archive ideally should look: My archive today, with neatly organized folders, all files keyworded and existing in final sizes, ready for use.
How to clean up past photo archives
There’s two steps of cleaning up and organizing past archives. The first, and most important one, is to make sure your photo archive is secure:
Step 1: Securing your files will work in the future
A lot of technology will change over the years. If your photos are “organized” in Lightroom, you are heading for troubled water: How likely is it that the DNG or raw format your photos exists in will be readable in 5 or 20 years?
Two scenarios that will convince you to change your ways: One was that when Adobe Lightroom “updated” their camera profile from Process 2010 to Process 2012 for Lightroom 4, all your images would change exposure and look if you “updated” them to Process 2012 as Adobe suggested. Fortunately, Adobe Lightroom still supports Process 2004 and 2010, but for how long?
You must get your photos out of software programs: When Apple stopped doing their photo program Aperture a few years ago, many users discovered they were trapped with thousands of photos in Aperture.
Basically, if your photos are in a software program, you are storing your photos for disaster: At some point, you will have to move them from that program.
The solution could be to move them to another program, and thus delay the catastrophe, but the right way to do it is to get them out of software.
Your photographs must be self-explaining files on a drive, what I called a “floating” archive in my article "How to write keywords into your photographs" a few days ago, not files locked inside a software.
The steps are described in my Lightroom Survival Kit and those steps are the same as you must apply for any photographs you take today and tomorrow:
- Import them to Lightroom, Capture One or other workflow program for editing.
- Select the ones you like, edit them, crop them and keyword them.
- Export final high resolution JPG or TIFF files of them; and those files are now your “originals” that are final prints, ready for print and other use.
- Pack it all down by exporting the whole batch of photos you made (mine are organized in event numbers) to external archive and clean out your software for previews. You are done with the photos, no reason to have them lying around in a software.
- Think old school workflow: Negative envelopes and final prints. You didn’t travel with your negatives in the old days or “kept them handy” next to the enlarger in the darkroom. Put everything away in an archive in a way so you can find it when you need it.
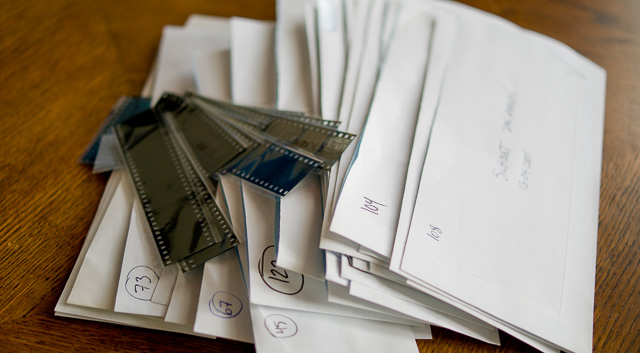
Think old school workflow: Much of the logics in organizing picture archives follows the logics of how it was done when it was film and photo paper. Whenever in doubt, think how you would do it if it was paper and not digital files. In the photo you see some of my negatives that organized in envelopes that has a number and a short description of the event inside, and date. © Thorsten Overgaard.

Step 2: Clean up the unorganized mess
The other type of cleanup of an old archive is the mess of unorganized photos on hard drives. You know, different folders with names that makes no sense anymore. It was all (not) organized in the delusive idea that “I remember where it is”. Delusive because none of us foresaw just how many thousand files we can accumulate on a computer in a few years.
If the photos are in a format that is readable, they could just stay in whatever mess they are in. They are safe, if you know what I mean; they are not in danger of getting lost by change of technology. The only "problem" you have with them is that it's a mess and how to find what you are looking for.
You might want to do one of several things to optimize them:
Keywording the mess
You could drag and drop sections of them, or all of them, into a virtual catalog software like Media Pro, Photo Mechanic or PhotoStation.
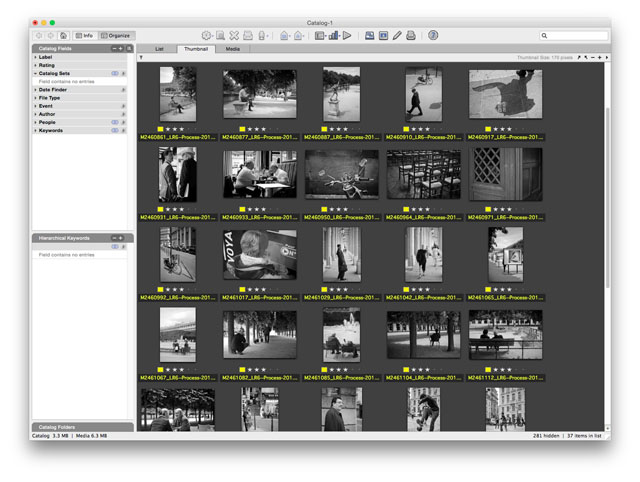
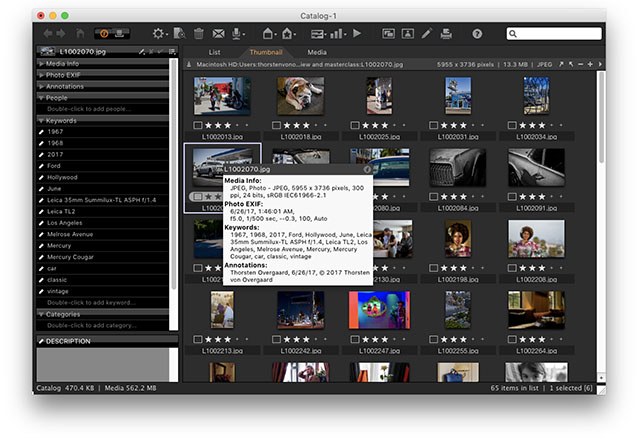
Media Pro is a virtual catalog (not physically existing). When you have 100,000 pictures in it, it's only 1 GB because it doesn't hold any of the original files. It just shows previews and has a link to the original file. You can add descriptions, keywords, etc in Media Pro, and then sync the data with the original files (Media Pro used to be iView Media Pro, then bought my Microsoft to be Microsoft Expression Media, then finally bought by Phase One to be Media Pro).
The important term here is virtual catalog because that means the software doesn’t import the files, the software actually doesn’t do anything to the files unless you command it to.
With Media Pro or Photo Mechanic you get an overview of all files and can add keywords, descriptions, stars and other markings to them. And then, when done, you can merge those changers to the actual file. This is the most valuable feature because that will allow you to find the photos by searching for keywords using Spotlight on an Apple computer for example. Doesn’t matter where they are, they can be found.

You don’t need Media Pro or Photo Mechanic for searching the files. Once the keywords have been added to the actual photo file, you could throw out the catalog software.
You can also (re-)organize the photos into folders in Media Pro or Photo Mechanic and all. Either use the software to help you actual (re-)organizing folder structures of the archive on the hard drives, or just organize them virtually in Media Pro, Photo Mechanic or FotoStation. Just be aware that hours or days spent organizing stuff in Media Pro or Photo Mechanic will be lost the day those software stops existing.
Reorganize, keyword and possibly re-edit the mess
You can drag and drop a section into Adobe Lightroom and choose “Add without moving files” and organize them using Lightroom. This way you are not copying the files but use Lightroom as sort of a virtual catalog. This gives several possibilities, for example:
A) You can add Keywords and descriptiopns, stars, etc to the files (and these are written into the file instantly (if you make sure “Write changes into XML” under Catalog Settings is turned on).
B) You can crop the pictures, edit exposure, change color balance, etc on the photos you feel need that (and export new hires JPG or TIF versions of them).
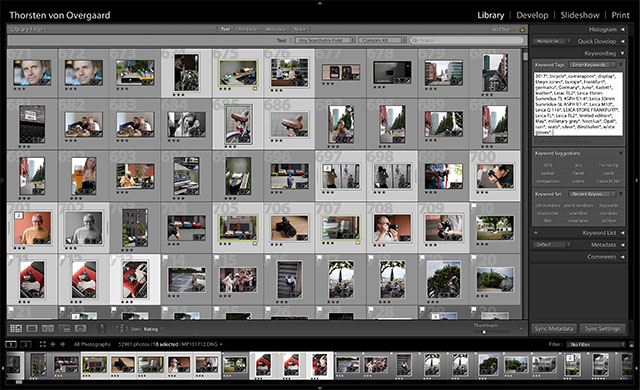
In Lightroom, you can add keywords to multiple files you select, but only when you are in thumbnail view (seeing only a film strip of thumbs in the bottom won’t add keywords to all the selected files).
C) You can use the export function of Lightroom to set up presets of exports so you can export a series of web-resolution editions of the images, hires JPG’s, etc.
D) You can move original files from one folder to another, make new folders, etc. As Lightroom is a “real-time” software, changes made in Lightroom happens right now (without need for save changes because they are already applied and saved), and in the same manner, moving files in Lighrroom moves the corresponding files on the hard drive (dangerous generally, but practically for actual reorganizing of files).
E) As a final step, you can then “Export as catalog” the entire set to a new final destination (the place you want the files to reside in the future) and that way scoop up files elsewhere spread throughout different folder, into one folder. Like a negative envelope in the old days, just digitall in our times.
If you use Lightroom for organizing previous archives, you might want to do it in smaller batches to see how it works. I wouldn’t throw 15,000 photos into Lightroom in one go. You can do it, but it will make the program slower. So I would do it in as small batches as possible.
Also, if you have web sizes, TIFF editions, CMYK-versions (four-color print versions) and so on in the same folders, you may have to consider how to go about with it.
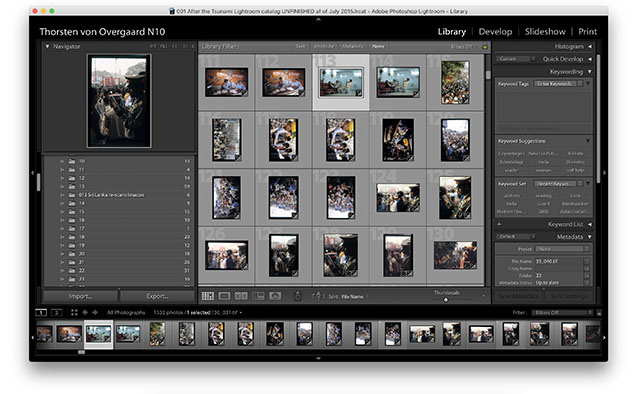
My own archive: I have some older folders with film scanned pictures that are organized with numbers, keywords and all, but I want to review the content of raw scans from film, make final and ready-to-use web editions and so on. Those I have imported into Lightroom as a stand-alone catalog of just those so I can review the original scans, make new edits, change colors, etc. As the final step I will be exposting them all as final photos, ready for use for print, web and all. You wouldn't do this just to make the archive "pretty", you would do it if you felt you would gain some usable stuff that would be worth the time spent.
Remember: One original, one backup
A detail you will realize to be of importance as soon as you start cleaning up and organize older files, is that you cannot have five originals of one file.
You try to add keywords, but you add them to one file and have four other copies. That’s clearly a mess.
If the file name (Like "L10044567.JPG" for digital camera files, or "15_017-Mysore-India" for film scans) is the same, then you can leave the copies as is. You search for a keyword and a file shows up. You look at that file’s name, and when you search that file name, you find four other copies and thus might find one in higher resolution, or one better looking. Your archive worked, even it was sort of a mess. Not something to proud of, but you did find the image you were looking for!
You will realize that ideally – in your current and future workflow – you should have only one original of an image. That one you put keywords into, and from that you make web-size versions and so on, so that all versions will have the same file name and the same keywords! (This is the reason that in your current workflow for new phjotos, you must add keywords in Lightroom or Capture One before you start exporting versions).
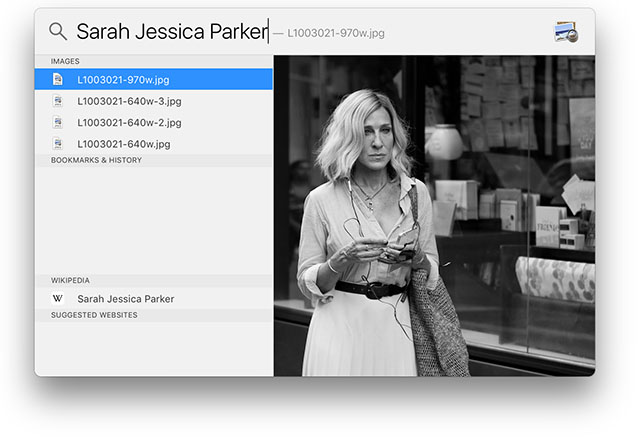
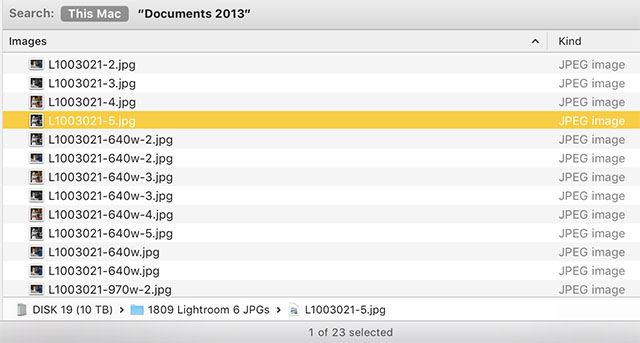
I make it a rule I have only one, and one backup externally (in the bank, actually). It should work this way when I search for a keyword like “Sarah Jessica Parker”: In the search result I can see I got several sizes of the same file name (picture 1 below). When I click on “Images” in the search result, I get a complete list of which files are on which drive (picture 2 below).
Spotlight comes up with hits for the keyword(s):
When I click on "IMAGES", I get a folder with all the hits on the keyword. Voila! My image in the different versions, color, black and white, different sizes. They all have the same file number becuase they were all made from the same DNG file (file-2 and file-3 is because it's different versions in color, b&w, etc)
Think archive
Think archive. The way we used to organize things in the old days was good, but add digitalization to it. Which means, it’s a different way to organize stuff, but the principles are the same.
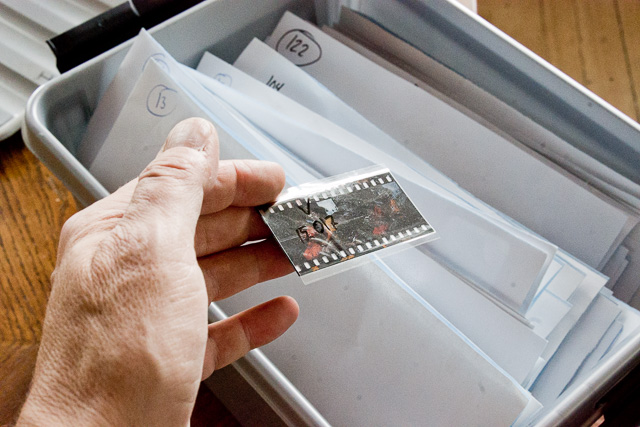
Cross-referencing: One of my archive boxes in Denmark. You can see that each envelope has an event number: Each slide or negative scanned has a number that refers to the event, as well as the picture number. The one I’m holding is 15_017. All negatives and slides ever taken is here, but only the selected ones are scanned and numbered. © 2017 Thorsten Overgaard.
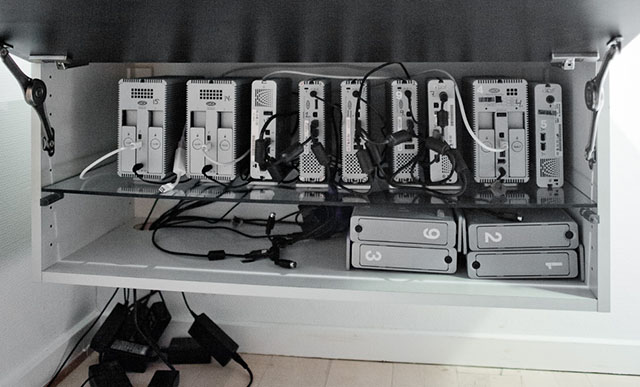
Today the archive looks like this. Same principle, different storage units. © Thorsten Overgaard.
To be continued
I hope you enjoyed this story on keywords. I will be doing some more articles on workflow as I get time to do so. You can also buy my Lightroom Survival Kit to get an overview of workflow and how to organize it.
As always, feel free to e-mail me at thorsten@overgaard.dk with questions, ideas and suggestions.
Related articles:
Advice for photographers: "Which computer to get"
Advice for photogtraphers: "How to write keywords into your photographs"
Advice on Apple Photos and smartphones: "How to sync your photo archive to your iPhone"
Advice for photographers: "The ultimate backup is in the bank"
Advice for photographers: "Calibrating computer screen for photographers"
Thorsten Overgaard's workflow extension course: Lightroom Survival Kit
Thorsten von Overgaard Leica Workshop Reviews 2014
| |
|
|
| |
A short review of DAM catalog software for photographers
By Thorsten Overgaard. August 9, 2017
DAM = Digital Asset Managament. Software for organizing photos, PDF files, music files etc. In this context the interest is how to use it for still photographs.
 Media Pro by Phase One, Denmark Media Pro by Phase One, Denmark
First there was iView, them Microsoft bought it and called it Expression Media as part of their web suite "Expression". Every time they made an update, something stopped working. Thnkfully, Phase One in Copenhagen bought it and re-programmed the whole thing to be a tool for their clients with a need to catalog their pictures taken with the Phase One medium format cameras. It's a great tool also for everyone else with pictues to catalog and keep track of. Price Euro 189.00 (for three users).
Good:
- Virtual catalog and tool. Handles a lot of files without altering the originals and without becoming a huge file itself.
- You can change the sequence of photos (good for organizing slideshows or sequence of how pictures should appear in an exhibition, etc).
- For keywords and reorganizing files, it’s great. The keyword box is just to the left and you can type keyword, keyword, keyword (with commas as separators) and then hot return, then Media Pro splits them out to separate keywords in the list.
- Media Pro only deals with the images you thrown into it, it doesn’t scan all your hard drives and show you everything. This way you can stay with just what you want to work with, 50 or 30,000 pictures, but nothing not relevant.
- No changes to your original files till you save the changes into the files.
- Free trial available from Media Pro.
Bad:
- The previews take time to create.
- The software sharpens the previews which I don’t like (I want to see the actual file, not a changed preview).
What was this made for: Professional photo management built to manage large photo libraries.
How do I use it: 1) To add keywords to previous and old projects, 2) To review and organize projects like exhibitions, slideshows, etc. as ad hoc catalogs (I open Media Pro, throw in the folders I want to see, then organize them and mark the ones I want to use). I don’t maintain “one catalog” of all my photos anymore.
 Photo Mechanic by Camera Bits, Inc. Photo Mechanic by Camera Bits, Inc.
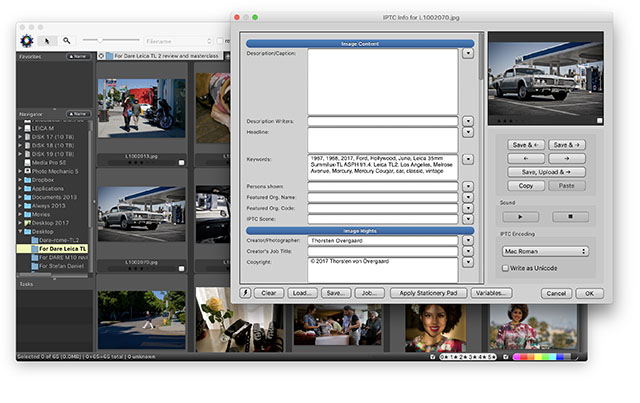
This has been the long-standing gold standard for DAM software. I've mostly seen it used by photojournalists in the field for fast selection (and keywording) of photos. Here is an article by Scott Kelby on how he uses it. Price $150 (for three computers).
Good:
- Virtual catalog and tool. Handles a lot of files without altering the originals and without becoming a huge file itself.
- Fast indexing of all drives.
- Has tools for sharing with 500px and more.
Bad:
- Indexes all your drives (which is good if that is what you want, bad if you wanted to only work on a project of certain folders or files – then get Media Pro instead).
- You must open a window for each photo to add keywords to each photo.
- 14-days trail for Mac and PC at https://www.camerabits.com/try-photo-mechanic-for-free/
What was this made for: Photo ingesting, tagging, and browsing tool.
How do people use it: 1) Many photojournalists use it in the field to preview what’s on a memory card so they can quickly select the photos the need to send to the newspaper right now, 2) To add keywords to previous and old projects, 3) To have an overview/search engine of all pictures on all drives at all times (a bit like Adobe Bridge, but much faster).
 FotoStation from FotoWare, Norway. FotoStation from FotoWare, Norway.
FotoWare in Norway seem to promote their cloud version mostly, but they still have a stand-alone software to use on a PC or Mac. $Price $149.00 (single user; two computers).
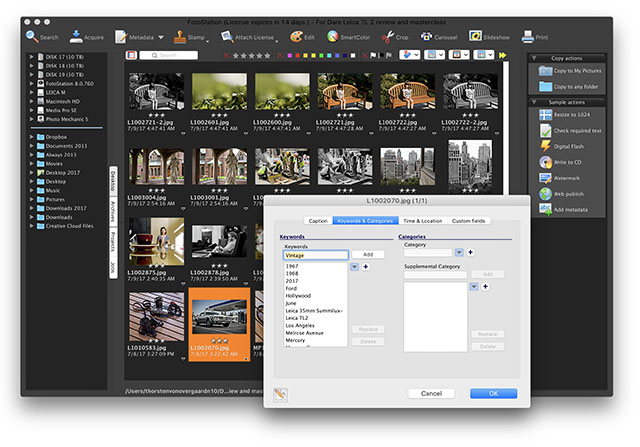
Good:
- Virtual catalog and tool. Handles a lot of files without altering the originals and without becoming a huge file itself.
- Fast indexing of all drives.
- Has workflow tools for making resized editions, etc. (Personally I wouldn't need or use it, but as an alternative to for example Apple Photos, this would be much times better).
Bad:
- Sharpens picture previews (which you can and should turn off in settings).
- Indexes all your drives (which is good if that is what you want, bad if you wanted to only work on a project of certain folders or files – then get Media Pro instead).
- You must open a window for each photo to add keywords to each photo.
- You can only add keywords to one file at the time, can’t add keywords to multiple files at the same time.
- Contains other tools like editing, etc. that doesn’t belong in a DAM software because FotoStation sees themselves as a workflow software (trying to be Lightroom, Photoshop and DAM in one).
- 14-days trail for Mac and PC at https://www.fotostation.com
What was this made for: Organizing and processing large collections of pictures.
How do people use it: 1) As an on-stop catalog and workflow editing software.
A user's experience with Photo Mechanic
I got this mail from mail from Dennis Linden on his use of Photo Mechanic:
I thought I was the only one in the world who thought the same as you when it comes to organizing photos. From the old photos from the 60’s to now, I have been doing for years what I have just discovered you are preaching.
I have now put the photos into my folder structure of choice on a Western Digital device. This device is “mirrored” to another similar device off-site so, the Source images are here in my studio and the back up is at my office building across town. One original, one backup. These new devices make that process completely foolproof.
My next step has been to really learn Photo Mechanic. This program is actually a miracle, but it took me a couple tries to get it right. Here are some observations I have and would submit for your consideration.
- PM works the same on Windows and Mac.
- PM is NOT a virtual catalog, not at all. There is nothing stored at all in PM, there is no database. Everything is read from the IPTC and EXIF data from the files in the folder, or subfolders you choose from.
- PM has a tremendous advantage with key-wording and captioning over any application I have used before.
- It has a feature called “Structured” keywords. This permits you to develop your own keywords, manage them in Google Sheets (since it exports TSV files and PM imports TSV files). You can use these structured keywords to import multiple synonyms automatically or manually.(New York, NY, USA, The Big Apple … can be entered as a single click. I use it for hardware combinations such as body and lens, so one click instead of multiple.
- You can stack keywords, and no duplicates are recorded. If you have “blue” in one stack and another, only one “blue” is recorded making it impossible to mess up the keywords.
- PM also has text substitutions which are also managed as Google Sheets and imported or merged within the program. So, if you shoot with a model and certain people tend to be around that model all the time, you can import a list for her/his “team” and then entires like ~dt speaks with ~js regarding ~fs, can be auto expanded to “Donald Tump speaks with Jeff Sessions regarding fall fashion shoot” any abbreviations you personally need or use can be placed into the description or the keywords.
- The searching works equally well from PM, or the finder program in Windows or Mac. So, for the folder 2017 I can search for Donald and Jeff and all the photos keyworded or having those words in the description will be shown. This means, on my folders on my personal and backed up network (for less than $1000) I can use windows computers or Macs, with our without PM.
- PM does permit you to load applications to edit photos, and these may be different on each computer or platform. So the program is not needed to import the raw files at all. I use Capture One and DxO if needed, but if all I need to do is crop and resize a JPEG, then PM will do that independently. However when printing, I prefer to do it old school and SIZE the TIFF for the final output print size at the printer specific PPI, as I learned from Mac Holbert. For example my Vancouver skyline print from May has the Original TIFF and then an 8x10 and a 9x15 and an 11x17 TIFF, sized and sharpened specifically for the printer and the paper I am using. No worries, putting codes in the tiff versions allows me to search for “Vancouver skyline night rain 11x17 epson luster” and voila.
|
|
| |
|
|
| |
|
|
|
 |
| |
Buy the Best-Selling eBook by Thorsten Overgaard:
"Finding the Magic of Light"
The new 2025-edition with 50% more pages and illustrations.
i"I have just been reading your eBook last night, which opened my eyes for more than
I have been thinking about before. You have a great sensitivity that I feel
connected with, and I enjoyed every word."
"I am reading your book, Finding the Magic of Light. Exactly what I crave."
"I find your books very helpful and thought-provoking."
"A must have. Personally useful for street photography."
|
 |
|
|
|
| |

Also available in German:
"Die Magie des Lichts Finden"
 DE DE |
|
In this easy to read and apply eBook, Thorsten Overgaard takes you on a journey to see, understand and simply use light.
"One of the most important ways to get an aesthetic and pleasant picture is to find the good light."
"Finding the Magic of Light"
New edition (January 2025)
eBook for computer and iPad.
(129 pages)
Only $78.00


Order now - Instant delivery.
★
★
★
★
★
★
|
| |
|
|
|
![]()
