By: Thorsten Overgaard. July 28, 2018.
Add to Flipboard Magazine.
Editing is to select and prepare for use. I try to go through all the pictures I took, the same day, to see what worked and what didn’t work. I make final pictures, ready for immediate or later use, of the good ones.
I learn from the bad ones. But also, I get to finish work, and that – together with the few successes of the day that I now have proof of, ready for use and sharing – is what gives me the enthusiasm and self-confidence to go out and take photos tomorrow.
I never really look at my “hit rate”, how big a percentage of the photos makes it to final ones. I concentrate on what is good, and I finalize those and admire the result. The bad ones are just there, and I skip over them to look for the good ones.
So no, I never delete bad pictures. A bad photo is simply one that isn’t a photo. Sometimes what I thought would be a great photo isn’t, and then I may look at it to see what I did wrong. What can I learn from this? It can be it just wasn’t great to begin with, and either I knew or I didn’t when I took it. Or it can be that I missed the moment (wrong timing), or technical things like focus or exposure. I make a mental note to do things different, but that’s all and then I move on to look for what works.
When enough works, you don’t have to worry about what didn’t. You look for the files that can easily be made into good pictures. If you look solely for your errors, you see just errors. So I look for good ones.
It’s a small thing, but it has a big effect on your enthusiasm for your photography: If you measure what is wrong by counting and deleting the bad photos, you feel like a failed photographer. If you look for what works and make that final pictures for using and sharing, you feel enthusiastic about your photography and want to do more.
The bad ones are learning experiences. Look and decide what to do when in a similar situation. If you can’t figure out what to do to make them better next time, ask somebody who could point you to an answer. In short, if you have to few good ones, take more photos.
What do I edit?
I’m for “global adjustments”, which means that I edit a photograph in general. I seldom edit a photo, and then start working on a corner of it, a face, a single color and so on (See examples in my article, "Editing Pictures: Before and After Examples").
The opportunities to do local adjustments are plenty in Capture One, Lightroom and Photoshop. I just generally don’t spend more than 20 seconds – 180 seconds on an image.
Either it works, or it doesn’t. I didn’t take a photo to remove things in the background, change exposure in individual elements, add clouds to the sky… and all that. I took the photo because I thought it was pretty obvious it would work as it was.
I edit those types of photos towards the look I want. I don’t try to edit and save the hopeless captures. I simply skip those. I concentrate only on what works, and that is all I am looking for when I go through the folder of pictures: “Mm, this one is a photo!” and then I already know that “I’m just going to take the exposure down a bit, warm up the colors and crop away that hand sticking into the frame to the right”.
I see the photo with the changes I want to make. Then I do the changes.
(This is much similar to working with a camera, if you notice: You walk down the street, and you notice something that could be a photo. No matter how clearly you “saw the photo”, you did actually prevision and see the photo before it was taken (why else would you do it?). It is because you “saw the photo” that you then took the camera and recorded it).
I think it is important to notice what we’re doing by observing: making decisions about what could be done or what should be done, and then doing it. In working with computers (and cameras), the observing and decision making part is often forgotten, we easily get thrown into the habit of doing without a final goal in mind).
I will usually do the edits in 20 seconds to 3 minutes. I edit until I feel it works and was what I envisioned.
Sometimes I work on something and realize it is somewhat satisfying, but not great. Then I realize it won’t get better than that, and so I leave it as is. This will result in a picture that is ready for use, and I’ll leave it up to a better me, or somebody else, in the future to decide if it will ever get used. Notice that I didn’t delete it, nor did I throw in three hours of work in order to save it. I leave it at that “somewhat ok result”, and we’ll see. I’ll spend my time on better pictures, and on taking new ones.

There was something there, but it's not an essential or great photo. So I edit it to look all right for the archive, then move on. Maybe it will be of use one day, maybe not. Sex Pistols cover in the Amoeba record store on Sunset Blvd in Los Angeles.
I see editing tools such as Capture One (and Lightroom) as a way to add 5% - 15% more sparkle and life to the photograph. I don’t use editing tools to “fix it in the computer”.
The photograph should be fairly well finished in the camera, and then in Capture One I will add that extra sparkle. I will also crop the image in Capture One, to any format (square, panorama, 2:3 format or whatever I see fit) so as to strengthen the story and to exclude disturbing lines and elements that don’t contribute to the story. I will correct the White Balance as needed, to get natural and nice colors.
Usually I will make the color version into its final edit; then make a copy of that version and make a black and white version.
As I move through the pictures, I mark the ones I’ve selected to edit with three stars. The three stars simply means “this is a picture”, and then I’ll edit it so it is ready for use.
Once I have gone through all the photos of the day (or the photos in the folder that I am working with), I take all the ones I had marked three stars and add keywords to them.
I add keywords for what I would look for, which is very simply 1) car, vintage, Hollywood, Los Angeles, USA, April, 2018, De Ville, model 1959, sunset, blue, classic, Cadillac, DADS KAD, and any other word I presume I would search for when I want to find the picture in the future).
I will also add factual information to the keywords, which is 2) Which camera and lens I used: Leica M10, Leica 75mm Noctilux-M ASPH f/1.25. And 3) Any information on names, streets, model numbers, in this case Canyon Drive, model year 1959, model name De Ville.
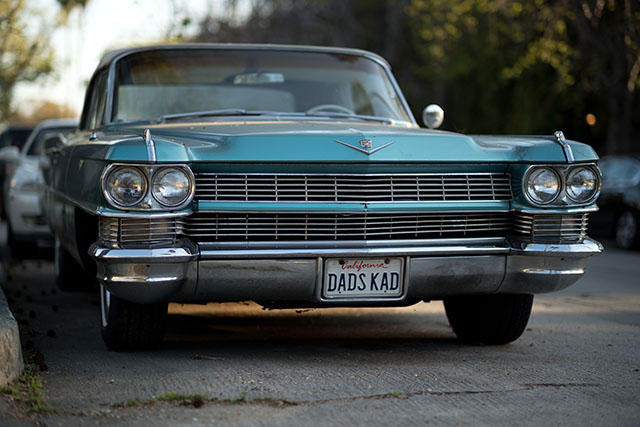
Adding keywords only to the files that matter (the three star ones that I edited so as to be ready for use) is important, and so is it that I add them to the files before I start exporting. The keywords become extremely important for future use of the archive.
Imagine that your archive is one big hard drive with many thousands of photos. Imagine they are just floating there all 40,000, 60,000 or 250,000 of them, because either there are no folders in the future to organize things into, or even if you made a neat structure of folders, the number of folders alone would take your breath away. That’s why keywords added now is important for future use:
You search for “Cadillac”, and there you go. The search comes up with 31 pictures in the whole archive with the word Cadillac. It’ll be rather easy to find which of the 31 pictures is the one you were looking for.
The image also contains information about where it was taken, with what, and when. So, I can write a caption that is correct too, without having to research or spend time looking elsewhere:
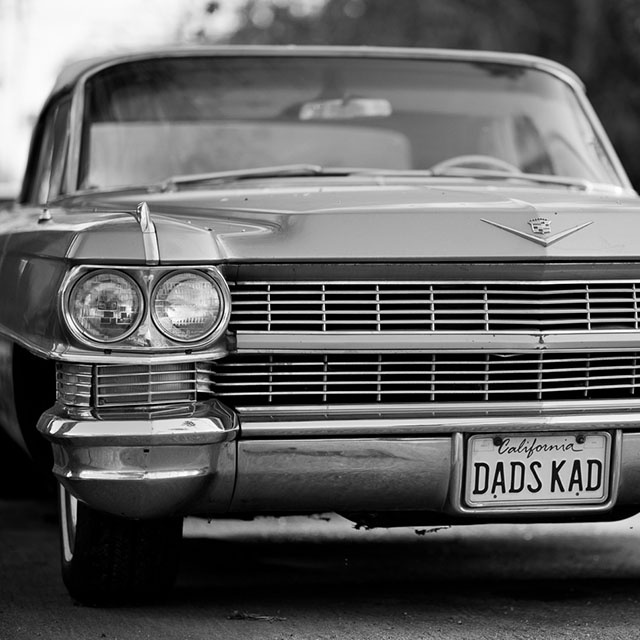
This elegant Cadillac de Ville model 1959 which you can often find parked in the Hollywood Hills, has been in the same ownership for 59 years and is still going strong. Leica M10 with Leica 75mm Noctilux-M ASPH f/1.25. © 2018 Thorsten von Overgaard.
I will often crop different versions if I see different possible uses. Instagram crop would be a square one, but also panorama or any other crop that makes sense to have in the archive.

I will do differnt crops for the archive.
Once I am done with the folder I am working on, or the photos from this event, I will archive it all on an external drive – the actual photo archive – and clean out the computer.
When I am done, I have “harvested” all the photos worth using from the set, prepared them for use with keywords, and I have cleaned out the computer again, as well as the memory card. My computer and camera are ready for new work, and the photos are in the archive for anyone to look through and easily see what might be useful for the article, exhibition or whatever else they are doing.
Editing is to select and prepare for use. It’s not doodling around with images on the screen, playing with effects and then getting tired of it and beginning something else. You start editing, go through it all, do it properly and then archive it all. In other words, it’s work, even when it’s fun. It has the common characteristic of all other types of work, which is that if you don’t do it, it stacks up and comes back to haunt you.
“Anything that is work is a shirk”.
I hope you enjoyed this talk about editing. As always, feel free to e-mail me for ideas, suggestions, questions and more.
Also read:
"Editing Pictures: Before and After Examples"
"My Precious Workflow"
"Which Computer to Get for Photo Editing"
Buy my editing guides today
You can buy any of the Survival Kits with 50% off using the codes here. You can use the Capture One code AMBOVERGAARD as well over at the Capture One website to buy software, software updates and Styles with 10% discount (write AMBOVERGAARD in the pop-up field under "Enter Promotional Code").
| |
NEW VERSION 22.3 |
|
| |
 |
|
| |
|
|
|
|
| |
490 pages easy-to-understand
workflow logics, checklists, Styles
and 3+ hours of videos.
Packed with help and tools for all questions on digital photography workflow.
Read more ...
Buy now
Start today
Thorsten Overgaard
Black and White Photography
Editing Color Photographs
Special Effects
Organizing files
Organizing Old Archives
Keywords
How to do safe backup
Hardware setup
Screens and Calibration
Printing Workflow
Capture One on iPad
Capture One Live
Publishing
+ Export Formats
+ Free Overgaard Styles
+ Preflight Checklists
The one and only method
The Survivel Kit is the only of it's kind, made by photographers for photographers.
|
|
The Brand New June 2022
"Capture One Survival Kit 22"
By Thorsten Overgaard
The complete workflow of Thorsten Overgaard,
made easy with pre-flight checklists and step-by-step instructions on how to set up and use a professional
photo editing software like Capture One Pro.
Laid out in a way that is easy to understand
and everyone can apply. Works for Capture One Pro 22
and all previous versions.
New revised version
This is the most revised version ever of the
best-selling Surival Kit by Thorsten Overgaard. This new
version includes many new chapters, on Capture One on iPad and how to add keywords better, as well as more
than 3+ hours of videos tutorials with
Thorsten Overgaard.
Simple and to-the-point tools on how to use select tools, how to do backup and how to manage and organize pictures archives so they don't get lost and doesn't have to be reorganized again and again.
Expanded and simplified
Also: Specialized first-help chapters on how to
sync your entire photo archive with the smartphone,
how to escape Apple Photos, how to empty photos out
of an iPhone, how to get out of Lightroom CC, what to do with iPad editing ... and more on how to not survive the digital age and perhaps even outsmart it.
Now comes with
Overgaard Leica Styles for FREE
Special black & white conversion, better skintones
and a CMOS sensor color correction.
(Value $48.00. FREE with this kit).
Thorsten Overgaard
Capture One Survival Kit 22.3
For computer, iPad, smartphone and Kindle.
Buy Now
Instant download.
Price $798.00
100% satisfaction or money back.
Released June, 2022.
UPDATE
VERSION 22.3 UPDATE
Compatible with all previous versions.
Simply use
code: "UPDATE22"
Only $298,00

|
|
|
| |
|
|
|
|
| |
#2131-1222-3 |
|
|
|
 |
NEW VERSION 11.3 |
 |
| |
 |
|
| |
|
| |
|
|
|
|
| |
|
| |
|
|
| |
Buy Now. Instant delivery.
New Version 11.3
ONLY $698.00

Now includes
4+ hours of
video tutorials.
100% satisfaction
or 100% refund.
More info.
|
|
| |
#2130-1121-3 |
|
| |
|
|
| |
Update to Version 11.3
Apply
code "UPDATE113" on checkout to get this complete version 11.3 update.
$298.00

Updates all previous Surival Kit versions since 2009. |
|
| |
|
|
Buy the complete new
Lightroom Survival Kit 11.3
The Legendary Tutorial for Photographers
Brand-new JUNE 2022-version.
Now with brand-new 4+ hours of video tutorials.
New sections on compostition and storytelling.
How to edit color photos.
How to edit black & white photos.
How to do keywords logical and easy.
The most successful photo editing kit ever
Photographer Thorsten Overgaard first released the Lightroom Survival Kit in 2009 and have honed it with new and fresh updates. This Version 11 is the most radical updated and renewed version ever, four years in the making.
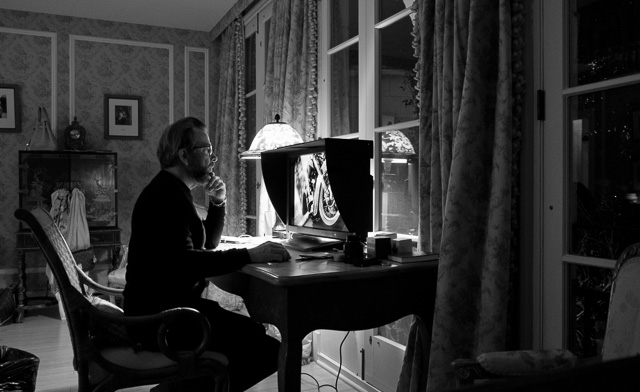
Professional workflow experience made simple, logical and easy to use.
Master editor makes it simple to understand
The Survival Kit is unique and one-of-a-kind being made for photographers for photographers. When someone understands their subject, they can explain it so it is easy to understand. The hallmark of Thorsten Overgaard is to make expert knowledge shown and told in a way so anyone can apply it.
Hands-on advice that works
With a 450 pages workbook and 4+ hours of video, every element of digital photography is touched on, in handy chapters and pre-flight checklists. Editing of color vs black and white photos, keywording, cropping of images, fine-tuning of tones, color balance and color control, export of originals, printing, archiving and backup, and much more.
Comes with the Overgaard Leica Presets (Value $48)
The Lightroom Survival Kit comes with Thorsten Overgaard's special-made Lightroom Presets for all digital cameras and for Leica digital cameras.
Understand all from camera to the final print
Chapters in this version goes over the background for High Dynamic Range (HDR), digital raw files and how to set up a professional photography workflow, from calibrating the screen to editing in Lightroom, and to making a final print. And more ...
10+ years experience in one package
No need to spend years figuring out the smartest way to do things when you can tap into the best way of doing things right here. The workflow of Thorsten Overgaard as been refined through years of field work with more than a thousand workshop attendees.
This method of workflow now used by thousands
The Survival Kit has been taught to thousands in workshops and in this Survival Kit. What does it do? It make you enjoy taking and making photos, and it increases your production considerabely. Most important of all, it'll give you back ownership of your files (which you will understand why is so important, once you have bought the Survival Kit and started applying its methods).
| |
|
|
| |
"Thorsten's methodology is perhaps not what hardware-, software- and cloud-companies want us to do, but as a former IT engineer I can only acknowledge his views about preserving our digital heritage. This workflow explained is for me the best I have ever seen".
★★★★★ |
|
| |
|
|
Video tutorials, image files, presets, checklists, definitions, tutorials of Lightroom, that boils down years of experience to a workflow you can implement in less than one day.
Start working in minutes. |
|
|
| |
|
| |
|
| |
|
| |
|
| |
|
| |
|
|
|
|
 |
|
 |
![]()
