By: Thorsten Overgaard. July 26, 2018.
Add to Flipboard Magazine.
Today I will show a few examples of what I edit. This is a series of articles where I will tell how I edit my photographs, what I look for, what tools I use, how much time I spend on editing, and what my hitrate usually is (how many of the photos I take ends up as final pictures).
These examples are relatively simple and you will see a pattern in what I do, and how long I use on an image. Generally, if things doesn't work out relatively fast, I skip the photo and move to the next one. I prefer to spend my time in the field, rather than by the computer trying to "fix it". My experince is that if something needs a lot of "fixing", it's seldom worth it.
A good picture looks good to begin with. It just needs a few adjustments. A bad picture looks bad and even a lot of work seldom makes it other than mediocre.
A few examples of what I edit
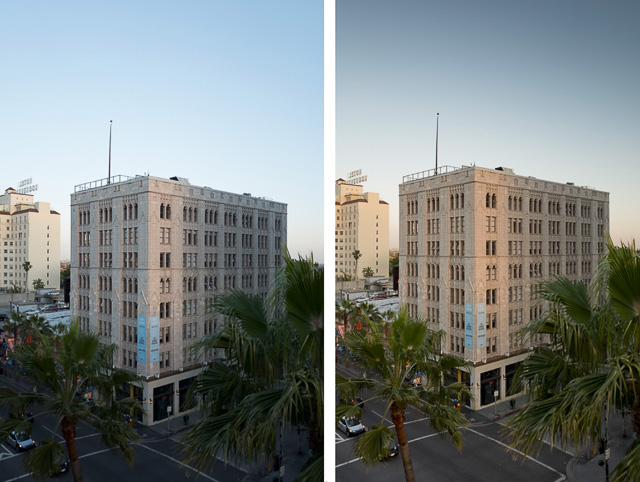 Above: Sunset boulevard with Leica Q.
Lines straightened, cropped slightly and white balance warmed up to look like the sunset light it was, and so that the sandstone building looks like sandstone. Shadow details lifted in the bottom of the photo, shade added on top to “frame” the building. Exposure brought down a bit (to make space for:) brightness and contrast brought up.
180 seconds editing.
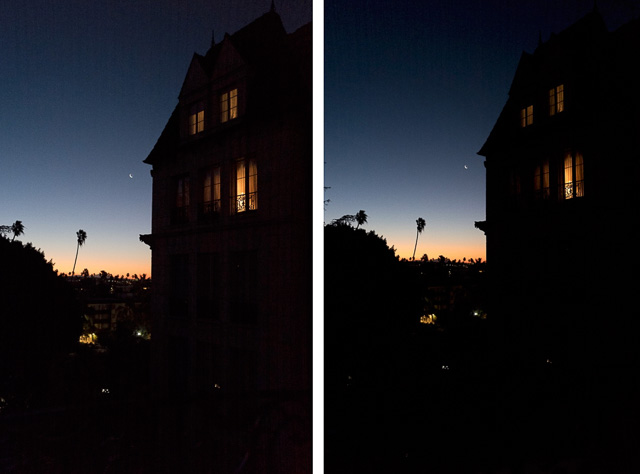
Early sunset from hotel window with Leica Q.
Lines straightened, white balance brought up a slight bit warmer. Exposure, shadow details, black and contrast changed slightly to make the photo more “sparkling”.
60 seconds editing.
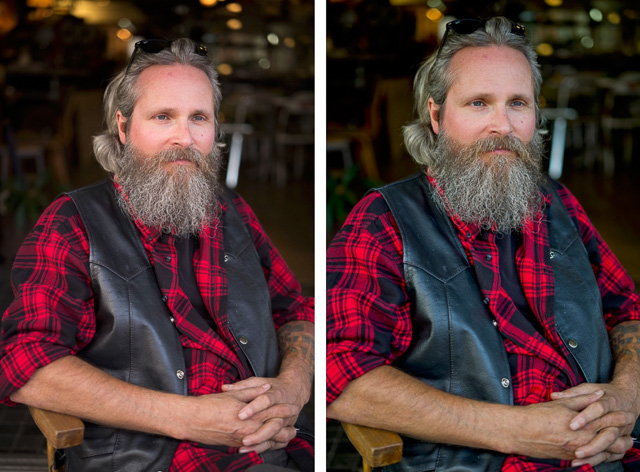
Above: Street Portrait San Francisco with Leica M-D 262.
Picture tilted and cropped. White balance brought up a small bit, red and orange channel desaturated to get better skin tone. Shadow details improved, then black and contrast added to get more lively leather vest and beard.
120 seconds editing.

Above: Street Scene San Francisco with Leica M-D 262.
Picture tilted and cropped. Converted to black and white. Exposure brought down, shadow details up, contrast up and brightness up.
30 seconds editing.

Above: Vancouver with Leica M-D 262.
Picture tilted and cropped. Converted to black and white. Exposure brought down, shadow details up, contrast up and brightness up.
30 seconds editing.
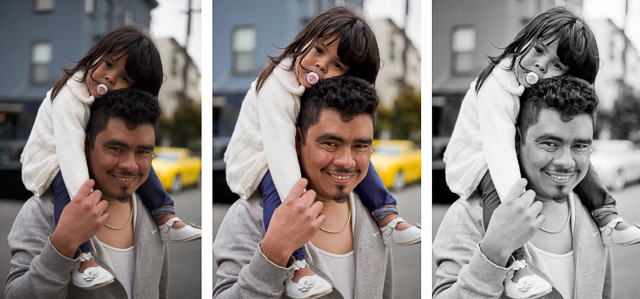
Above: Street portrait San Francisco with Leica M-D 262.
Exposure brought up and white balance adjusted. Shadow details up considerably, contrast up and brightness up. Cropped for clarity again, white balance adjusted again after editing for more exact colors.
Then added a copy for black & white to make a version without the bright yellow color in the background: Black and white applied. Shadow details up, exposure up, brightness up. Added black and contrast to get tonality to sparkle.
180 seconds editing.

Above: Street portrait Los Angeles with Leica M-D 262.
Exposure brought up quite a bit. Made a monochrome version. Exposure up quite a bit, cropped and tilted. Shadow details up, brightness up. Added black and contrast to get tonality to sparkle.
180 seconds editing.
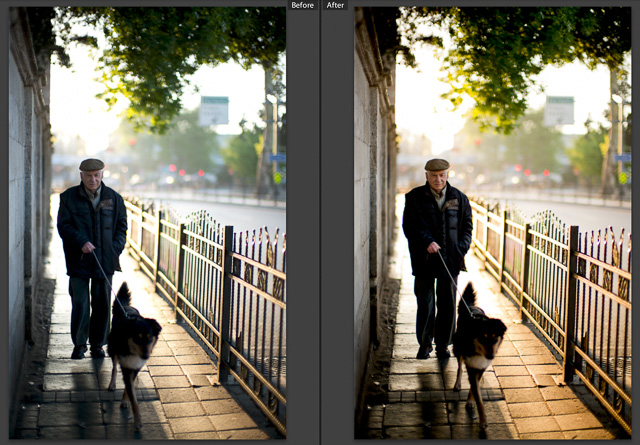
Above: Early morning in Istanbul. Artistic change of White Balance with Leica M240
Here is an image I adjustment White Balance from 4800 Kelvin (as shot Auto White Balance in the camera) to 6800 Kelvin, because I decided to make an artistic change of the white balance. To make it look warmer than it realistically was.
I hope you enjoyed this talk about my editing. As always, feel free to e-mail me for ideas, suggestions, questions and more.
Also read:
"My Precious Workflow"
"The Philosophy of Editing"
"Which Computer to Get for Photo Editing"
Buy my editing guides today
| |
NEW VERSION 22.3 |
|
| |
 |
|
| |
|
|
|
|
| |
490 pages easy-to-understand
workflow logics, checklists, Styles
and 3+ hours of videos.
Packed with help and tools for all questions on digital photography workflow.
Read more ...
Buy now
Start today
Thorsten Overgaard
Black and White Photography
Editing Color Photographs
Special Effects
Organizing files
Organizing Old Archives
Keywords
How to do safe backup
Hardware setup
Screens and Calibration
Printing Workflow
Capture One on iPad
Capture One Live
Publishing
+ Export Formats
+ Free Overgaard Styles
+ Preflight Checklists
The one and only method
The Survivel Kit is the only of it's kind, made by photographers for photographers.
|
|
The Brand New June 2022
"Capture One Survival Kit 22"
By Thorsten Overgaard
The complete workflow of Thorsten Overgaard,
made easy with pre-flight checklists and step-by-step instructions on how to set up and use a professional
photo editing software like Capture One Pro.
Laid out in a way that is easy to understand
and everyone can apply. Works for Capture One Pro 22
and all previous versions.
New revised version
This is the most revised version ever of the
best-selling Surival Kit by Thorsten Overgaard. This new
version includes many new chapters, on Capture One on iPad and how to add keywords better, as well as more
than 3+ hours of videos tutorials with
Thorsten Overgaard.
Simple and to-the-point tools on how to use select tools, how to do backup and how to manage and organize pictures archives so they don't get lost and doesn't have to be reorganized again and again.
Expanded and simplified
Also: Specialized first-help chapters on how to
sync your entire photo archive with the smartphone,
how to escape Apple Photos, how to empty photos out
of an iPhone, how to get out of Lightroom CC, what to do with iPad editing ... and more on how to not survive the digital age and perhaps even outsmart it.
Now comes with
Overgaard Leica Styles for FREE
Special black & white conversion, better skintones
and a CMOS sensor color correction.
(Value $48.00. FREE with this kit).
Thorsten Overgaard
Capture One Survival Kit 22.3
For computer, iPad, smartphone and Kindle.
Buy Now
Instant download.
Price $798.00
100% satisfaction or money back.
Released June, 2022.
UPDATE
VERSION 22.3 UPDATE
Compatible with all previous versions.
Simply use
code: "UPDATE22"
Only $298,00

|
|
|
| |
|
|
|
|
| |
#2131-1222-3 |
|
|
|
 |
NEW VERSION 11.3 |
 |
| |
 |
|
| |
|
| |
|
|
|
|
| |
|
| |
|
|
| |
Buy Now. Instant delivery.
New Version 11.3
ONLY $698.00

Now includes
4+ hours of
video tutorials.
100% satisfaction
or 100% refund.
More info.
|
|
| |
#2130-1121-3 |
|
| |
|
|
| |
Update to Version 11.3
Apply
code "UPDATE113" on checkout to get this complete version 11.3 update.
$298.00

Updates all previous Surival Kit versions since 2009. |
|
| |
|
|
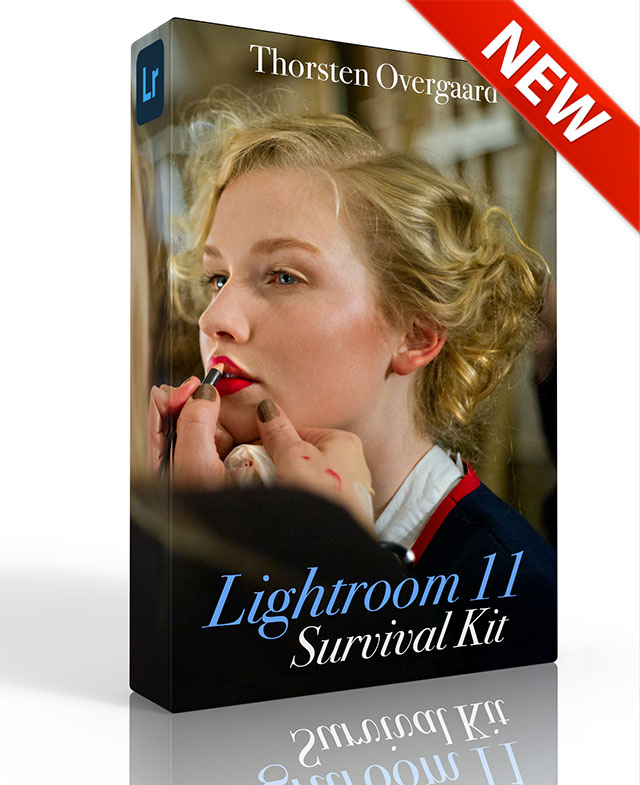
Buy the complete new
Lightroom Survival Kit 11.3
The Legendary Tutorial for Photographers
Brand-new JUNE 2022-version.
Now with brand-new 4+ hours of video tutorials.
New sections on compostition and storytelling.
How to edit color photos.
How to edit black & white photos.
How to do keywords logical and easy.
The most successful photo editing kit ever
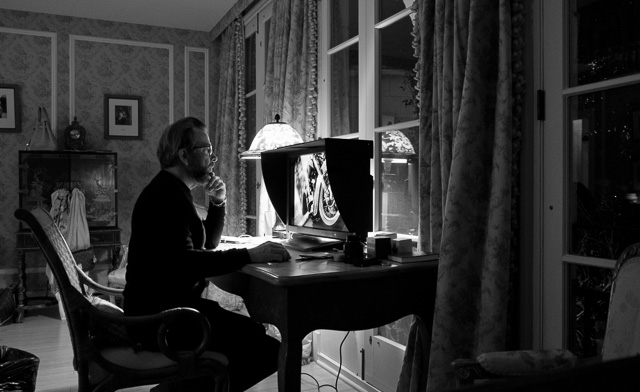
Photographer Thorsten Overgaard first released the Lightroom Survival Kit in 2009 and have honed it with new and fresh updates. This Version 11 is the most radical updated and renewed version ever, four years in the making.
Professional workflow experience made simple, logical and easy to use.
Master editor makes it simple to understand
The Survival Kit is unique and one-of-a-kind being made for photographers for photographers. When someone understands their subject, they can explain it so it is easy to understand. The hallmark of Thorsten Overgaard is to make expert knowledge shown and told in a way so anyone can apply it.
Hands-on advice that works
With a 450 pages workbook and 4+ hours of video, every element of digital photography is touched on, in handy chapters and pre-flight checklists. Editing of color vs black and white photos, keywording, cropping of images, fine-tuning of tones, color balance and color control, export of originals, printing, archiving and backup, and much more.
Comes with the Overgaard Leica Presets (Value $48)
The Lightroom Survival Kit comes with Thorsten Overgaard's special-made Lightroom Presets for all digital cameras and for Leica digital cameras.
Understand all from camera to the final print
Chapters in this version goes over the background for High Dynamic Range (HDR), digital raw files and how to set up a professional photography workflow, from calibrating the screen to editing in Lightroom, and to making a final print. And more ...
10+ years experience in one package
No need to spend years figuring out the smartest way to do things when you can tap into the best way of doing things right here. The workflow of Thorsten Overgaard as been refined through years of field work with more than a thousand workshop attendees.
This method of workflow now used by thousands
The Survival Kit has been taught to thousands in workshops and in this Survival Kit. What does it do? It make you enjoy taking and making photos, and it increases your production considerabely. Most important of all, it'll give you back ownership of your files (which you will understand why is so important, once you have bought the Survival Kit and started applying its methods).
| |
|
|
| |
"Thorsten's methodology is perhaps not what hardware-, software- and cloud-companies want us to do, but as a former IT engineer I can only acknowledge his views about preserving our digital heritage. This workflow explained is for me the best I have ever seen".
★★★★★ |
|
| |
|
|
Video tutorials, image files, presets, checklists, definitions, tutorials of Lightroom, that boils down years of experience to a workflow you can implement in less than one day.
Start working in minutes. |
|
|
| |
|
| |
|
| |
|
| |
|
| |
|
| |
|
|
|
|
 |
|
 |
![]()
