By: Thorsten Overgaard. New York, January 22-24, 2016. Edited January 29, 2016
Add to Flipboard Magazine.
With great anticipation I heard it would snow in New York while I was here. So great was my enthusiasm I just couldn't stay in bed but had to go out 3 AM in the morning with my Leica to see the wonder.
26.5 inches of snow was what New York got. It's not record (that is only second-most recorded since 1869), but with the usual drama and a taste for making even small events into historic "breaking news", the snowstorm was named "Snowzilla" and soon got it's own hashtag, #Blizzard2016.
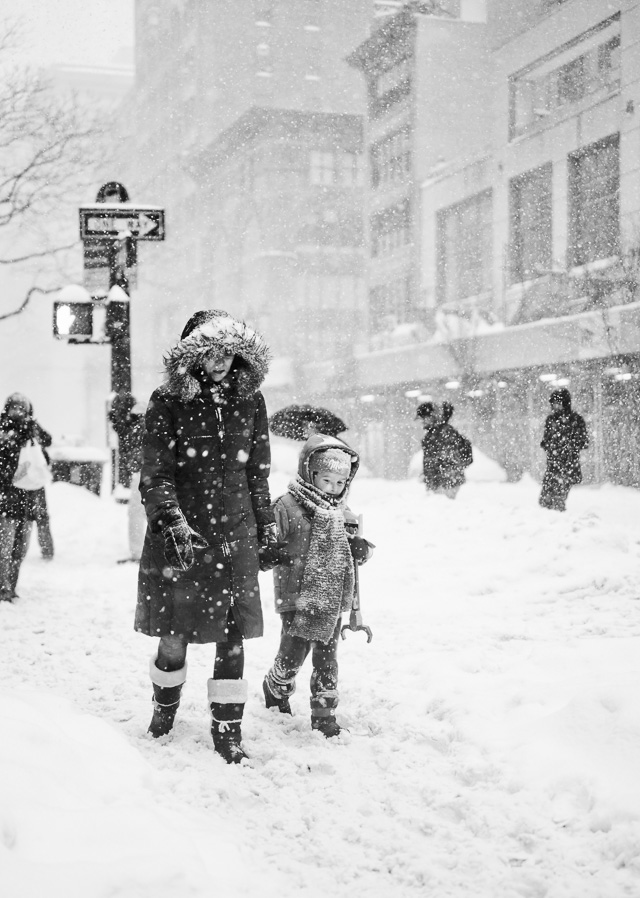
Mother and son exploring a New York covered in show after the "Snowzilla" Leica SL with Leica 50mm APO-Summicron-M ASPH f/2.0. © 2016 Thorsten von Overgaard.
My second blizzard in New York
I happened to be in New York also during the 2011 blizzard that almost closed down New York with 20 inches of snow. I wrote about that here, but that blizzard happened just before Christmas and the temperatures stayed below zero for many days, leaving the snow-chaos ongoing for almost a week.
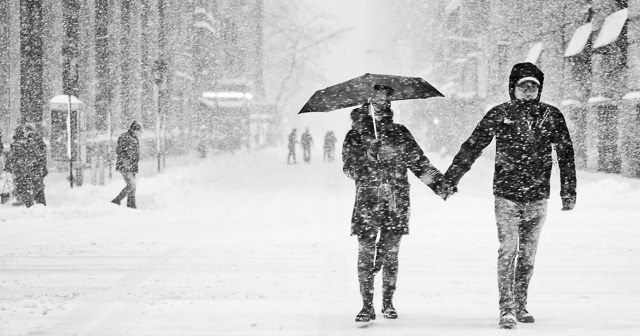
A couple having fun in the snow on 32th Street . Leica SL with Leica 50mm APO-Summicron-M ASPH f/2.0. © 2016 Thorsten von Overgaard.

A one weekend only snow performance
The "Snowzilla" was a one weekend performance. The snow started falling in the evening Friday and stopped 10 PM Saturday evening. Convenient for the many New Yorkers who could take their Sunday walk and instagram the whole thing before the warmer weather and sun will take it away and hopefully make it easier to perform the normal duties of the city in the coming week.
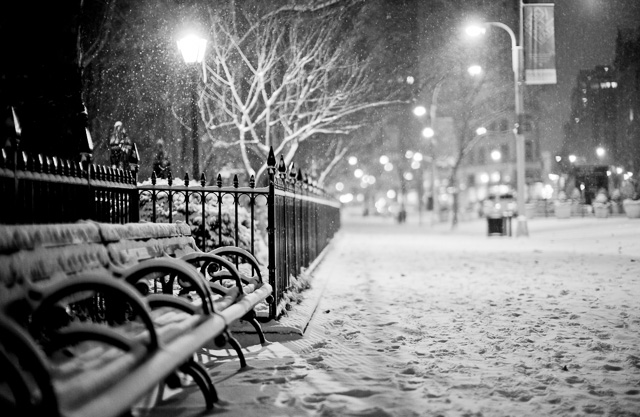 The New York 2016 Blizzard. I went out at 03 AM in the morning as it had started snowing. Here it is by Madison Square Park. Leica M 240 with Leica 50mm Noctilux-M ASPH f/0.95. © 2016 Thorsten von Overgaard.
Leica in the snow
I saw the snow start falling in the evening. You could feel it in the air some hours before that it would be coming. At 3 AM I woke up and had a look out the window and I just couldn't resist taking the Leica and go out to see how it was looking. I walked a few streets down and some blocks over, then I would circle back home to my warm bed.
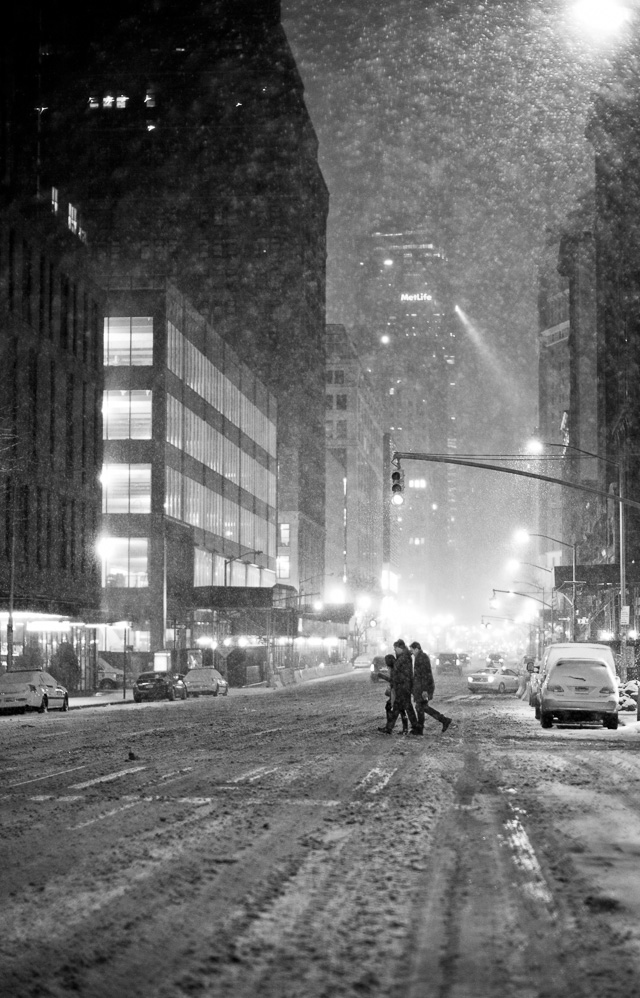
04 AM in New York: 6th Avenue with the Met Life building in the background and the last party-people trying to get home. Leica M 240 with Leica 50mm Noctilux-M ASPH f/0.95. © 2016 Thorsten von Overgaard.
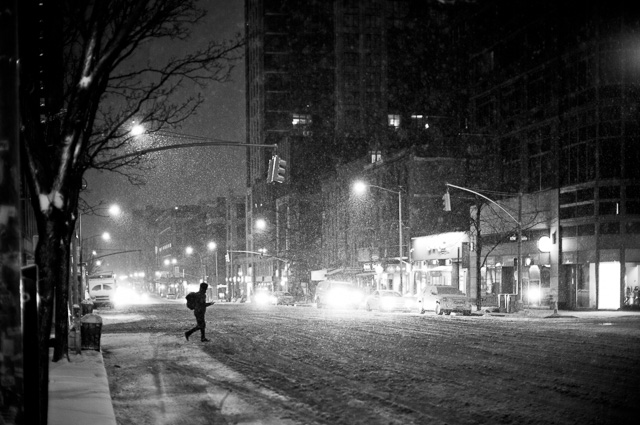
6th Avenue 04 AM in New York during the 2016 Blizzard. Leica M 240 with Leica 50mm Noctilux-M ASPH f/0.95. © 2016 Thorsten von Overgaard.
A ban on traveling
Like the New Yorkers I had seen out there in the night, I wasn't prepared for snowstorm either. I had left my boots home in Denmark so I would get some next day. I had seen that the designer store downstairs in the hotel had some nice warm ones with sheep inside on sale, reduced from $248 to $38. A steal, everything considered.
When I got to the store at 1 PM, they were in a panic. "We're closing now! We need to get home before they close the trains down!" the store manager rushed us with an intense voice. The trains would close down at 3 PM and there was issued a ban on traveling. Oh my! But I got my boots so I could get out in the snow and play with the Leica SL.
Most stores were closed already, and even the 24 hour CVS around the corner gave in and closed at 3 PM in the afternoon.
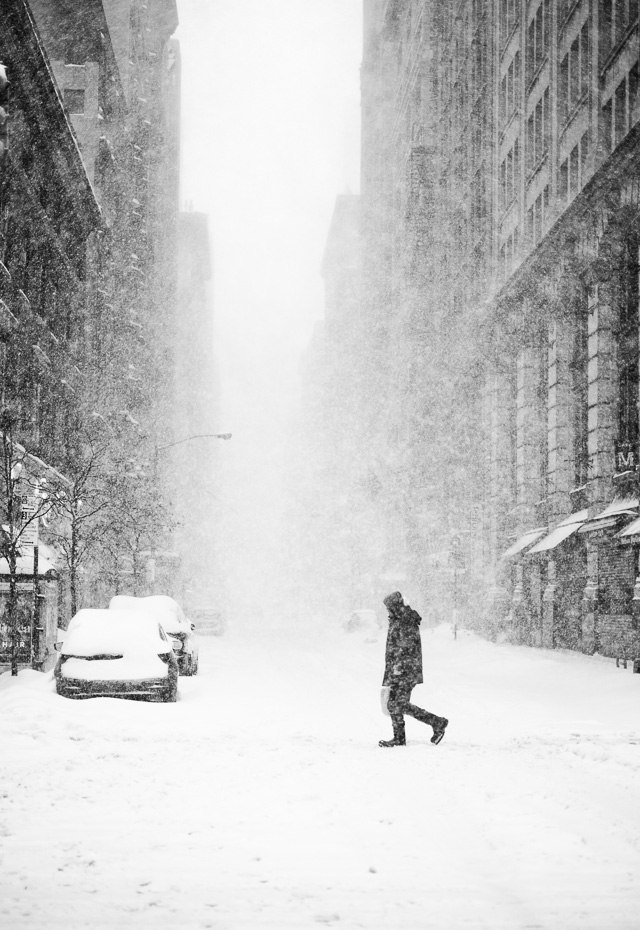
A man crosses 32th Street. Leica SL with Leica 50mm APO-Summicron-M ASPH f/2.0. © 2016 Thorsten von Overgaard.
| |
|
|
|
|
| |
Buy the new eBook
"A Little Book on Photography"
by Thorsten von Overgaard |
|
| |
|
|
|
|
| |

Order now - Instant delivery.
More info
★
★
★
★
★
★ |
|
It's a humorous understatement to call this
new eBook by Thorsten Overgaard for
"A Little Book on Photography".
It's a grand book, a history lesson, life experience, a biography and poetry book and brilliant photo book!
All in one beautiful package of 180 pages
to fire you up and get you to love
photography ... unconditionally!
"A Little Book on Photography"
eBook for computer, Kindle and iPad.
New release March 2017.
Intro price only $47 - 180 pages.
| |
|
|
| |
Buy Now

Instant Delivery |
|
| |
|
|

|
|
| |
|
|
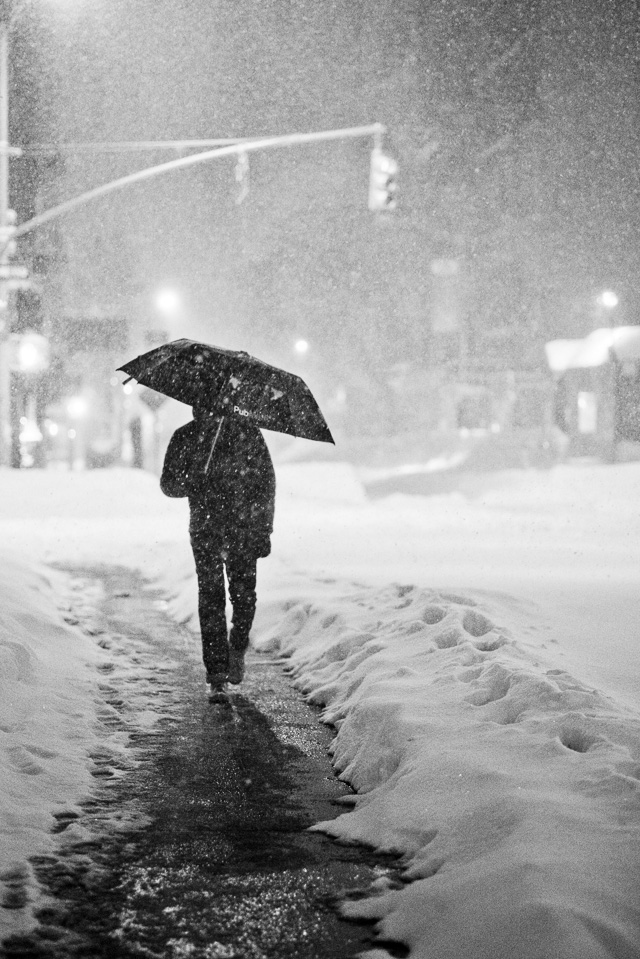
After a day where the whole city, the trains and stores closed down or never opened, you had to make your plans carefully to get to a place that was open, not to mention the exit strategy: How to get home. Leica SL with Leica 90mm APO-Summicron-M ASPH f/2.0. © 2016 Thorsten von Overgaard.
Sunday snow off party
Sunday it was all over. The snow had stopped falling Saturday evening and now it was all sunshine and snow as far as the eye could see. Many stores were still closed, but the brave ones had opened up for business on time or with a little delay to service the many New Yorkers out and about instagramming the white wonder.
Weather forecast says it's going to be sunny and plus temperatures the next few days. Soon the snow will be just a memory.
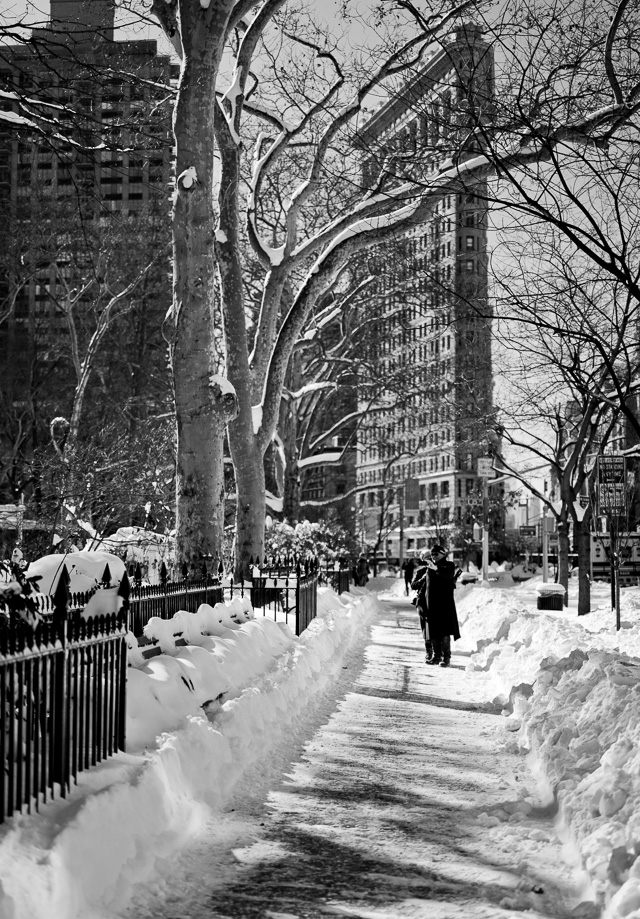
The Day After the 2016 Blizzard: New Yorkers are out and about seizing, selfieing and instagramming the result of a days snowfall from "Snowzilla". The weather forecast says sunshine and warmer weather the next days. Leica SL with Leica 50mm APO-Summicron-M ASPH f/2.0. © 2016 Thorsten von Overgaard.
I hope you enjoyed this report directly from the center of the "Snowzilla". As always, feel free to e-mail me with comments, questions, suggestions at thorsten@overgaard.dk.
Epilogue
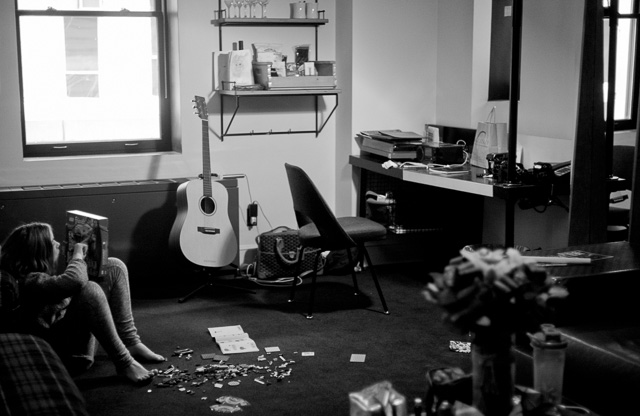
The LEGO store in New York was open Sunday afternoon, and so was the Nutella Cafe. So we got LEGO to make and cakes to eat in the nice warm ACE Hotel. Leica M 2400 with Leica 50mm Summicron-M f/2.0 II.
The technical stuff
By: Thorsten Overgaard, January 29, 2016
I added this section to the above article. I got quite a few e-mails on this which prompted me to add a little more to this story. One question was how the equipment deals with the weather, and some comments on the grey tones.
Using Leica in any weather
One of the things that interests many are how the Leica M and the Leica SL perform in wet, cold and snowy weather.
The short answer is that I expect it to work, and so it does.
I always take chances with my equipment and I rest assured that Leica can repair anything. It's all handmade, so any part can be taken off, cleaned or replaced. The chance that I would be able to ruin a complete lens or camera ... is unlikely. I would have to drop it all in the ocean to have a complete meltdown.
I never cared to protect the EVF plug on the back of the Leica M 240. You should think it is a precious little opening to the electronics that you should protect from water and dust. Two years ago I had a failure on my black Leica M 240 (which is my main camera; the silver is the backup). The camera made half shutter photos and you could hear when the electronics and shutter had a hickup. In the picture half the frame would be under-exposed, but it was only an occasional error.
I figured and figured - as you always does - what could be the error and the reason. I was almost sure it was the electronics. I could think of several times where there had been rain and the water might have slipped into the electronics.
I sent it to Leica Customer Service in Wetzlar, expecting somewhat that they would return to me in the same way as the Apple Store does some times: They can measure if there has been water damage in the equipment, and that's not covered by anything (not even Apple Care).
You feel like a stupid fool. Why did I not protect it?
But that feeling was replaced by relief and surprise when Leica got back and said it was the shutter and they were replacing it. It had nothing to do with water after all. (They actually replaced the shutter once more later again; some shutters just go awry).
You could say I am testing it. I somehow have no fear of water or anything. I am prepared to pay for repairs if needed, I think that is an important detail: If you drive a car and you are ready to experience anything and deal with it, it's freedom. If you drive a car to protect it against damage, it's a constant pain (and more likely to hit something).
Somewhere in my back head I have an insurance policy that I might drop a camera on concrete or down a pool, or a water drop might get into it. Or I might stumble and hit a lens on a metal fence. But it's part of it all and it's covered. I'm prepared to deal with it and pay for repair if it happens.
I'm not trying to avoid it, and I'm not very careful.
I reality I have had to replace the lens shade on a few lenses (which is usually a few dollars plus labour), get a new $90 base plate for a Leica M9 and I had a couple of lenses where I had to get the front lens replaced ($250 for a 35mm Summilux FLE, $550 for a 90mm APO front lens). That's about it.
The only camera that ever had a water failure was the Panasonic DMC-LC1 (the Digilux 2 sister camera) but that was actually a sensor error that was known to turn on with humidity and/or heat. So that wasn't really a water failure. But it was prowoked by use in heavy rain.
All my cameras I have used in heavy rain, from the Leica Digilux 2 to the Leica R9 with DMR digital back, to the Leica M9, Monochrom, the M246 and the M240. And they all survived.
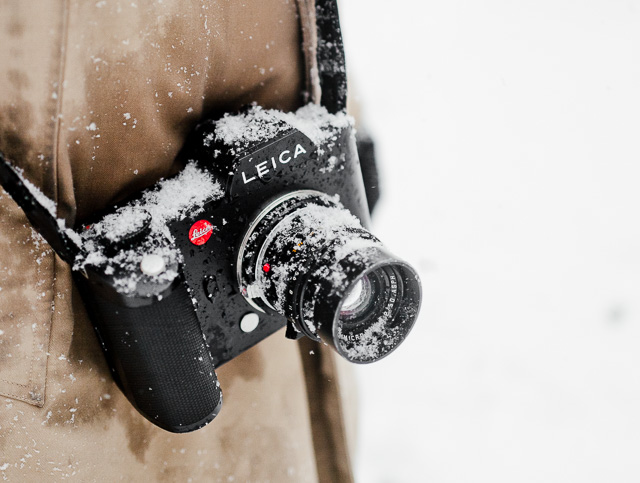
The Leica SL after an hour in the snow. © 2016 Thorsten Overgaard.
The Leica SL is a chapter in itself, being weather sealed to a degree so you can actually pour water over it or dip the lens in water. More on that camera in a later article on the Leica SL.
The reason I picked the Leica SL for some of the things I did in the snow was partly an sadistic tendency I have to cause that camera as much pain as possible, partly because I wanted to gain some photographs with the Leica SL and Leica 50mm APO-Summicron-M ASPH f/2.0 combination. It may all make more sense in a later article on the Leica SL.
Dealing with water on cameras and lenses
I will let the camera and lens get wet, and when I have a break or go inside, I will use a micro fiber cloth to wipe off the water. And then I leave the camera and lens in open air so the humidity can vaporize. I never use a hairdryer, put it on an AC or something like that. And I certainly don't put a wet camera into a closed bag where it can't vaporize.
I hope this helps any concern on using a Leica in rain or snow. They are very much like mechanical film cameras in practical use. They don't care much about water it seems.
Black and white tonality and snow pictures
I didn't consider for many seconds if the photos from the snow in New York should be color or black and white.
If I think back, one reason might be that it looks good in black and white. Also, my best pictures, in my own opinion, are those that are timeless. If a photo I make if first percieved to have been taken in 1920 or 1950 it's a success for me.
New York has a lot of possibilities of looking like the 1920's or 1950's if you look away from the current car models and modern signs and fashion. A lot of New York - and USA in my opinion - is stuck in those periods of great history and progress. Many places nothing has changed. Some places, like in LA yesterday, I notice that old neon signs or architecture has been reproduced to travel back in time to a point where things were considered more cheerful.
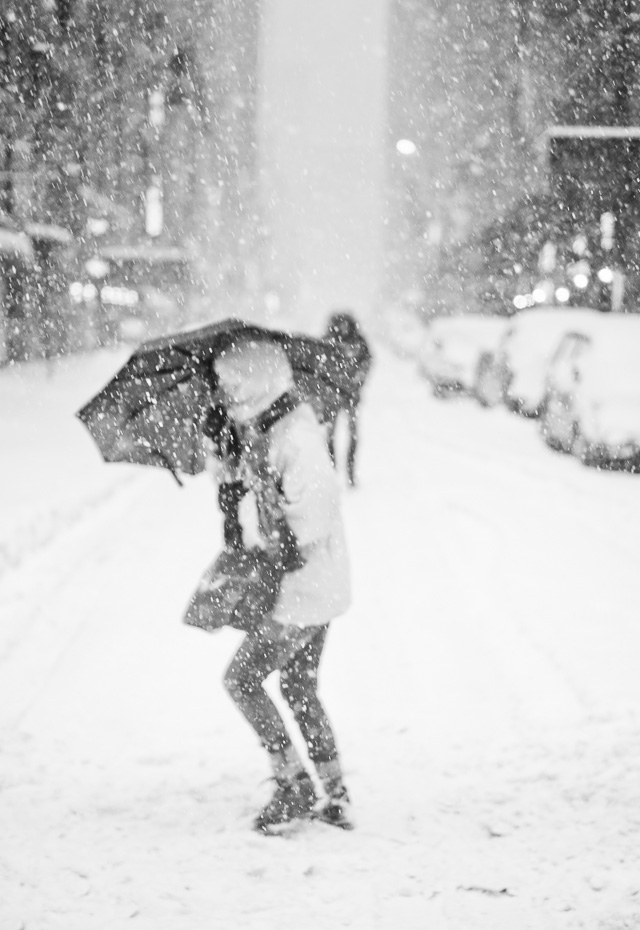
Leica SL with Leica 50mm APO-Summicron-M ASPH f/2.0. 200 ISO, 1/400 second.
White snow
Photographing snow is always a challenge because the light meter in cameras are designed to make everything look midtone. The Leica M 240 measures an oval in the center of the frame, about 1/3 of the total frame, and tries to make that area a midtone (middle grey) in average.
Obviously, when it is white snow in most of that center of light metering, the camera will set the exposure to what will be an actual under-exposure. This is how the area of metering will become midtone. Likewise, if you photograph in a dark room or outside at night, the camera will compensate the exposure so the whole image looks brighter so as to make the center midtone.
As the one controlling the camera you have to compensate for this, or override it by going to manual exposure, so as to get the snow bright white.
| |
 |
| |
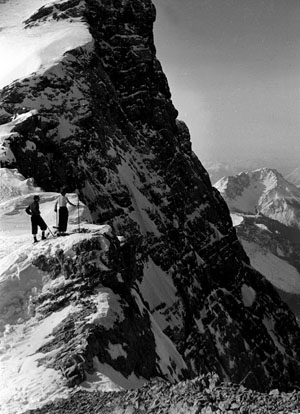
Dr. Paul Wolff snow mountains (1930) |
| |
|
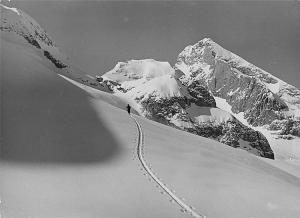
Usually when there is snow on for example a mountain, those pictures will be extreme contrast between the bright white snow that reflects the light from the sky, versus the areas without snow; which are often shadow areas of persons or buildings.
One thing you cannot do in photography is to have the extreme contrast from dark shadow to bright sunshine in one picture. The scale of film and sensors tend to only cover one end of the scale. So either you have the bright end look right and the shadows go black, or you get the shadow details and the dark tones look right, but then the bright areas of sunshine and bright light will be blown out - meaning completely white without any definition.
What to you looks as a very bright landscape with bright details in the shadow areas to the camera is high contrast.
Blown out white areas are not pretty in most photos. Only when the blown out are is in the background as a bokeh of light explosion.
Snow should be not completely white, but almost. There has to be some definition, but white snow doesn't have a lot of definition that show shape of it. It's usually a white mass.
| |
 |
| |
Dr. Paul Wolff snow mountains (1930) |
| |
|
So when you go up and down in the controls in Lightroom, the question is where to put it? You make it darker but fail to get any definition. It's not like concrete or a shirt where lower exposure will reveal some texture and shape of things. It stays one-toned and really all you can do with the controls is to make it a bright tone or a more grey tone.
Snow should have a minimum of tonality. If you imagine photographing people skiing in snow, you will leave some black silhouettes on white paper if you blow the snow. You need to keep a frame with definition in all areas.
It's a touchy balance. You make the snow darker, but suddenly it is grey snow. That was too much, so you have to slide back a little without blowing the white snow.
At the same time you want to get as much shadow detail, pleasurable grey tones and an overall natural looking pictures. It's not easy with snow.
Snow at night
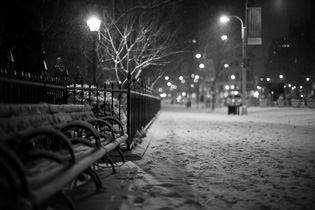
One of the first photos I took at night with streetlights reflecting in the snow. I first did an edit that looked natural in Lightroom.
But some times what looks right in Lightroom seems too dark when I put it on my website or post it on Facebook. The white background on Facebook or on most websites makes the picture look darker than it did in Lightroom where the side panels are dark.
I noticed after I posted the first photo. Then I made a virtual copy in Lightroom and changed the edit. I liked that better.
| |
|
As shot: |
Right: The night photo of the benches in show.
1000 ISO, f/0.95 and 1/125th of a second.
Leica M 240 with Leica 50mm Noctilux-M ASPH f/0.95. |
|
 |
| |
|
|
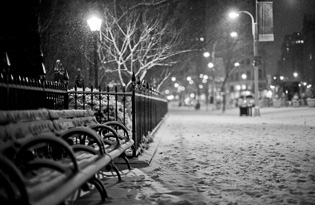
| 1st edit: |
|
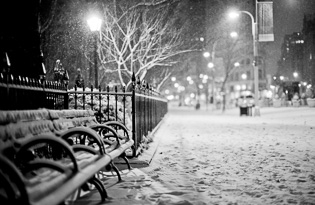
2nd edit: |
 |
|
 |
 |
|
 |
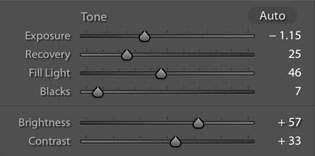
You can see here that this photo is not that far from the original. But it has more shadow details and more contrast.
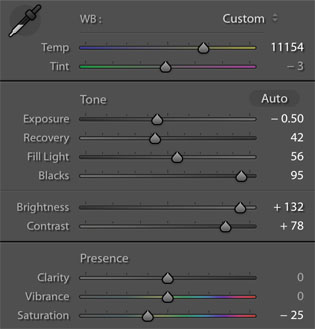
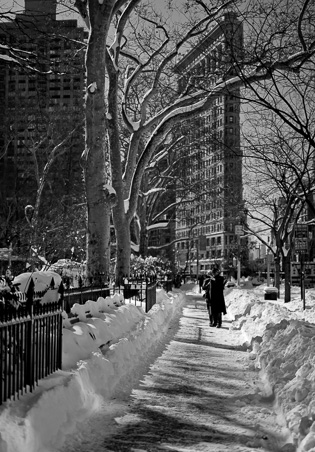
Very often I reduce Exposure to make space for increasing Fill Light (shadow details) and increase Brightness. The overall image will milk out (wash out) when you do that, but then Blacks and Contrast can be used to gain back the black areas and contrast without loosing the shadow details and the tonality of the midtones and highlights.
All Recovery (25) does is that it gives more grey tones in the midtones and highlight. It reduces overall contrast this way. |
|
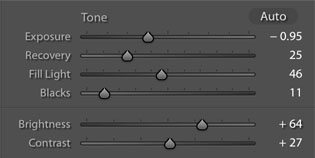
As the 1st edit looked too grey, I changed it to look overall brighter and more sparkling:
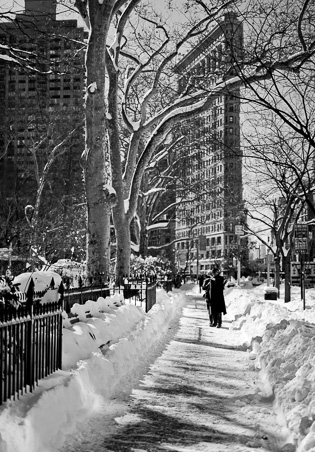
In the slightly brighter edit I increased Exposure a little and Brightness as well. I reduced the Contrast and increased Black to maintain black areas and add a little more drama. |
| |
|
|
But how bright should a night photo look of snow? That is a very good question and I think there are many right answers to this.
Also, I will note that my personal experience is that I like to set the exposure somewhat so that the main subject (the one in focus or the one you first see in the photo) is correctly exposed. That is the basis of the exposure setting in camera and in Lightroom.
Next I want the background light to explode because it makes the photo more alive.
The rest of the picture somehow has to fall as it may within those two parameters. Natural exposure of the main subject and explosion of light sources.
I will regulate contrast and blackness so as to keep a balance in it all.
Some will try to make a night photo be "correct exposed" by keeping the background lights at a reasonable level; and often subjects in the foreground and in the sides will then be silhouettes or darkness.
This may be the way it looks to the eye. But it's not the way I want it to look in the photograph. I allow myself to redefine how things look.
Overcast light and snowstorm
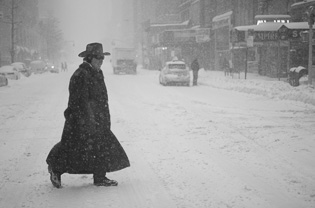
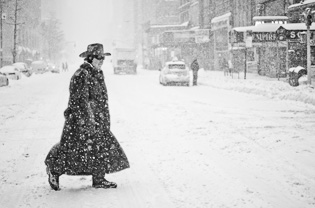
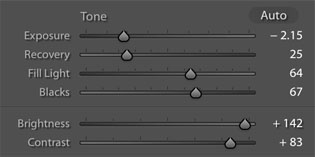
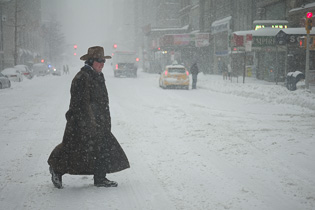
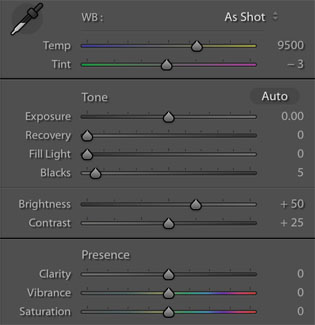
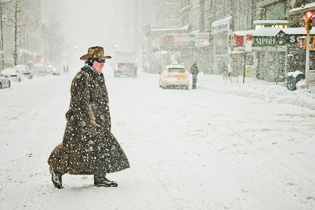
The photographs I did in overcast daylight with snowstorm I edited to define the snow flakes, keep the snow fairly white and contain more contrasty light than the actual scene had in real life.
| As shot (JPG from the camera): |
|
Edited (JPG from the camera): |
 |
|
 |
As shot.
ISO 200, f/2.0 at 1/320 second.
Leica SL 601 with Leica 50mm APO-Summicron-M ASPH f/2.0. |
|
 |
| |
|
|
| Color DNG from the camera: |
|
Color DNG edited: |
  |
|
 |
Sunshine and snow
The day after the "Snowzilla" I didn't do many pictures. I saw lots of enthusiastic people out and about from early morning filming and photographing with their phones when not stumbling and falling in the snow.
The only photo I really kept and one which I am sure I will be happy with for many years, is sunshine and snow. The worst light condition you can face.
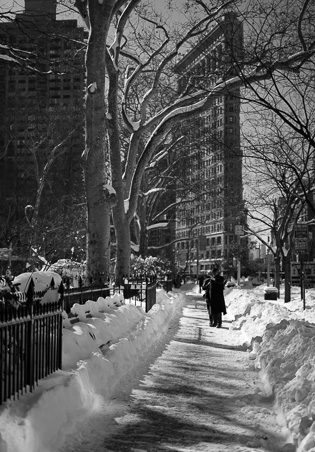
The reason I will be happy with it for many years is that it has the worlds first skyscraper in the background, with straight lines and the whole building - The Flat Iron Building - and the park fence, the trees and the natural center of attention; a couple doing a selfie in the snow with the Flat Iron Building in the background.
But mainly, who can tell what year it was taken?
Again I did a brighter edit of the photograph when I saw it outside Lightroom:
| |
|
As shot: |
Right: The photo as shot.
100 ISO, f/2.0 and 1/5000 second.
Leica SL 601 with Leica 50mm APO-Summicron-M ASPH f/2.0. |
|
 |
| |
|
|
| 1st edit: |
|
2nd edit: |
 |
|
 |
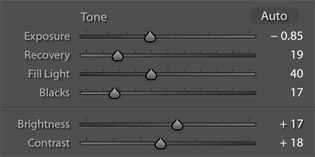 |
|
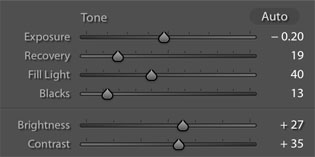 |
| |
|
|
| |
|
|
The actual circumstances of the photo was that I was walking with Joy and we were talking. We had just bought warm coffee in a deli up the street, so I had only one hand free, holding the coffee in the left hand. Joy would ask me from time to time to hold her coffee as well so she could take iPhone photos.
In other words, I was completely handicapped and preoccupied. I set the focus on the 50mm APO by guessing, then took a photo, tried to check the focus and adjust it a little, then took a few more. And that was it.
I always warn people that you cannot go shopping when you are out photographing. You need both your hands free! Drinking take-away coffee handicaps you the same was as a shopping bag. I'm not proud that I did this photo with one hand, but that was the circumstances.
But I am happy that it worked despite that.
I hope this answered some of the questions you might have asked yourself. As always, feel free to e-mail me at thorsten@overgaard.dk for suggestions, questions, ideas, etc.
![]()
