| |
|
More on colorsBy: Thorsten Overgaard
It gets worse, by which I mean it gets nerdy. But read on if you want to understand more
"Planckian radiation" is a fancy term used to determine color temperature, and this is fundamentally how Capture One and Adobe measures a new camera model in order to determine the Kelvin values that appear when you look at an image in Lightroom Classic, Capture One Pro or Photoshop. It's sort of goes like this: Leica says this image is 5400 Kelvin, and then they measure what it actually is; and that is the Kelvin value you see in Lightroom Classic, Photoshop and Capture One.
They could have done it the other way: Someone measures the actual value and tell Leica what the Kelvin is, and then they put that in the camera. Thus it would be the same value from camera menu to final picutre.
What is Color Temperature?
Imagine you have different kinds of light bulbs. Some light bulbs give off a warm, yellowish light, like the light from a candle. Others give off a cool, bluish light, like the light on a cloudy day. The "color temperature" of a light tells us what color the light is, and we measure it in a unit called "Kelvin" (K), named after Thomas Kelvin (1824-1907) who invented the Kelvin scale.

| |
|
|
|
|
|
|
|
|
|
|
| 2000 Kelvin |
|
3200 Kelvin |
|
5400 Kelvin |
|
7300 Kelvin |
|
10000 Kelvin |
|
13100 kelvin |
 |
|
 |
|
 |
|
 |
|
 |
|
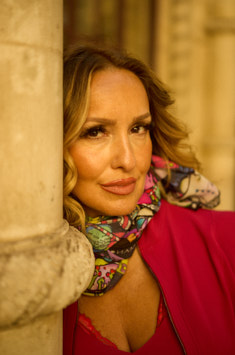 |
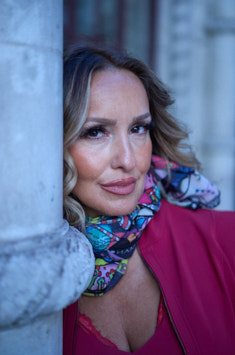
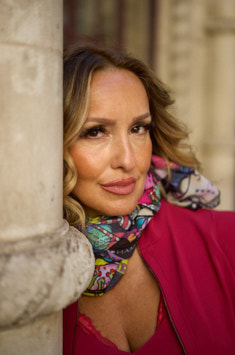
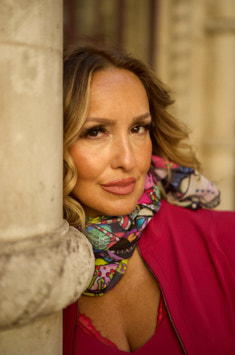
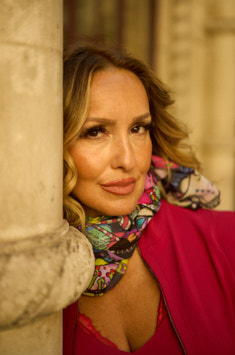
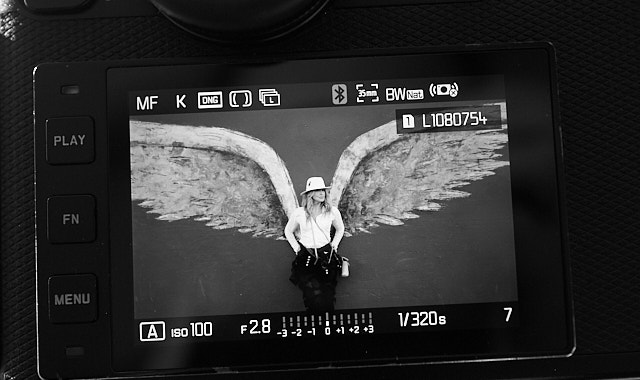
| Layla in Lisbon, Portugal. Leica M10-R with Leica 50mm APO-Summicron-M ASPH f/2.0 LHSA. |
What is a Black Body?
Think of a black body like a magical piece of metal. When you heat it up, it changes color. When it's not hot, it looks black. But as it gets hotter, it starts to glow:
- First, it glows red.
- Then, as it gets hotter, it turns orange.
- Then yellow.
- And if it gets really, really hot, it turns blue!
Planckian Radiation
A scientist named Max Planck (1858-1947) figured out a way to describe how this magical piece of metal (the black body) glows at different temperatures. This glowing light is called "Planckian radiation."
Determining color temperature
When we look at a light bulb, we can think of it like our magical piece of metal. The color of the light it gives off tells us how "hot" it would need to be to glow that color. For example:
- A candle or an old-fashioned light bulb gives off a warm, yellowish light. This is like the black body when it's not super hot, maybe around 2700 K.
- The light from the sun at noon is a bit whiter, which is like our black body being hotter, around 5500 K.
- A cloudy sky or some types of LED lights give off a cool, bluish light. This is like the black body being even hotter, around 6500 K or more.
Why is it useful?
Knowing the color temperature helps us choose the right kind of light for different activities. For example:
- Warm light (like from a candle) is nice and cozy, great for relaxing.
- Cool light (like daylight) is bright and makes it easier to see details, good for working or reading.
So, color temperature (measured in Kelvin) tells us about the color of the light, just like how hot a black body would need to be to glow that color. Planck's ideas help us understand and measure this!
How Does This Help in Photography?
In photography, we want our pictures to look natural. But different kinds of light can make colors look strange. For example, indoor lights might make everything look too yellow, and sunlight on a cloudy day might make things look too blue.
To fix this, cameras use the idea of color temperature to adjust how the colors look in the picture to make them appear natural as the eye see them in daylight.
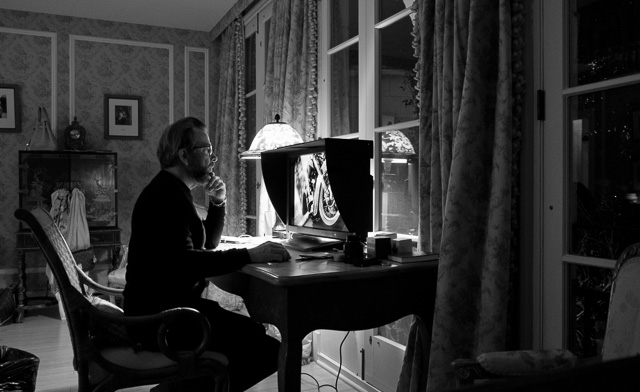
Leica DMR digital back (2006). © Thorsten Overgaard.
Turn it around to understand it right
What sometimes is mind-bending is that if the light is 3200 Kelvin, we set the Kelvin scale to 3200. What that actually does is "take out the yellow/orange" (bu adding blue) to make it 5400 Kelvin, which is white light. In that sense, in photography, we want to know the Kelvin value so we can "nullify" it and make white light.
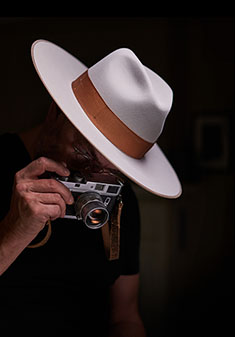
The eye sees everything as 5400 Kelvin white light
The reason for all this is to make things appear to the eye as in real life. Our eye and mind automatically make any light "daylight white." When you look at the menu in a restaurant, it's white paper, even if the light in the restaurant is warm Tungsten (2400 Kelvin), which to a camera makes it yellow-orange. The eye adjusts all light to 5400 Kelvin daylight white automatically. And so, that is what Kelvin in editing and cameras is all about—how to balance the color of the light back to the 5400 Kelvin daylight white that the eye sees.
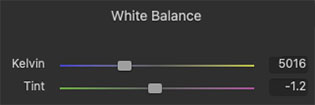
Then there is also tint
"Tint" refers to a slight change in color, often used to adjust the overall tone of an image. Tint adjusts the balance between green and magenta in an image. When the light in a photo has a greenish or magenta tint, you can use the tint adjustment to correct it. Together, Kelvin and tint help make the colors in a photo look just right, just like we see them with our eyes. Her is what a change of tint does to an image.
| Tint 0/0 |
|
Tint - 20 |
|
Tint + 20 |
 |
|
 |
|
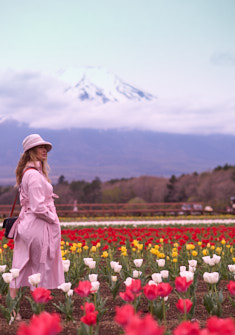 |
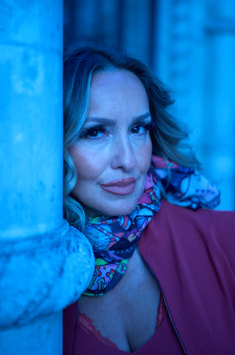
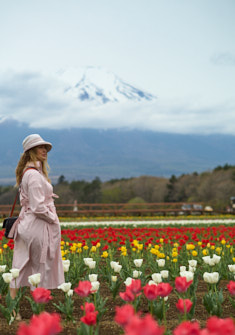
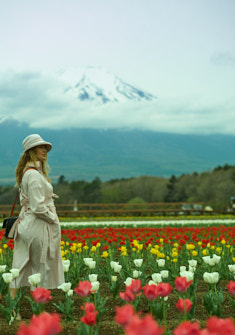
| Layla in Hana no Miyako Flower Park in Japan, with Mount Fuji in the background. Leica M11-P with 75mm Summilux-M f/1.4. |
What is a 1000 Kelvin amongst friends?
How does 1000 Kelvin in difference look? In this example you can see what happens to colors when the Kelvin is off.
| Kelvin is 0 |
|
Kelvin is +1000 |
|
Kelvin is -1000 |
 |
|
 |
|
 |
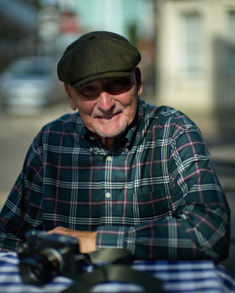
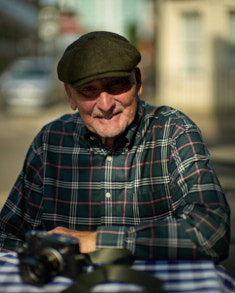
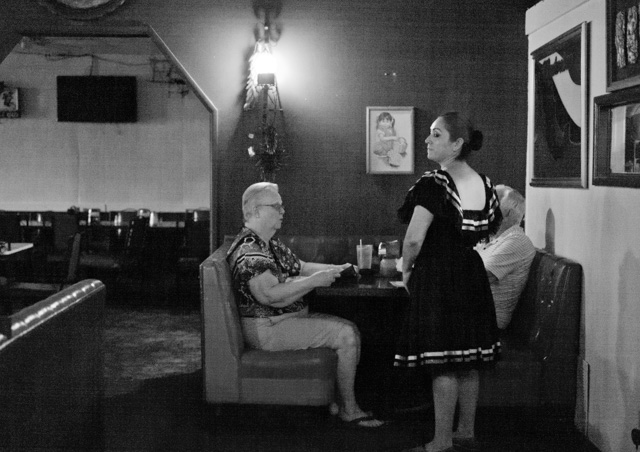
When light conditions are mixed, as in this one with shadows, reflections of sun, sunshine in the background, etc, the correct color balance becomes really essential. Mr. Richard de la Sota in the Overgaard Workskop in London. Leica M11-P with 50mm Noctilux f0.95.
|
| Kelvin is 0 |
|
Kelvin is +1000 |
|
Kelvin is -1000 |
|
|
 |
|
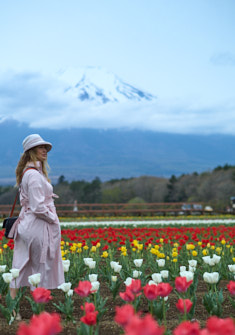 |
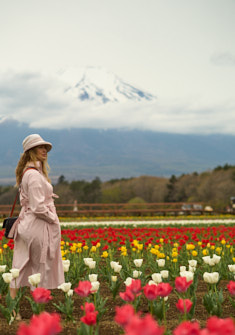
| Layla in Hana no Miyako Flower Park in Japan, with Mount Fuji in the background. Leica M11-P with 75mm Summilux-M f/1.4. |
More on colors, editing, post production and workflow
I have worked with digital workflow for the last twenty years, and the result (apart from many articles and videos available online) is my Lightroom Survival Kit and my Capture One Survival Kit.
The monster class of them all is my Workflow Masterclass, which goes into every detail to be understood in editing, selecting, archiving, backing up, calibrating equipment and screens, printing, sharing... and more.
What is daylight temperature?
I consider 5400 Kelvin to be daylight temperature, but not even that we can agree about. If you google daylight Kelvin, you will get all sorts of answers like 5200 Kelvin, 5500 Kelvin and even some places 4000 Kelvin and 6500 Kelvin to stretch it.
Fundamentally, you can just mesure the daylight (which is straight sunshine at noon) with a Color Spectrometer (r a Kelvin app on your phone if you want to be chap about it), and then the answer is XXXX in most places in the (but whych I mean to say that daylight temperature is the temperature of the sunlight, so it doesn't really change no matter if it is the desert, New York city or the Antarktis).
Kodachrome film could be said to be the mother of color film, and it is a "daylight" film. Fundamentally all film are daylight film. Kodachrome doesn't state what their Daylight is, but does say that their slides are to be viewed at 5000 Kelvin daylight.
However, the varied answer to "What is daylight Kelvin?" illustrates the confusion and why "color science" really isn't a science. Of, if it is, it's not explained in a way so nomral people understand it.
Before we get into a heated argument about daylight temperature, that really isn't the point. Uniform color control is: That what you reproduce on a screen, in a print or on a slide, looks like the real thing you photographed.
If you are a monochrome photographer
If you made it this far in this article and still wonder how this relates to your black and white photography, first of all well done for reading this far. Secondly, the answer is that colors shouldn't matter - but they can do.
If you use a Leica M Monochrom, colors doesn't really matter. Well, they do, but there's nothing you can do about it. The Leica M Monohcorm records the same no matter if daylight, Tungsten or any other color of light.
It does mean that in tungsten light, faces and everything becomes more yellow/orange and even reddish, but so does everything in the scene. So you may sense a difference in faces and object when photographing in different light conditions.
The great thing is that it is so far out of your control that there is not a damn thing you can do about it. Some would call it blessed ignorance, but mostly it is just known as black and white photography.
The error you can do is to buy a color camera to take photos, with the intention to turn them into black and white. Beucase this now suddenly gives you the possibility to adjust the underlying colors of monochrom. You can do this experiment: Open up a photo in Lightroom or Capture one, and then slide the Desaturation all the way to the left so it is now a black and white photograph. Next, you move the Kelvin slider to the left and to the right. And by golly, not you see that the tones change! And not only do the change, they change individually. A dark red that had a pleasant dark 70%-ish monochrom tone washes out to an ugly unimportant 40% tone.
Granted, it can be used to lift faces that look dark (heavy and old) to look brighter relatively to the rest of the content in the photo, but you slide too far and the face starts looking like the skin is backlit.
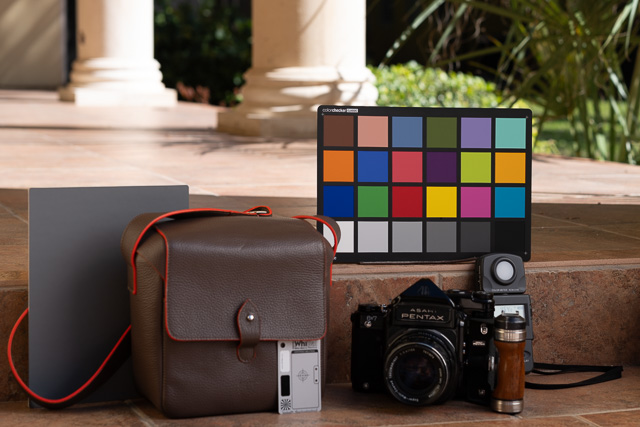
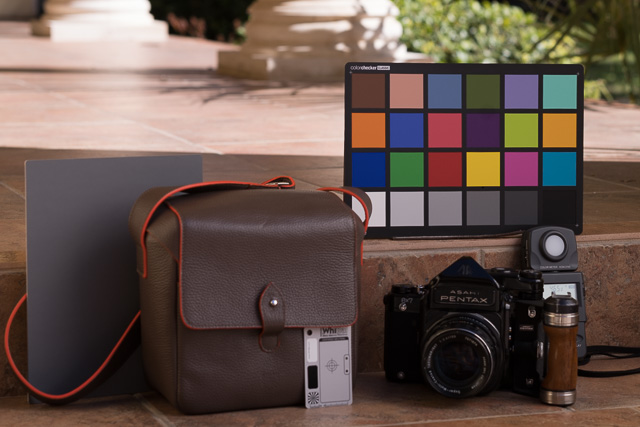
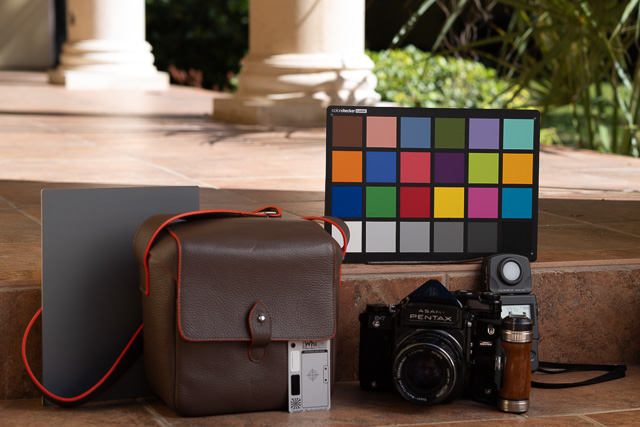
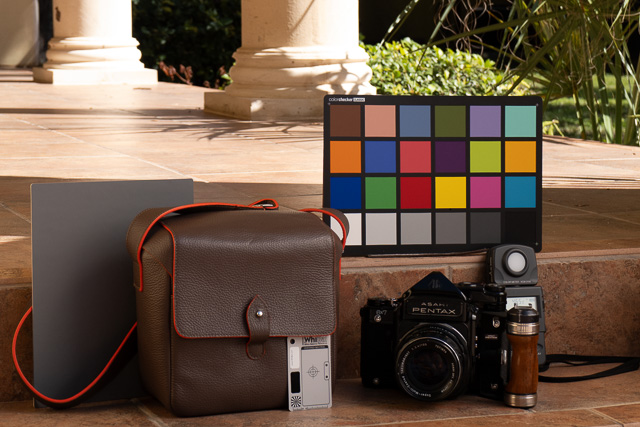
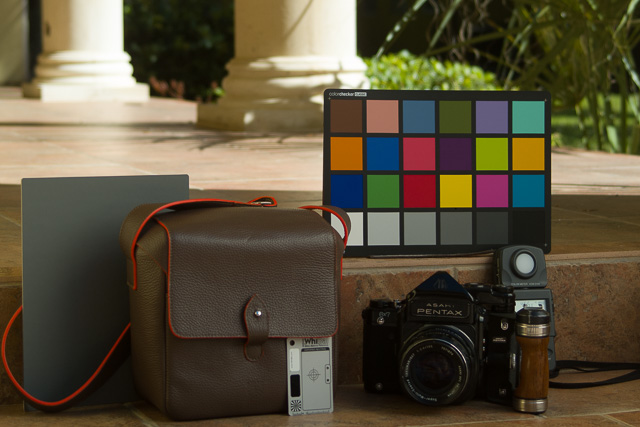
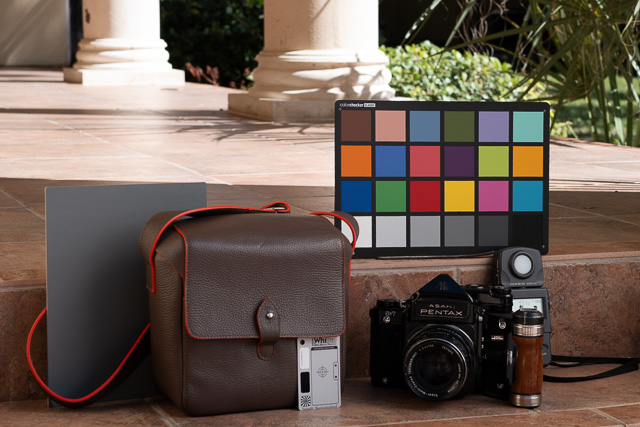
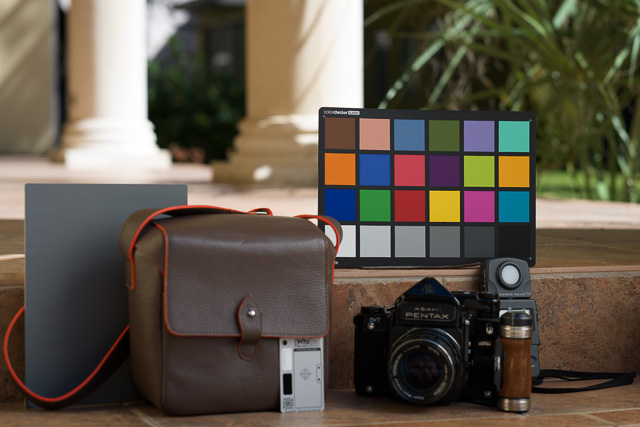
A practical test
Here is a test photo with a MacBeth color chart from X-Rite, all cameras were set to 4600 Kelvin. They show not-corresponding Kelvin in editing (the show the numbers in the chart above). Apart from their different color profiling and resulting neuances of how they reproduce the test chart's colors, they sort of "show 4600 Kelvin" overall.
The lesson learned is that if you set a Leica M11 to 4600, it will behave as 4600, but the Kelvin number in editing won't match. In other words, you can use external color meter to measure the Kelvin, set the camera, and it will match (forget the Kelvin numbers it shows in editing). What you cannot do, is take a photo on auto and then adjust it to the Kelvin number you measured on location.
Leica SL3
Leica M11-P
Leica M10-P
Leica D-Lux 8
Leica DMR
Leica Q3
Hasselblad 907X 100MP
More to come ...
As always, feel free to email me at thorsten@overgaard.dk for questions, suggestions and ideas.
| |
NEW VERSION 22.3 |
|
| |
 |
|
| |
|
|
|
|
| |
490 pages easy-to-understand
workflow logics, checklists, Styles
and 3+ hours of videos.
Packed with help and tools for all questions on digital photography workflow.
Read more ...
Buy now
Start today
Thorsten Overgaard
Black and White Photography
Editing Color Photographs
Special Effects
Organizing files
Organizing Old Archives
Keywords
How to do safe backup
Hardware setup
Screens and Calibration
Printing Workflow
Capture One on iPad
Capture One Live
Publishing
+ Export Formats
+ Free Overgaard Styles
+ Preflight Checklists
The one and only method
The Survivel Kit is the only of it's kind, made by photographers for photographers.
|
|
The Brand New June 2022
"Capture One Survival Kit 22"
By Thorsten Overgaard
The complete workflow of Thorsten Overgaard,
made easy with pre-flight checklists and step-by-step instructions on how to set up and use a professional
photo editing software like Capture One Pro.
Laid out in a way that is easy to understand
and everyone can apply. Works for Capture One Pro 22
and all previous versions.
New revised version
This is the most revised version ever of the
best-selling Surival Kit by Thorsten Overgaard. This new
version includes many new chapters, on Capture One on iPad and how to add keywords better, as well as more
than 3+ hours of videos tutorials with
Thorsten Overgaard.
Simple and to-the-point tools on how to use select tools, how to do backup and how to manage and organize pictures archives so they don't get lost and doesn't have to be reorganized again and again.
Expanded and simplified
Also: Specialized first-help chapters on how to
sync your entire photo archive with the smartphone,
how to escape Apple Photos, how to empty photos out
of an iPhone, how to get out of Lightroom CC, what to do with iPad editing ... and more on how to not survive the digital age and perhaps even outsmart it.
Now comes with
Overgaard Leica Styles for FREE
Special black & white conversion, better skintones
and a CMOS sensor color correction.
(Value $48.00. FREE with this kit).
Thorsten Overgaard
Capture One Survival Kit 22.3
For computer, iPad, smartphone and Kindle.
Buy Now
Instant download.
Price $798.00
100% satisfaction or money back.
Released June, 2022.
UPDATE
VERSION 22.3 UPDATE
Compatible with all previous versions.
Simply use
code: "UPDATE22"
Only $298,00

|
|
|
| |
|
|
|
|
| |
#2131-1222-3 |
|
|
|
 |
NEW VERSION 11.3 |
|
| |
 |
|
| |
|
| |
|
|
|
|
| |
|
| |
|
|
| |
Buy Now. Instant delivery.
New Version 11.3
ONLY $698.00
Now includes
4+ hours of
video tutorials.
100% satisfaction
or 100% refund.
More info.
|
|
| |
#2130-1121-3 |
|
| |
|
|
| |
Update to Version 11.3
Apply
code "UPDATE113" on checkout to get this complete version 11.3 update.
$298.00
Updates all previous Surival Kit versions since 2009. |
|
| |
|
|
Buy the complete new
Lightroom Survival Kit 11.3
The Legendary Tutorial for Photographers
Brand-new JUNE 2022-version.
Now with brand-new 4+ hours of video tutorials.
New sections on compostition and storytelling.
How to edit color photos.
How to edit black & white photos.
How to do keywords logical and easy.
The most successful photo editing kit ever
Photographer Thorsten Overgaard first released the Lightroom Survival Kit in 2009 and have honed it with new and fresh updates. This Version 11 is the most radical updated and renewed version ever, four years in the making.
Professional workflow experience made simple, logical and easy to use.
Master editor makes it simple to understand
The Survival Kit is unique and one-of-a-kind being made for photographers for photographers. When someone understands their subject, they can explain it so it is easy to understand. The hallmark of Thorsten Overgaard is to make expert knowledge shown and told in a way so anyone can apply it.
Hands-on advice that works
With a 450 pages workbook and 4+ hours of video, every element of digital photography is touched on, in handy chapters and pre-flight checklists. Editing of color vs black and white photos, keywording, cropping of images, fine-tuning of tones, color balance and color control, export of originals, printing, archiving and backup, and much more.
Comes with the Overgaard Leica Presets (Value $48)
The Lightroom Survival Kit comes with Thorsten Overgaard's special-made Lightroom Presets for all digital cameras and for Leica digital cameras.
Understand all from camera to the final print
Chapters in this version goes over the background for High Dynamic Range (HDR), digital raw files and how to set up a professional photography workflow, from calibrating the screen to editing in Lightroom, and to making a final print. And more ...
10+ years experience in one package
No need to spend years figuring out the smartest way to do things when you can tap into the best way of doing things right here. The workflow of Thorsten Overgaard as been refined through years of field work with more than a thousand workshop attendees.
This method of workflow now used by thousands
The Survival Kit has been taught to thousands in workshops and in this Survival Kit. What does it do? It make you enjoy taking and making photos, and it increases your production considerabely. Most important of all, it'll give you back ownership of your files (which you will understand why is so important, once you have bought the Survival Kit and started applying its methods).
| |
|
|
| |
"Thorsten's methodology is perhaps not what hardware-, software- and cloud-companies want us to do, but as a former IT engineer I can only acknowledge his views about preserving our digital heritage. This workflow explained is for me the best I have ever seen".
★★★★★ |
|
| |
|
|
Video tutorials, image files, presets, checklists, definitions, tutorials of Lightroom, that boils down years of experience to a workflow you can implement in less than one day.
Start working in minutes. |
|
|
| |
|
| |
|
| |
|
| |
|
| |
|
| |
|
|
|
|
|
|
|
APO = in lens terminology stands for "apochromatically corrected". In most lenses, optical design concentrates the focus of blue light and green light into a single plane, but red light falls slightly into another plane of focus. In APO lenses, the design and expense has been put in to making red light focus on the same plane as blue and green. Under a microscope you would see that all light subject is now in focus, creating a sharper image overall. Many manufacturers offer APO designs, but in most of these only the very center of the lens is APO corrected. Leica prides itself on making most of the frame APO corrected.
APo-correction has traditionally been used for long tele lenses (and periscopes), but in recent years APO-correction has been applied to 50mm and wide angle lenses as well. One will notice that the colors are really bright and alive, almost more real than to the eye, in lenses like the Leica 90mm APO-Summicron-M ASPH f/2.0 and 50mm APO-Summicron-M ASPH f/2.0.
Apochromat; ORIGIN early 20th century, made of the two words; apo (Greek origin, away from) and chromatic (Latin origin, meaing relating to color).
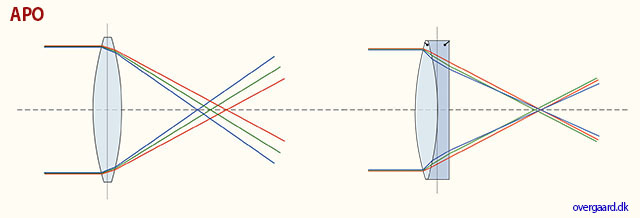
APO corrected basically means that the red, green and blue has been corrected to meet more precisely in the same spot. Clarity of colors and definition of details would be the result.
Auto- means “self”. The idea is that when a camera has auto-(something), it does that (something) by itself.
Banding = Noise in digital images. Horizontal lines in a horizontal picture (if the camera is in portrait mode/vertical, the lines will obviously be vertical). It's simply noise; the result of uncontrolled algorithms working overtime with an image the sensor really can't see because it's very dark. (If your image has vertical lines in it, it is more likely that the sensor needs remapping).
This image at 6400 ISO, underexposed and then brought up to correct exposure in Lightroom, displays banding: Horizontal lines in the image. Leica M-D 262 with Leica 50mm APO-Summicron-M ASPH f/2.0.
Base ISO = The ISO the digital sensor was born with. Even a digital sensor goes from say 50 ISO to 25,000 ISO, it only has one base ISO. Any other setting is an algorithm that figures out how the image whould look if there was 64 times more light, or half the light, etc.
When you go down from Base ISO (for example 200 to 100 ISO), you can expect a
decrease in quality. When you go up, the decrease is much less. For some sensors, you loose 2-3 stops by going down 1 step in ISO, but can go 8 steps up and only loose 1 stop in dynamic range. Basically, your ISO range should be from Base ISO and as far up as you can, before you see visible decrease in quality (mostly 3200 ISO - 6400 ISO).
Base ISO for Leica M9 is 160 ISO, for Leica M240 it is 200 ISO. For Leica M10 it is around 160 ISO. For Leica M Monochrom it is 320 ISO. For Leica Q and Leica Q2 it is around 100 ISO. For Panasonic Lumix S it is 200 ISO. For most Canon cameras the base ISO is around 100, for most Nikon cameras it is around 200 ISO.
BSI = Backlit sensor = Back-Illuminated Sensor (also known as BI = Backside Illumination) sensor that uses a novel arrangement of the imaging elements to increase the amount of light captured and thereby improve low-light performance. These sensor types were first used for low-light security cameras and astronomy sensors, and then was brought into wider use, in the A7 II (2015), Nikon 850D (2017), Leica SL2-S (2021) and Leica M11 (2022), to increase the cameras performance in low light (high ISO).
Burning = Expose one area of a photos more (in the development in the darkroom by exposing more light from the negative onto the light-senisitive paper by shading for all other areas than one with two hands forming a hole, or a piece of metal or paper with a hole in it). In modern digital post processing (using editing software liek Lightroom or Capture One Pro), a digital tool "burn" a selected area and makes it darker digitally. (Also see "Dodging").
Camera - is today’s short name for Camera Obscura (meaning “a dark room”). Camera means Chambre and was used only as a Latin or alien word, actually only for Spanish soldiers’ rooms, until popularized in connection with photography in 1727: “Camera Obscura”. In 1793 the slang term “camera” was used by Sterne Tr. Shandy: “Will make drawings of you in the camera” and by Foster (1878), “The eye is a camera”. Camera Obscura was described by Iraqi scientist Ibn-al-Haytham in his book, “Book of Optics” (1021) and by Leonardo da Vinci in 1500; popularized and made widely known in 1589 by Baptista Porta when he mentioned the principle in his book “Natural Magic”. Johannes Kepler mentions Camera Obscura in 1604.
Camera = chambre (room), Obscura = dark (or cover).
Camera comes from Chambre, mostly in relation to Spanish soldiers’ rooms. Obscura means 'dark', so a dark room is basically the derivation for the word camera.
| |
|
|
| |
Why is it called a "camera"..?
The word Camera is today's short name for Camera Obscura (which originally means “a dark room”).
Origin of the word Obscura means "dark" or "covered", and the word Camera means Chambre and was used originally only as a Latin or alien word, actually only for Spanish soldiers' rooms, until popularized in connection with photography in 1727: “Camera Obscura”.
In 1793 the slang term “camera” was used by Sterne Tr. Shandy: “Will make drawings of you in the camera” and by Foster (1878), “The eye is a camera”.
Ibn-al-Haytham mentioned Camera Obscura in his "Book of Optics" in 1021.
The concept of Camera Obscura was described by Iraqi scientist Ibn-al-Haytham in his book, “Book of Optics” (1021) and by Leonardo da Vinci in 1500; popularized and made widely known in 1589 by Baptista Porta when he mentioned the principle in his book “Natural Magic”. Johannes Kepler mentions Camera Obscura in 1604.
Camera = chambre (room), Obscura = dark (or cover). |
|
| |
|
|
CCD sensor (as used in Leica M8, M9, Leica S) = (Charged Coupling Devices) - The first digital cameras used CCD to turn images from analog light signals into digital pixels. They're made through a special manufacturing process that allows the conversion to take place in the chip without distortion. This creates high quality sensors that produce excellent images. But, because they require special manufacturing, they are more expensive than their newer CMOS counter parts.
| |
 |
| |
Color meters may use CCT scale, which is the same as Kelvin. In this case, 5229 CCT is the same as 5229 Kelvin. © Thorsten Overgaard. |
| |
|
CCT = Correlated Color Temperature,. CCT is basically another word for Kelvin color temperature. (CCT is defined in degrees Kelvin). Scientists and light researchers may talk about CCT, but photographers talk about Kelvin. However, on many light metering instruments one may find the Kelvin value given in "CCT".
CMOS sensor (as used in Leica CL, Leica T/TL/TL2, Leica M10, Leica M 240, Leica M Monochrom Typ 246, Leica S Typ 007, Leica SL, Leica Q, Leica Q2, Leica M10, Leica X, Leica D-Lux, etc.) = (Complimentary Metal Oxide Semiconductor) chips use transistors at each pixel to move the charge through traditional wires. This offers flexibility because each pixel is treated individually. Traditional manufacturing processes are used to make CMOS. It's the same as creating microchips. Because they're easier to produce, CMOS sensors are cheaper than CCD sensors. CMOS allow Live View and use less energy than CCD.
Contrast - The degree of difference between tones in a picture. Latin contra- ‘against’ + stare ‘stand.’
 |
|
 |
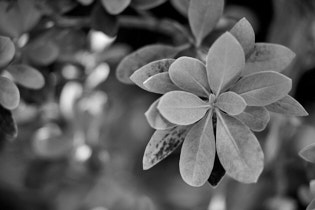
| Normal to low contrast |
|
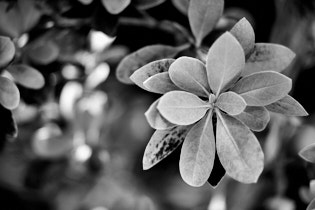
High contrast |
| |
|
|
CQS = Color Quality Scale. An expansion of CRI (see below), but overtaken by SSI (see further below). A measurement of color rendering based somewhat on CRI, but taking into account which colors people liked the best (!).
CRI = Color Rendering Index. A system used in the movie industry and some photography to measure, evaluate and optimize the light sources for color accuracy.
A value between 1-100 that is an index of how well colors will be correct under a given light source. Often given in Ra, (Rendering Average) from 0 to 100 when a lightsource (like the sun, an LED lamp, a Tungsten lamp) is measured with a spectrometer (color meter). It's a measurement of how colors are rendered under a type of light soruce, based on a selection of 8 key colors (R1-R8). There also exist Extended CRI, which is based on a larger selection of 15 of key colors (R1-R15).
CRI or Ra is calculated as the average value of R1 through R8. This Color Rendering Quality is overall often referred to as Ra, (Rendering Average). For example Ra 90 is considered as quality light for color rendering, whereas Ra 60 would result in problems with incorrect or missing colors. The daylight sun is usually Ra 94-96.
When the Extended CRI is used, the result may be summed up as Re (Rendering Extended).
CRI is based on the spectral sensitivity of the human eye (CIE 1931 "standard observer). Since 2017 the CRI has been replaced by SSI (Spectral Similarity Index) that is a standard that takes into the account the human spectrum, a digital still camera's sesors spectrum, the telvision camera's sensor spectrum, and the movie camera's sensor spectrum: And also takes into account the differences between models and brands. One could say that this is the expanded CRI, predicting how different types of ditgital recording mediums will render colors using different light sources.
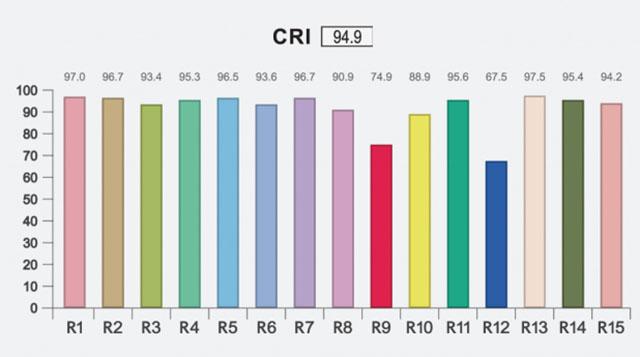
CRI measurement. While the overall CRI is 94.9, the red (R9) and blue (R12) are weak. These two, along with R15, are the most essential for correct colors of skin tones and more.
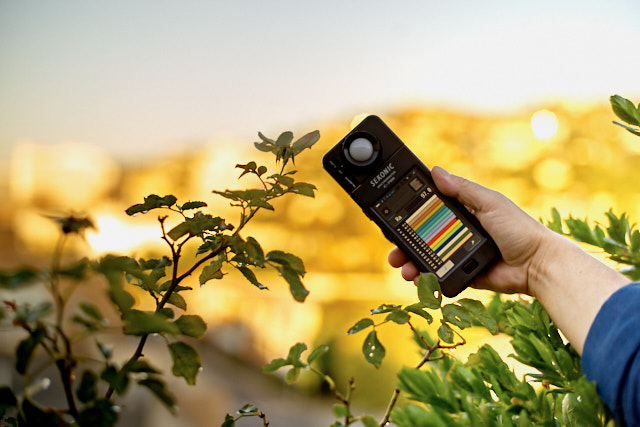
Sekonic Color spectrometer used to measure the light quality, the CRI index. © Thorsten Overgaard.
DMR - Leica Digital Module R was presented in 2005 as a 10MP CDD sensor attachment to the Leica R8 and Leica R9 film cameras, made with Kodak and Imacon. About 3,000 units was produced from 2005-2006 and production likely stopped when Imacon (a Copenhagen company who made high-end film scanners) was bought by Hasselblad. New price in 2005 was $5,995 / €4,750. The image quality of the DMR is very close to Kodachrome film. Read more in my article Leica DMR digital back.
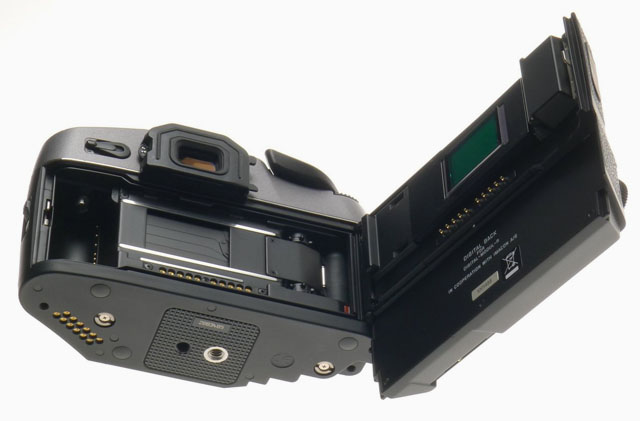
Leica DMR is an attachment to the Leica R8 and Leica R9 film cameras. You simply remove the film back and install the digital back instead.
DNG = Digital Negative, an open standard developed by Adobe. It is a single file that contains the raw image data from the sensor of the camera as well as date, time, GPS, focal length, settings, etc.
The alternative is a RAW file + XMP file where the RAW file contains the image information and the XMP contains the rest of information about where, how and when the picture was taken, as well as editing data when the photo is edited in Lightroom or Capture One.
A Camera Raw profile (that is specific for that camera) in the computer helps the software program, for example Adobe Lightroom, to translate the RAW data into the image. Camera producers provide a Camera profile with their camera, and Adobe makes their own 'refined' Adobe Raw camera profile for all new cameras.

A raw file (or DNG) is simply the full recording of digital data (1's and 0's) from the sensor. In the computer, the sensor data is translated into the exact colors, via a camera profile.
Dodging = Expose one area of a photos less (in the development in the darkroom by exposing less light from the negative onto the light-senisitive paper by shading for an area with a hand or piece of metal of paper). In modern digital post processing (using editing software liek Lightroom or Capture One Pro), a digital tool "dodge" a selected area and makes it lighter digitally. Also see "Burning")
Dodging in the darkroom using a piece of metal or paper to shade so a portion of the light-sensitive paper gets less light. Photo: richardpickup.
Dynamic range. The grade of ‘contrast range’ (or number of tones) a film or sensor, or simply a photograph, possess between bright and dark tones. The human eye is said to have a dynamic range of 10-14 ‘stops’ (but because we scan area by area and compile a concept of the overall scene, they eye is often thought to have a much higher dynamic range), Film used to have 7-13 ‘stops’ and some modern sensors have up to 15-17 ‘stops’.
EXIF =Exchangeable Image File, a file generated in camera and enclosed in the image file that contains recording information on the image such as shutter speed, exposure compensation, what metering system was used, aperture setting, ISO setting, date and time the image was taken, whitebalance, which lens was used, camera model and serial number. Some images may even store GPS information so you can see where the image were taken. The data from the EXIF file continues to follow any later editions of the image and can be read in photo editing software such as Capture One and Lightroom, as well as Photoshop (go to the menu File > File Info). There is also software available that can read EXIF data from any file, like Exifdata.com.
The EXIF data is all the information about shutter speed, metering method, ISO, etc. - and then some more that you don't see on the screen (such as camera model, serial number, lens used, etc).
Exposure Bracketing = The possibility to set the camera to automatically record a series of images where the exposure is above and below what the camera measures. The idea is that at least one of the images will be correctly exposed.
f/ (f-stop, also known as aperture).
f- (focal length). Often given in mm, for example 90mm. In the past they were often given in cm or inch, for example 9.5 cm or 3.2 inch.
f-stop = the ratio of the focal length (for example 50mm) of a camera lens to the diameter of the aperture being used for a particular shot. (E.g., f/8, indicating that the focal length is eight times the diameter of the aperture hole: 50mm/8 = 6,25 mm); or the other way around, the hole is the focal length divided with 8).
ORIGIN early 20th cent.: from f (denoting the focal length) and number.
One f-stop is a doubling or halving of the light going through the lens to the film, by adjusting the aperture riing. Adjusting the f-setting from f 1.4 to f.2.0 is halving the light that goes through the lens. Most Leica lenses has half f-stops to enable the photographer to adjust the light more precicely.
Gel = A transparent colored material used to modify lights for photography, cinematography video and theatre. They can be used to make tungsten light (3200 Kelvin) into daylight white (5400 Kelvin) by using a CTB gel (color temperature blue), or the other way around with a CTO (color temperature orange, which converts daylight to tungsten). Or they can be for color effects or light effects. A number of non-color gels exist to create special light effects. Gels exist to create diffusion effects on the light. Other effects include opal, skylight, star-effect and various softening filters and light effect filters.
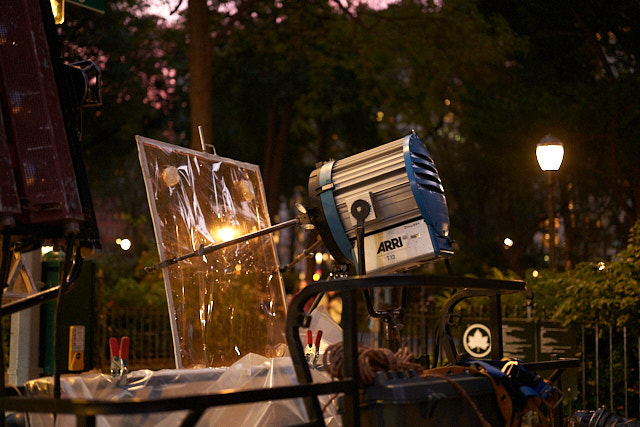
An ARRI daylight lamp on a movie set with a gel in front. © Thorsten Overgaard.
Hot light = Light used in television and movie production. It can be small or large hot lights. Most people would call them spotlights.
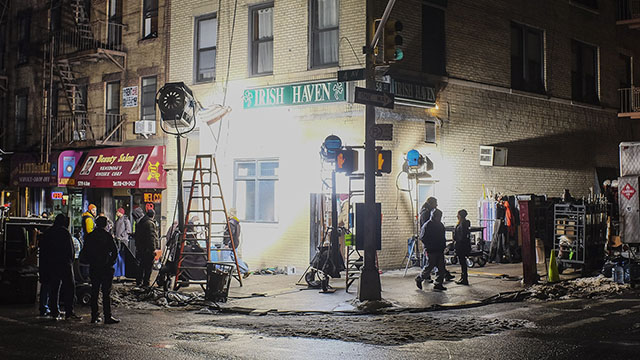
Hot lights on the set of Gotham.
Hue = A color or shade depending on the dominant wavelength of red, green or blue. The word Hue comes from Swedish hy which is "skin complexion". It is independent of intensity, so often (in computer editing programs for example), Hue is an adjustment along Saturation (which is intensity of color as compared to white)
Incident light meter = A light meter that measures the reflections off of something. Incident means “falling on something”, from Latin incidere ‘to fall’ and in- ‘upon’. Most cameras have an incident light meter, and what is does is that it measures how much light reflects off a white, dark red, or mixed landscape; and then adjust it to be midddle tone. Thus, if you photograph snow, the images will usually be under-esposed as the meter wants the white snow to be middle tone (50% black), and if you photograph in a dark restaurant, the image will be overexposed because the light meter wants the scene to be middle tone (50% black). For a normal scene in a city with whites, blue sky, people, cars and all, the ligth meter usually gets it right. Thus, as a user of the camera you have to be aware that the light meter doesn't know what you are photographing, so you must do the adjustments in those instances where the scene is not a mix of tones making up middle tone. This is also the portrait of a person with lots of light behind the person, her you must adjust the exposure so the face is corectly exposed and not the overall frame of bright light from behind and the face 'in shadow'.
ISO = Light sensitivity of the camera sensor is given in ISO (International Organization for Standardization). It's a standard that was used in film and is now used in all digital cameras also. The base ISO for the Leica TL2 sensor is around 100-150 which means that this is what the sensor "sees". All other levels are computer algorithms calculating the effect as if the sensor could "see" more (hence noise at higher ISO levels).
ISO goes in steps of doubling: When the ISO is raised from 100 ISO to 200 ISO, the camera only need half the amount of light to make the same picture. For each step in ISO to 400, 800, 1600, 3200, etc. the light sensitivity is doubled for the sensor (and the camera sensor only need half the light of the previous ISO to record the same image).
Also see Base ISO in this list.
6400 ISO indoor photo. With modern cameras the ISO can go to 3200, 6400, 12,800 and even higher without loss of dynamic range and without digital noise. Leica M10 with Leica 50mm Noctilux-M ASPH f/0.95. © 2017 Thorsten Overgaard.
JPEG = A standard for picture format made in the 1990's by Joint Photographic Experts Group). Mostly referred to as JPG as in L1003455.JPG which would be the name for a JPG file from the camera.
Kino Flo = (Cinema Fluorescent) = A brand of fluoroscent lamps are used in still photography, television and moviemaking. Often referred to as simply 'kinos'. The Kino Flo company was founded by gaffer (chief electrician in a motion-picture) Frieder Hochheim who designed these film lights based on the use of fluorescent light tubes as a more compact and less heat emitting light source for movies, television and stills. The Kino Flo lamps was used in the movie Barfly (1987) as one of the breakthroughs of using fluorescent light in movies. In the movie they work in smaller spaces and light the scenes so it looked like natural light. Today the majority of the Kino Flo lights are LED based, very well-controlled for color spectrum and often adjustable for the specific sensor used in a camera model. The first primitive Kino Flo was used by Wim Wenders and Robby Müller in The American Friend (1977) where Frieder Hochheim was faced with the challenge of lighting a cramped interior where traditional lights wouldn’t fit.
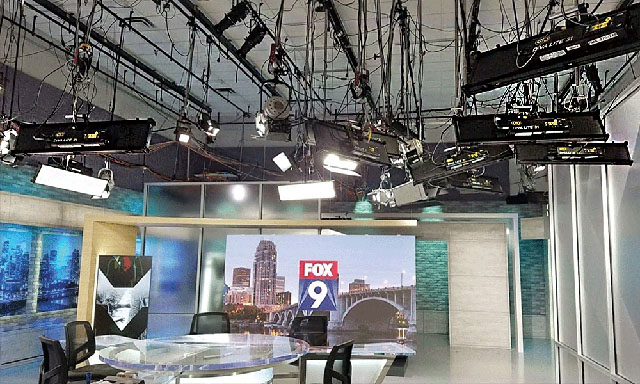 Kino Flo LED lamps in the Fox studio. Kino Flo LED lamps in the Fox studio.
LCC = acronym for Lens Cast Correction, which is a tool in phtoo editing (Capture One) that can help correct common issues that arise when using wide angle lenses. The "cast" is typical color cast, meaning that the color goes in an unwanted direction; snow in a photo has too much blue, so you correct it to have less blue and look like white snow. In Copture One, one create an LCC master profile which contains adjustment of color cast, dust spot removal and more, and then that LCC file can be applied to any photo in a series (of for example landscapes or architecture photos).
LED light = Light source that found popularity in still photography, video and theatre stages from 2010 and onward, due to the lamps compactness, high output of light with little electricity and emitting no heat. LED lights are generally known to be very economical, though for photography and video you require high-quality LED lamps that output exact eklvin values and display a full color spectrum. Household LED lamps as used in restaurants, in street lamps, offices etc vary quite a bit in their color spectrum can result in very unexpected colors when used to light a scene. Manufactures of high-end LED lamps in controlled unites are Kino Flo, Aputure, ARRI and similar companies.
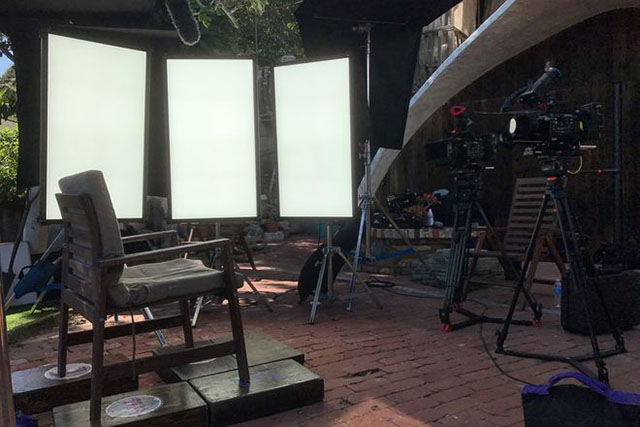
High-end LED light panels where the color output is software-controlled to meet exact color standards. In the photo it is three large Kino Flo "Celeb 850" LED lights set up on a movie set. The panels come in all sizes and the
Leica = A compound word derived from " (Lei)tz" and "(ca)mera". Apparently they were originally going to use "LECA", but another camera company already used a similar name in France, so they inserted the 'i' to prevent any confusion. The Leica name and logo is owned by Leica Microsystems GmbH.
Light = Tiny particles called photons that behaves like both waves and particles. Light makes objects visible by reflecting off of them, and in photography that reflecting off of subjects is what creates textures, shapes, colors and luminance. Light in its natural form (emanating from the sun) also gives life to plants and living things, and makes (most) people happier. So far, nobody has been able to determine exactly what light is. The word photography means “writing with light” (photo = light, -graphy = writing). Read more about light in my book Finding the Magic of Light.
Macbeth ColorChecker. A chart with key colors that you photograph (or record on film/digital video) and use to compare and adjust light sources, development, editing, etc so as to obtain the correct key colors. The top left colors on the Macbeth are skin tones, which traditionally are the most sensitive or difficult, to get right. The original Macbeth Color Checker i still available (about 20x25 cm in size).
Macbeth is a brand name and was bought by X-Rite who sells the "smaller version" of it, the X-Rite ColorChecker.
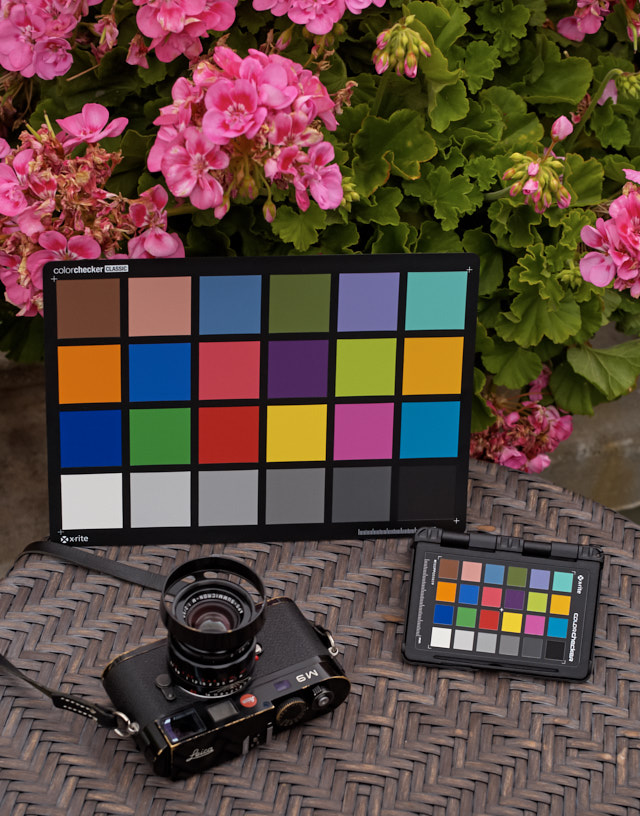
The original Macbeth Color Checker and the newer pocket version X-Rite ColorChecker.
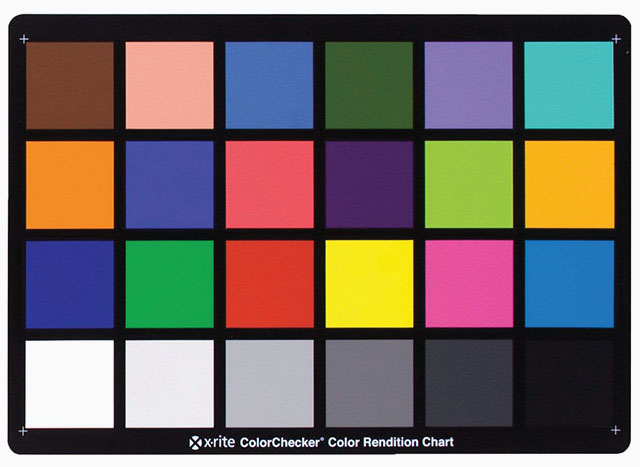
The original Macbeth Color Checker chart.
Night lights = For movies and still photo, a large light to light up a street or location at night. In the picture below, it's a Bebe Night Light with with a bank of 15 strong lights.
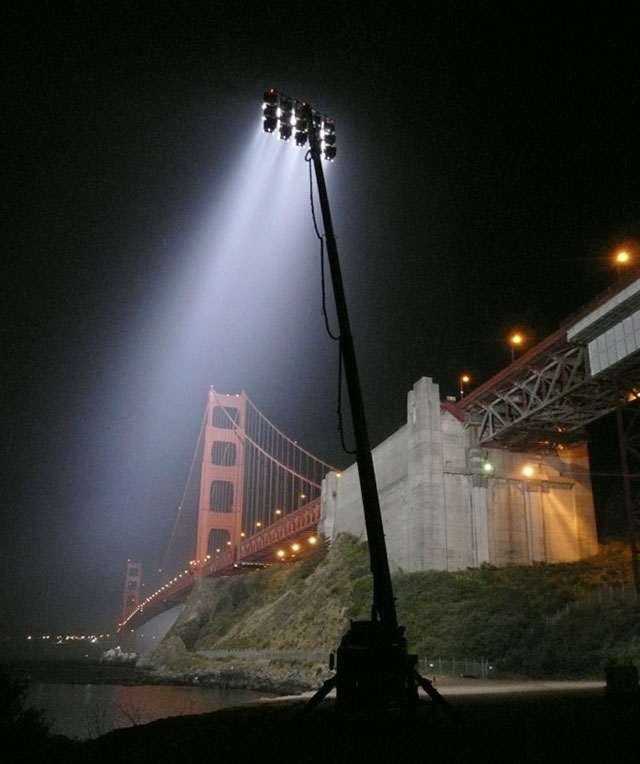
Bebe Night Light with with a bank of 15 strong lights for location lights at night.
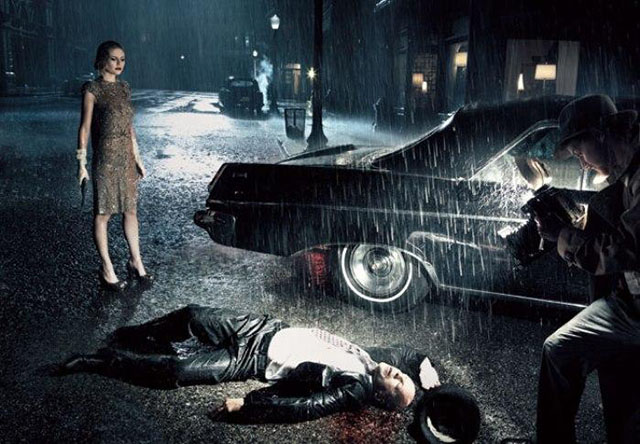
For this photo of Bruce Willis and Kirstin Dunst on Sunset Blvd and Verdugo in Los Angeles, photographer Annie Leibovitz used a Bebe Night Light with a bank of eight spots to light up the scene behind them.
© 2007 Annie Leibovitz.
Photography - "Writing with light" in that photo is light, graphy is writing. Also often said as "Painting with light".
Photogenic - That you are able to look good in photos, or said about someone that they do well in photos. Comes from "eminating light".
| |
 |
| |
A graphic illustration of the typical Bayer Color Filter Array on an RGB sensor. It's called a Bayer filter because Bryce Bayer of Eastman Kodak invented the technology of filtering incoming light into RGB and distribute it into the the photosites that each read just one color (R/G/G/B). |
| |
|
Photosite - The unit in a digital camera sensor that records intensity of either red, green or blue. Unlike the output of a sensor, measured in pixels (and where each pixel contains RGB), the photosite records only one color each, and it's intensity (how bright it is). A photosite can not distinguish colors, which is why there is a Color Filter Array (basically a prism) above them to filter the colors and send information to the photosite if 's a R, G og B color. See illustration below. In a monochrome sensor (as in the Leica M Monochrom and the Phase One Achromatic), all photosites are recording intensity of light only as there is no concern which color it is, and there is no color filter.
The ratio of photosites to pixels is not a given. Each block of 4 contiguous photosites contains one photosite sensitive to low wavelengths (blue), one photosite sensitive to high wavelengths (red), and two identical photosites sensitive to medium wavelengths (green). So four photosites would be the minimum to create one 'full-color' pixel. Apart from that, depends on the sensor specifications, which is different from brand to brand. Sometimes four photosites (two Green, one Red and one Blue) makes up one pixel, at other times it's more photosites to one pixel; and there is also pixels sampled from photosites across (sort of overlapping patterns).
Pixel - Made up word from Pix (picture) and el (element). A pixel is the smallest full-color (RGB) element in a digital imaging device. The physical size of a pixel depends on how you've set the resolution for the display screen. The color and tonal intensity of a pixel are variable, meaning that each pixel contains RGB. This is different from a camera sensor's small eyes (photosite) that are an intensity of either red, green or blue. You could say that the digital sensor's photosite (where each unit collects just one color; red, green or blue) is the input technology, whereas the pixels on a screen (where each pixel contains red, green and blue) is the output device. So while sensors are measured in megapixels (mega = million), it's their output unit of pixels, and not the input unit of photosites that is measured and stated. See illustration below.
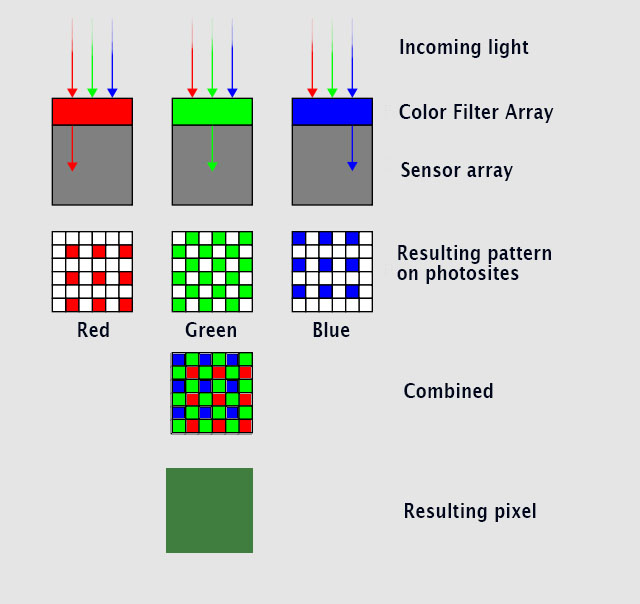
Here's an illustration of how light goes through a color filter that enables the underlying photosites to each record if it';s an R, G or B color - combined - makes up one pixel containing RGB. © Thorsten Overgaard.
Readout time (for electronic shutter) = The time it takes for a sensor that use electronic shutter to capture the entire imager from top to bottom of the sensor. A CMOS sensor reads a line at the time from the top to the botton. While the shutter speed can be 1/640th of a second, the sensor or shutter reads slower, which causes small movements of a handheld camera to show as warped shapes, misplacement of things, rolling shutter issues, tilted lines and more. The Leica M11 has a sensor readout time of 1/10th second, the Hasselblad X1D has a readout time of 1/3 second. Nikon Z9 (2021) manages to almost eliminate the warping due to a 1/270 readout speed of a stacked sensor, the Canon R3 has a readout time of 1/180th second on a stacked sensor. The handling for slow readout time is to use a tripod or mechanical shutter - or wait for "stacked sensors" to be the norm.
Saturation: How colorful, intense or pure the color is. Less saturation would be less colorful, more saturation would be more colorful. In today’s photography, de-saturating a photo on the computer will gradually make it less and less colorful; and full de-saturation would make it into a black and white photo.
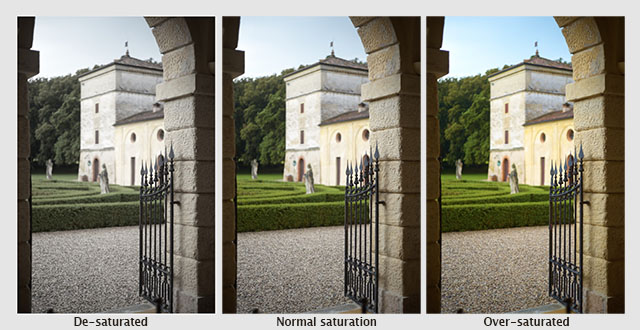
A photo from Verona, Italy de-saturated, normal saturated and over-saturated. © Thorsten Overgaard.
Sensor = A device that detects a physical property (like light) and records it. A camera sensor is a plane plate with thousands of small “eyes” with (photosites) a lens in front of each (CFA, Color Filter Array), which each individually records the amount of red, green and blue light rays that comes through the lens. Together, Red, Green and Blue form all colors of the spectrum, which becomes a pixel. Sensor comes from Latin sens- ‘perceived’.
Sensor, multimodal senor - Is a new technology for cameras (and machine imagining for AI) in 2025-2030 where nanostructured components image sensors can gather more information about incoming light, like a built-in spectometer in the camerea sensor and the pixel funcamentally will be sensitive to the incident angle: The sensor closest to the light sends the strongest current, and by comparing the strongest and weakest currents from both, the angle of the incoming light waves can be determined. Where a normal sensor detects intensity of light, the multimodal sensor detects intensity of light, spectrum, angle and phase.
SDC = Software Distortion Correction. A correction of lens distortion (not straight lines) applied in the camera and which is part of the DNG or RAW file. In Lightroom or Capture One Pro the SDC of the camera file is applied automatically (and cannot be removed), in software like AccuRaw one can open the DNG file without the SDC correction. Sean Reid Reviews have written a good article on what SDC is and does in "Software Distortion Correction".
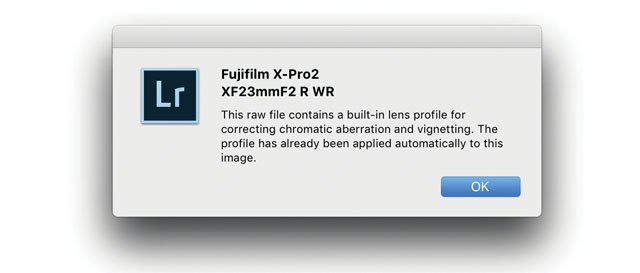
SDC (Software Distortion Correction): In Lightroom the correction profile for the Fujinon 23mm is applied automatically and cannot be turned off. If you go into Develop mode in Lightroom and look under Lens Correction > Profile, you will see a message in the bottom with an exclamation mark. When you click on that, you get the message above.
SSI = Spectral Similarity Index. A standard for measuring color rendering started in 2017 that takes into the account the human spectrum, a digital still camera's senor spectrum, the telvision camera's digital sensor spectrum, a movie camera's digital sensor spectrum, and analog film's spectrum: Further SSI takes into account the different models and brands of sensors/cameas/film. The aim is to predict how different types of ditgital recording mediums will render colors using different light sources.
Daylight is the optimum light source, but if one use other ligth soruces in a studio or on a film set, the SSI becomes valuable as it will give possibility to find the best quality light sources (amongst LED, Tungsten, daylight lamps, etc), or (for mainly film sets) correct light sources present (street lamps for example) with gels (colored filters put in front of a light source to change the light). It's implied in the SSI measuring method, that a higher SSI value could also be obtained by matching light and recording device to obtain the best possible colors.
SSI is based on sampling 24 color samples to an average value between 1 SSI and 100 SSI. (SSI 100 indicates perfect match. Values above SSI 90 should be very good. SSI 80-90 should be good, and below SSI is likely to have color rendering issues (to say it mildly).
One could say that the SSI is expanded version of the previous method to measure a light source for its color quality, CRI (Color rendering Index) which used 8 color samples measure and give an average value between 1 Ra and 100 Ra (Rendering Average). Not only does the SSI use 24 instead of 8 color samples, it also takes into account many other perceptions than the human eye. While the SSI is based on the Macbeth ColorChecker chart (with 24 colors), it also used other color charts with up to 190 color patches. Read more at oscars.org.
The Sekonic C-800 color meter launched in March 2019 measures SSI and CRI values (whereas the previous model, Sekonic C-700) only measured CRI).
WB = Short for White Balance:
White Balance = (often referred to as WB) in camera menus. See my aticle "Adjusting the White Balance in Photoraphy" for explanation, illustrations and examples.
XML = Stands for extensible markup language, which is a way enclose information to a document about how to format it, and more.
XMP = Stands for extensible markup platform (also known as XMP sidecar) and is a standard developed by Adobe and standardized by the International Organization for Standardization ISO. XMP is a 'sidecar' to an image that contains the EXIF data (camera settings) as well as other data about the image recording and editing that would norally be in proprietary formats (only readable by certain software). XMP in short is a container enclosed with the image as a 'sidecar' that contains all available information (EXIF data about settings, IPTC data (who took the photo, copyright info, image captions, etc), but most noteable, the XMP allow you to include information about the editing that was performed to the raw or DNG file, so that when you open the image file in another editing software, the raw data, as well as information about the crop, exposure compensation and other editing you did to the photo, is included).
In Adobe Lightroom Classic, one should make sure to select that editing information is written to the XMP file of each image (go to Lightroom > Catalog Settings > Metadata and then click "Automatically write changes into XMP").
Zone System -A system of 11 greytones. Ansel Adams worked out the Zone System in the 1940's with Fred Archer. It may look as simply a grey scale (and it is) but it's the use that has troubled many. If you use a normal external light meter, it will give you the exact amount of light and you can expose your photograph based on that and it will be correct. 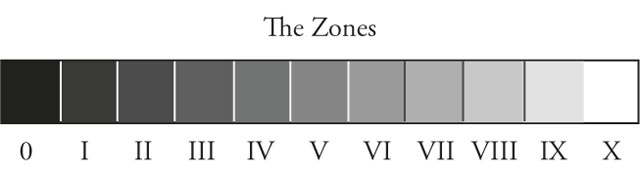
What Ansel Adams basically did was that he studied (by measuring with a spot meter), what the exact grey tones were of the sky, the clouds, the sand, the water, the skin and so on at different times of the day.
You could say that he built up a conceptual understanding of how different materials of different colors and reflective surface would look in black and white at different times of day (or different light conditions). He also realized that a tone changes for the human eye depending on it's size and in which context of other tones it is seen.
In short, you could say that the Zone System is know how something would look in black and white when looking at a scenery. Some who have struggled with the Zone System have done so because they think it is a rule. It is not.
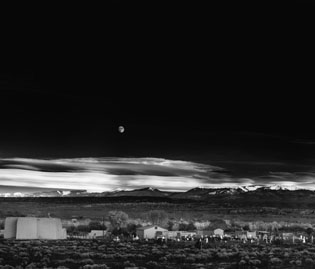
| How Ansel Adams made New Mexico look: |
|
How most people see New Mexico: |
 |
|
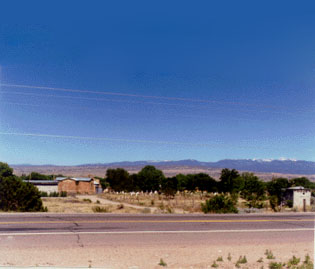 |
| The artistic use of the Zone System. |
Ansel Adams developed the Zone System to understand light for himself, but also as a fundament for teaching the light, exposure and making the final photograph. How will it look if you do the usual, and what will it look like if you manipulate it. But most interstingly; how do you work with light, cameras and photographic materials to achieve the look you envision.
The Zone System is meant as a basis on which to create your own aesthetic style and communication. Photography is painting with light. The greyscale is our palette. Ideally we should have a conceptual understanding of the tones and be able to use them intuitive. That was his vision for us all.
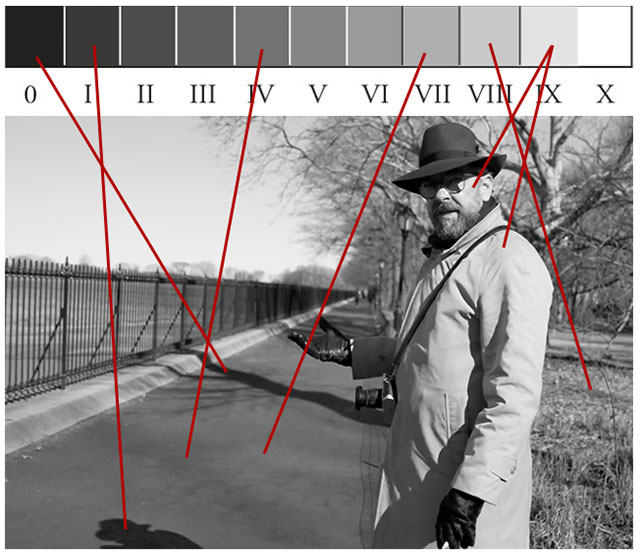
Thorsten Overgaard in New York, explaining the Zone System in his "Street Photography Masterclass".

|