By: Thorsten Overgaard. June 6, 2015. Latest edited May 29, 2019.
White balance is something all have heard about but few use. That's because it's widely misunderstood. Most people think it's somethimg that happens automatically, in the camea, or that it is something you "fix in the computer".
Nothing could be more wrong. Colors are too important for the aesthetics of photographs to let it up to an automatic feature to decide what is the right colors.
White Balance could be the first adjustment you do when you import an image into Adobe Lightroom or Capture One Pro. But White balance can also be set in the camera so that the colors are fundamentally correct and neutral in the camera, and when imported into the editing software, they will look ready to use.
There are neutral colors, which in this context it means that the color of an apple or a red brick wall is that exact color in the photograph as the one you saw in the real world.
There are different views on colors. Neutral is a better word, or 'exactly the right color representation'. That is the ideal you work with, technically making a photoraph. First you get the colors right, then you are free to make artistic changes to chem: make them warmer or colcer, saturate or desaturate all or single colors.
If you can't get the colors neutral, your're helpless. So that's why we're having this conversation. I'll teach you now to get the colors neutral.
hc color temperature should fundamentally be neutral and correct, and from here you may adjust the color temperature of the image as an “artistic choice” to for example being warmer.
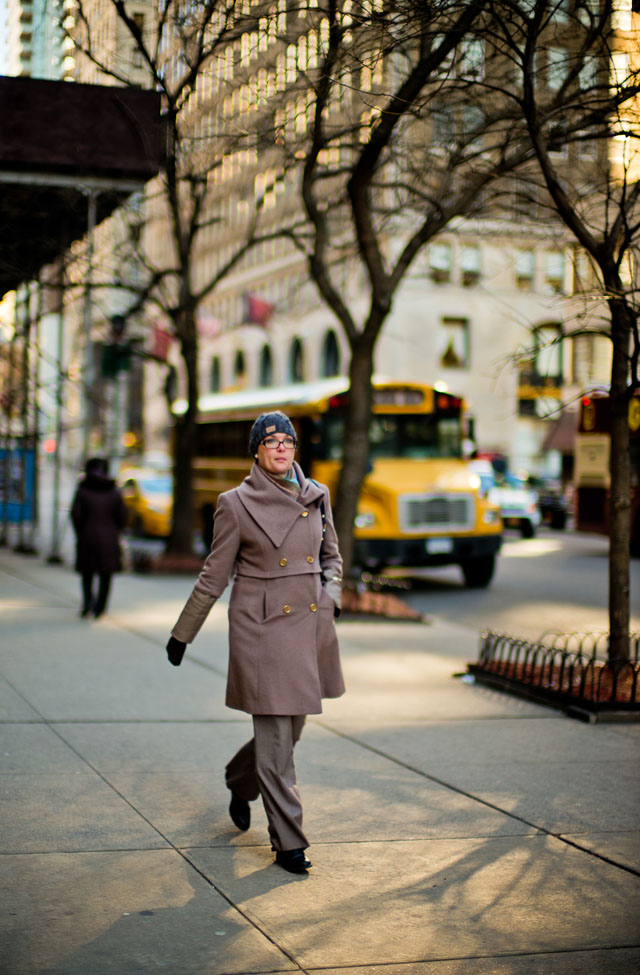
New York by Thorsten Overgaard.

Advertisement:


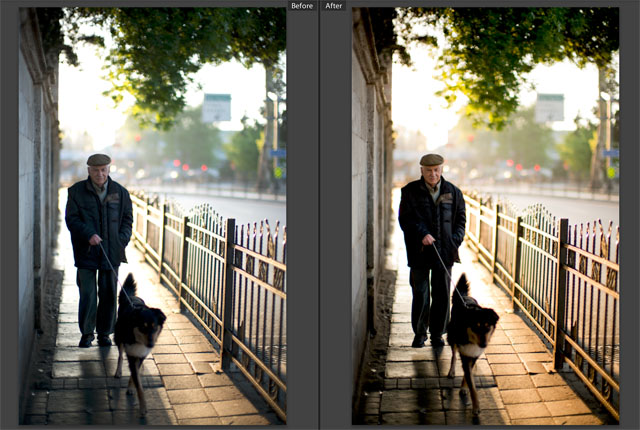
Artistic change of White Balance in Lightroom
Here is an image I adjusted White Balance from 4800 Kelvin (as shot Auto White Balance in the camera) to 6800 Kelvin by moving the Temp ruler in Lightroom:
 |
| Before |
|
After |
 |
| |
|
|
External White Balance
If you did a manual white balance with a white piece of paper or a greycard (WhiBal®) before you photographed, the white balance is most likely as it should be, and all colors looks good.
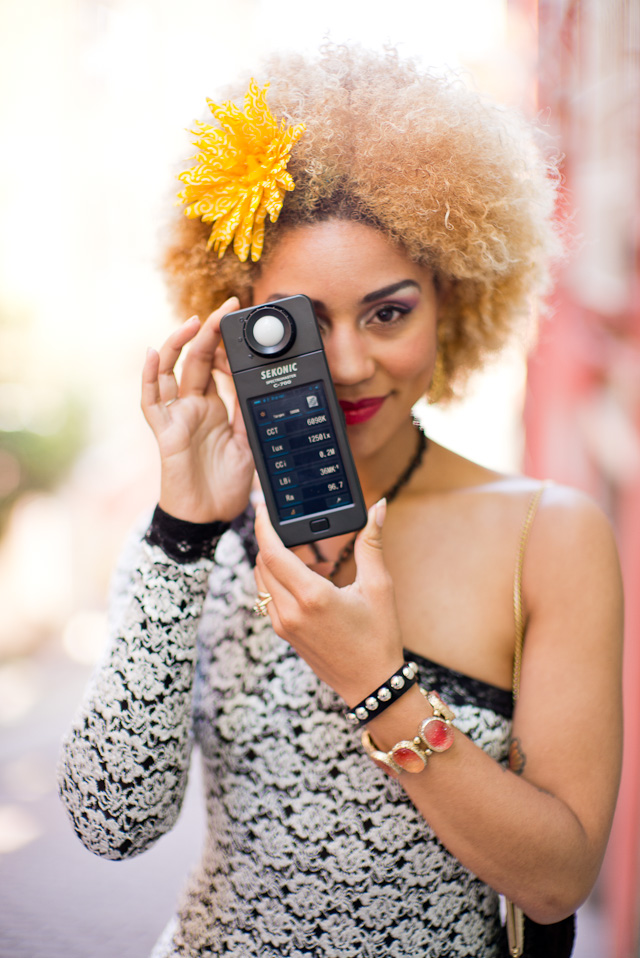
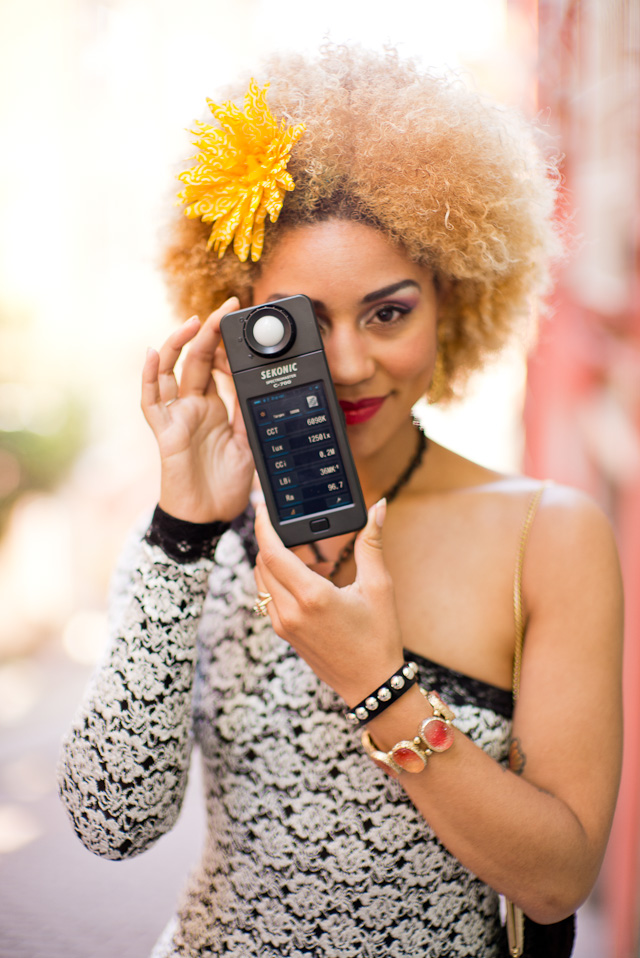
You can also use an external Color Meter that will measure the White Balance so you can type in the correct Kelvin value. This image below gives a good idea how much of an improvement the step up will give your image:
| |
 |
|
 |
| Usig WhiBal |
|
Using external color meter |
 |
The image to the left was made with the White Balance set in the camera by pointing it to a WhiBal card and was 5500 Kelvin. The image to the right is measured with the Sekonic C-700 that read the light 6098 Kelvin.
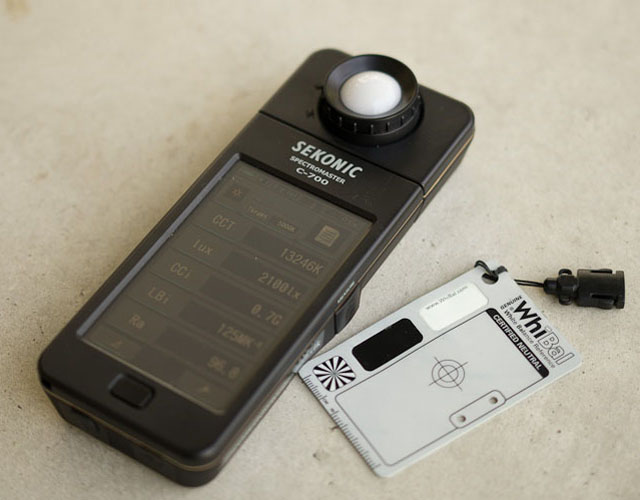
Sekonic C-700 Color Meter ($1,400) and WhiBal white balancing card ($30, often referred to as a "whibal greycard").
I have to read the Sekonic C-700 Color Meter and do the adjustment in Lightroom (or in the camera before I take the picture). In this case I adjusted it in Lightroom.
I did this video some time ago on how to set the White Balance in camera before the shoot with a WhiBal card:
Setting the White Balance manually on the Leica M Type 240
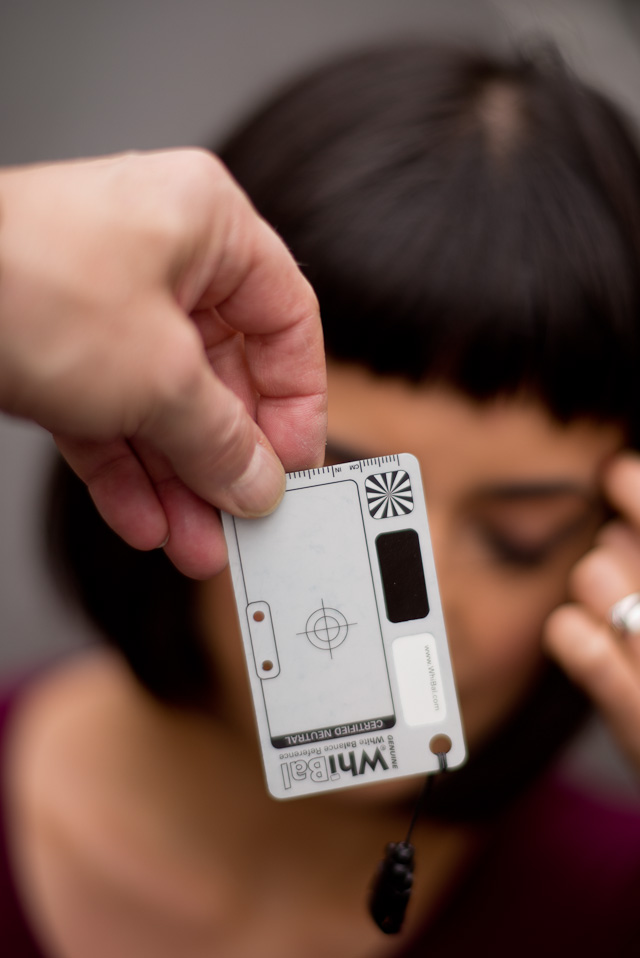
Setting the white balance in the camera before photographing is clearly to prefer and is rather simple. You simply put the WhiBal card (or a piece of white paper) in front of the main subject and take a "reding" with the camera. Then the White Blaance is adjusted to the actual light.
Correct White Balance
If you didn't set the White Balance in the camera or are not satisfied with the Auto White balance the camera did, you need to establish the correct color temperature and adjust it to "white light" (daylight).
In Lightroom you can click on the symbol for White Balance (WB), which is the picker to the left in the color panel:
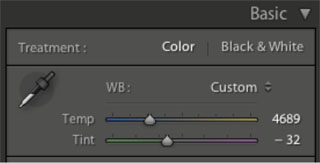
You can also use the W-key on the keyboard that corresponds to the white balance mode.
You then point at something neutral white, grey or black: A wall, the edge of a persons glasses, a white shirt, a black shirt, the white of the eyes, a grey button on a jacket.
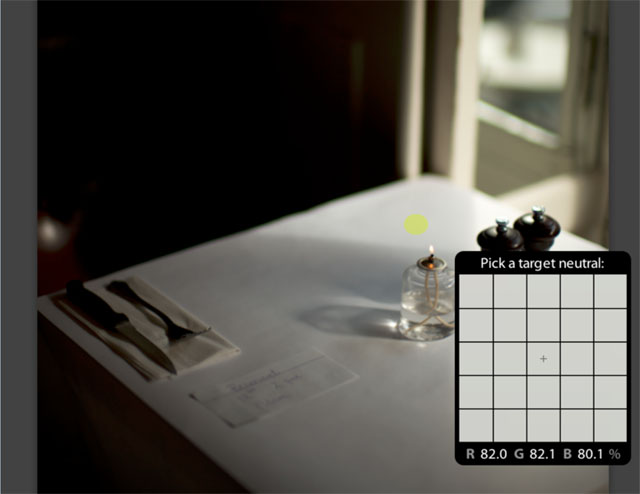
Pick a neutral target as the one marked with yellow in this image.
What you look for to put the pointer at is something that is neutral and which is hit by the key light (the most important light source in the image). In the above, the white table with the light from outside would be a good spot to put the pointer at to get a neutral white light.
You will see a preview of how the image’s colors changes when you click on a point in the pictures.
If the color doesn’t look right, you UNDO it and then try another spot and see how that works:
Command (-key) + Z (-key) is undo/regret previous action.
Every time you hit Command + Z Lightroom steps one step previous in the actions you did. Usually you can undo the last 20-30 actions you did.
Using preset White Balance in Lightroom
You may also use the presets As Shot, Tungsten and so on:
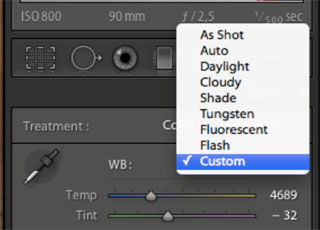
Using the White Balance slider in Lightroom
You can use the Temp (the scale showing the Kelvin number) to get closer to achieving the correct white balance, but it's difficult to decide when the balance is correct and the colors looks neutral.
One problem with White Balance is “remembering the color”. It’s almost impossible because colors change after light, size and which colors are next to them.
If you buy paint for a wall based on a small sample, you will discover that your wall looks very different because the size is bigger. And the color changes again when the light changes!
Further, the color temperature (White Balance) is a combination of Temp and Tint. Play around with the two and you will see how you get into trouble very easily!
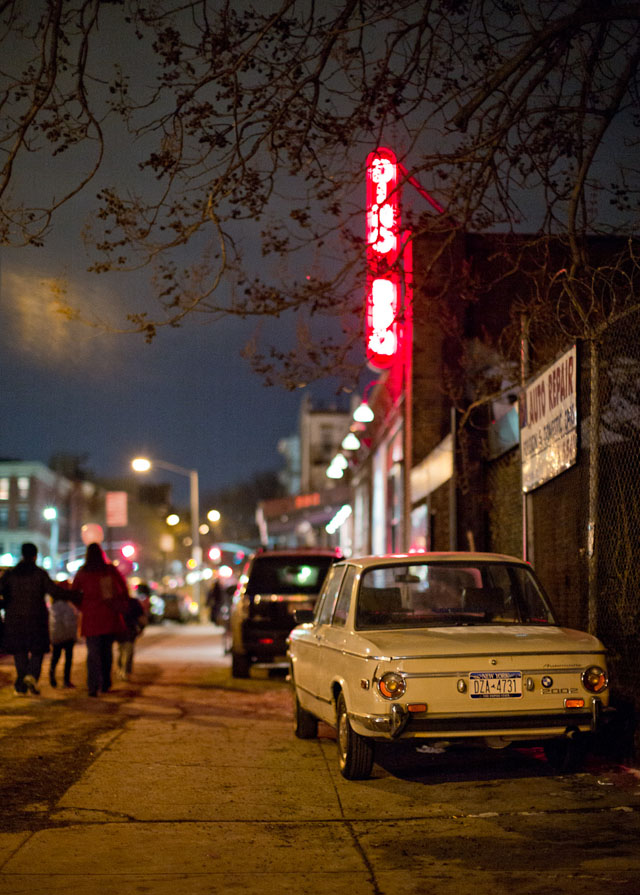
The easiest way
The fastest and easiest way to get the colors right in a photograph is to set the White Balance manually with a piece of white paper or the neutral grey WhiBal card before you photograph. Nothing to fix in the comptter and no guessing as to what the exact skin tone was.
Buy my Lightroom Survival Kit for more on this
I hope this was helpful. You can learn more on this and other ways to get the right workflow in my Lightroom Survival Kit 6:
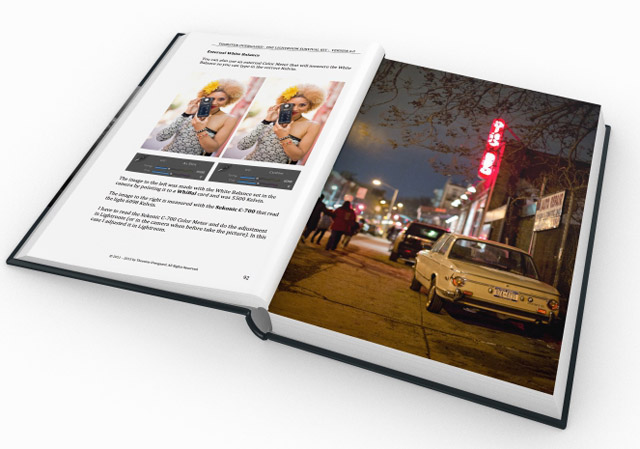
The Lightroom Survival Kit 6 contains sections that are easy to understand and use on White Balance in Lightroom, as well as many other subjects to "survive Lightroom" and improve the overall quality of photography.
 |
NEW VERSION 11.3 |
 |
| |
 |
|
| |
|
| |
|
|
|
|
| |
|
| |
|
|
| |
Buy Now. Instant delivery.
New Version 11.3
ONLY $698.00

Now includes
4+ hours of
video tutorials.
100% satisfaction
or 100% refund.
More info.
|
|
| |
#2130-1121-3 |
|
| |
|
|
| |
Update to Version 11.3
Apply
code "UPDATE113" on checkout to get this complete version 11.3 update.
$298.00

Updates all previous Surival Kit versions since 2009. |
|
| |
|
|
Buy the complete new
Lightroom Survival Kit 11.3
The Legendary Tutorial for Photographers
Brand-new JUNE 2022-version.
Now with brand-new 4+ hours of video tutorials.
New sections on compostition and storytelling.
How to edit color photos.
How to edit black & white photos.
How to do keywords logical and easy.
The most successful photo editing kit ever
Photographer Thorsten Overgaard first released the Lightroom Survival Kit in 2009 and have honed it with new and fresh updates. This Version 11 is the most radical updated and renewed version ever, four years in the making.
Professional workflow experience made simple, logical and easy to use.
Master editor makes it simple to understand
The Survival Kit is unique and one-of-a-kind being made for photographers for photographers. When someone understands their subject, they can explain it so it is easy to understand. The hallmark of Thorsten Overgaard is to make expert knowledge shown and told in a way so anyone can apply it.
Hands-on advice that works
With a 450 pages workbook and 4+ hours of video, every element of digital photography is touched on, in handy chapters and pre-flight checklists. Editing of color vs black and white photos, keywording, cropping of images, fine-tuning of tones, color balance and color control, export of originals, printing, archiving and backup, and much more.
Comes with the Overgaard Leica Presets (Value $48)
The Lightroom Survival Kit comes with Thorsten Overgaard's special-made Lightroom Presets for all digital cameras and for Leica digital cameras.
Understand all from camera to the final print
Chapters in this version goes over the background for High Dynamic Range (HDR), digital raw files and how to set up a professional photography workflow, from calibrating the screen to editing in Lightroom, and to making a final print. And more ...
10+ years experience in one package
No need to spend years figuring out the smartest way to do things when you can tap into the best way of doing things right here. The workflow of Thorsten Overgaard as been refined through years of field work with more than a thousand workshop attendees.
This method of workflow now used by thousands
The Survival Kit has been taught to thousands in workshops and in this Survival Kit. What does it do? It make you enjoy taking and making photos, and it increases your production considerabely. Most important of all, it'll give you back ownership of your files (which you will understand why is so important, once you have bought the Survival Kit and started applying its methods).
| |
|
|
| |
"Thorsten's methodology is perhaps not what hardware-, software- and cloud-companies want us to do, but as a former IT engineer I can only acknowledge his views about preserving our digital heritage. This workflow explained is for me the best I have ever seen".
★★★★★ |
|
| |
|
|
Video tutorials, image files, presets, checklists, definitions, tutorials of Lightroom, that boils down years of experience to a workflow you can implement in less than one day.
Start working in minutes. |
|
|
| |
|
| |
|
| |
|
| |
|
| |
|
| |
|
|
|
|
 |
|
 |
More on the Lightroom Survival Kit 6
More on White Balance
![]()
